Deployment of Litmus Edge Manager from Azure SaaS
Litmus provides Litmus Edge Manager (LEM) as a managed SaaS solution on Azure Marketplace. If your organization has a custom agreement, you use a private offer for deployment. A private offer is custom plan that you've negotiated with Litmus that is not available on the public marketplace.
You deploy LEM through the private offer by:
- Accepting the private offer on the Azure marketplace
- Purchasing and deploying the private on the Azure marketplace
- Activating the subscription on Litmus Central Portal
- Downloading and deploying Litmus Edge Manager from Litmus Central Portal
Note that private plans are offered through Site Model licensing. This licensing model gives you full control over your infrastructure. With this model:
- You deploy the infrastructure but no license is included. You request a license separately from the Litmus Account team.
- Tag consumption is not monitored or billed.
- You maintain full control over your virtual machines. Litmus has no access to your environment.
Prerequisites
Before you being, ensure that you have:
- Negotiated a private plan with Litmus.
- Access to Azure Portal.
Step 1: Accept the Private Offer
- Log in to Azure Portal and search for Marketplace.
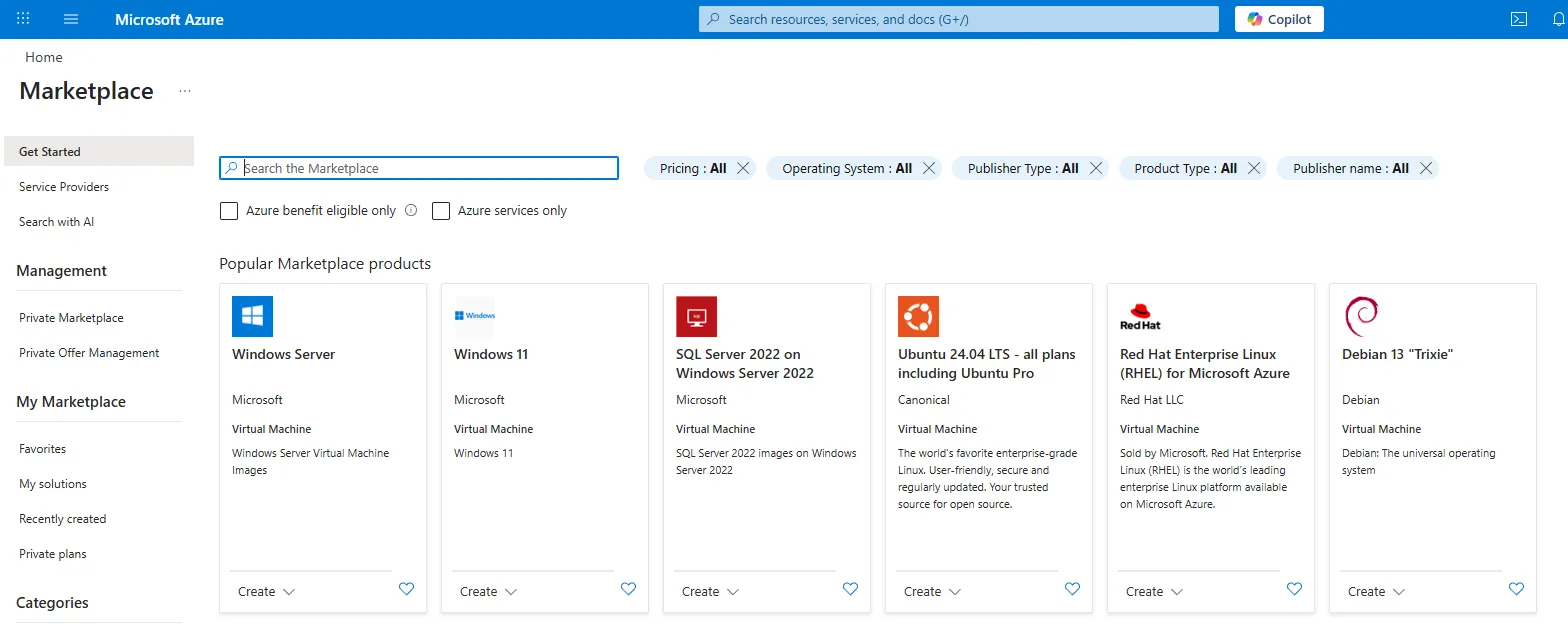
- In the left navigation menu, select Private Offer Management.
- In the Private Offer Management page, click View + accept for the Litmus Edge Manager SaaS - Site Model offer.
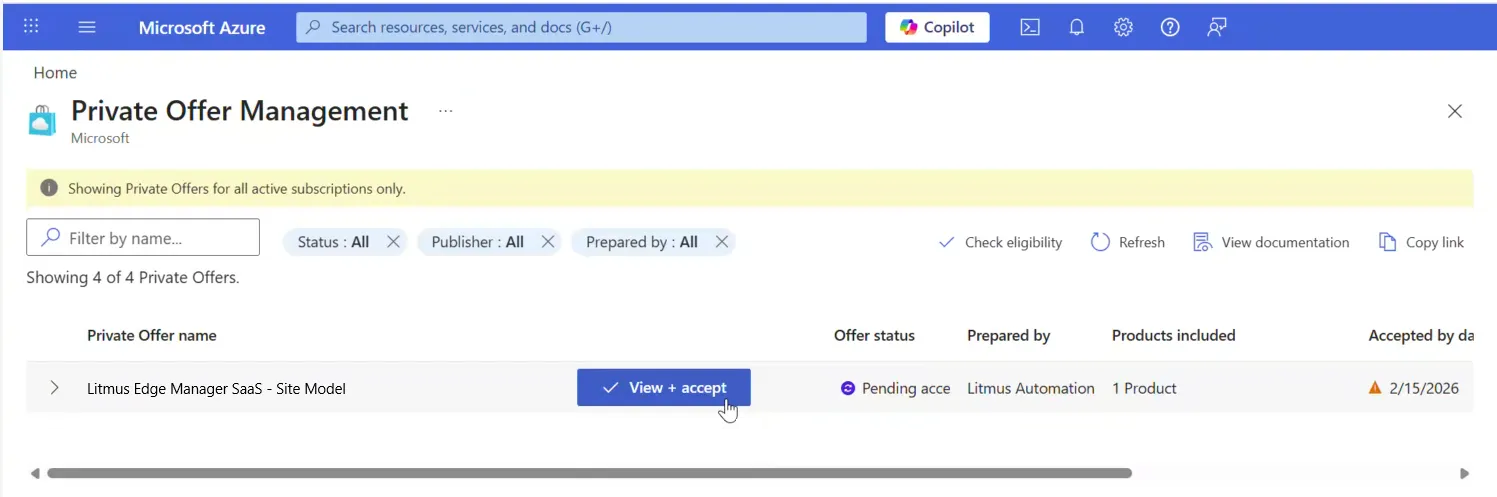
- Next, a page displays with offer details and terms and conditions. Review this information, confirm that you've read the terms and conditions, and click Accept Private Offer.
Then you're returned to the Private Offer Management page.
Step 2: Purchase and Deploy the Private Offer
- In the Private Offer Management page, click Purchase for the Litmus Edge Manager SaaS - Site Model offer.
- In the right pane, define the following settings:
- Resource Group: Select a resource group in which to place the SaaS instance.
- Name: Provide a name for the Litmus Edge Manager SaaS offering that you're subscribing to.
- Billing term: Select a 1, 2, or 3 year subscription.
- Recurring billing: Decide on whether to automatically renew after the subscription expires.
- Click Review + subscribe, review subscription settings again if necessary and click Subscribe. The Subscription progress page displays while the SaaS subscription is setting up. When complete, the offering has been deployed.
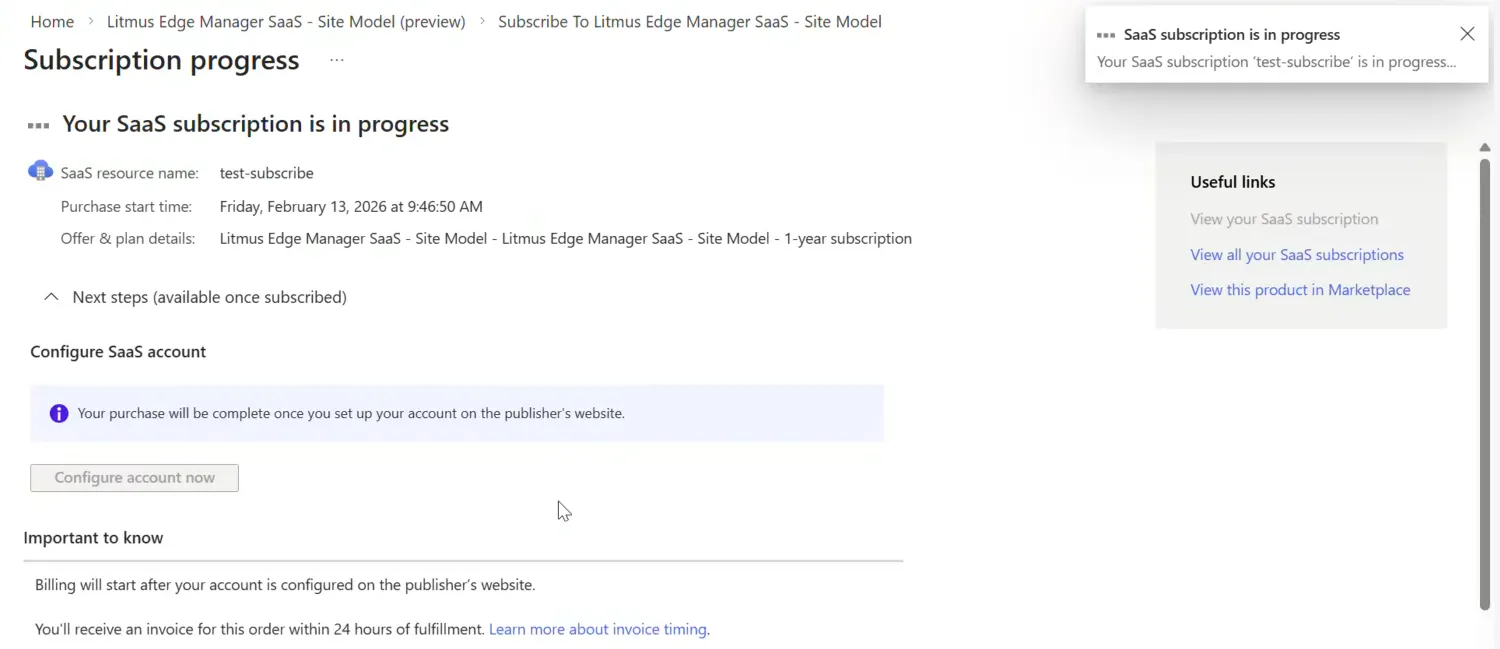
- Once complete, click Configure account now and you are directly to the Azure Marketplace Activation page in Litmus Central Portal.
The link redirects you to the Azure Marketplace Activation page in Central Portal.
Step 3: Activate the Subscription in Litmus Central Portal
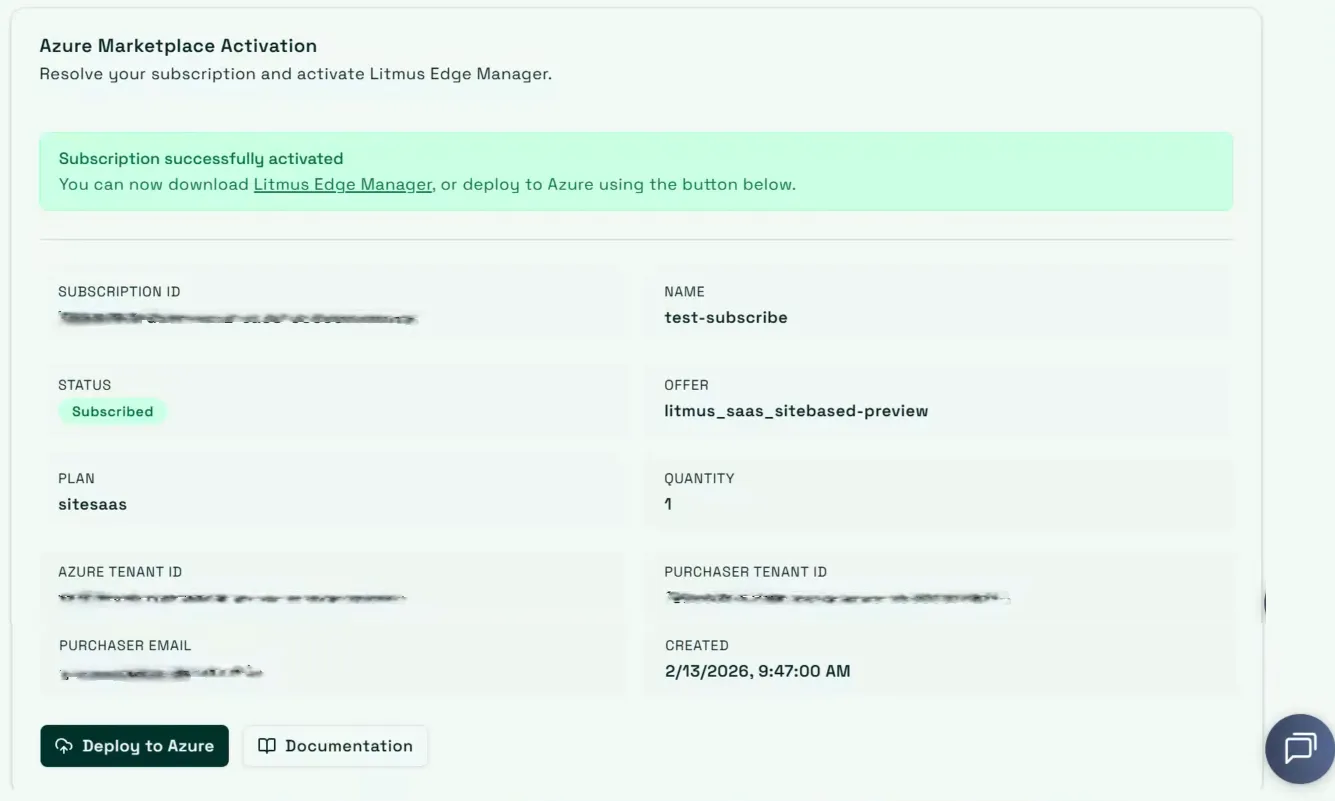
- On the Azure Marketplace Activation page in Central Portal, click Activate Subscription.
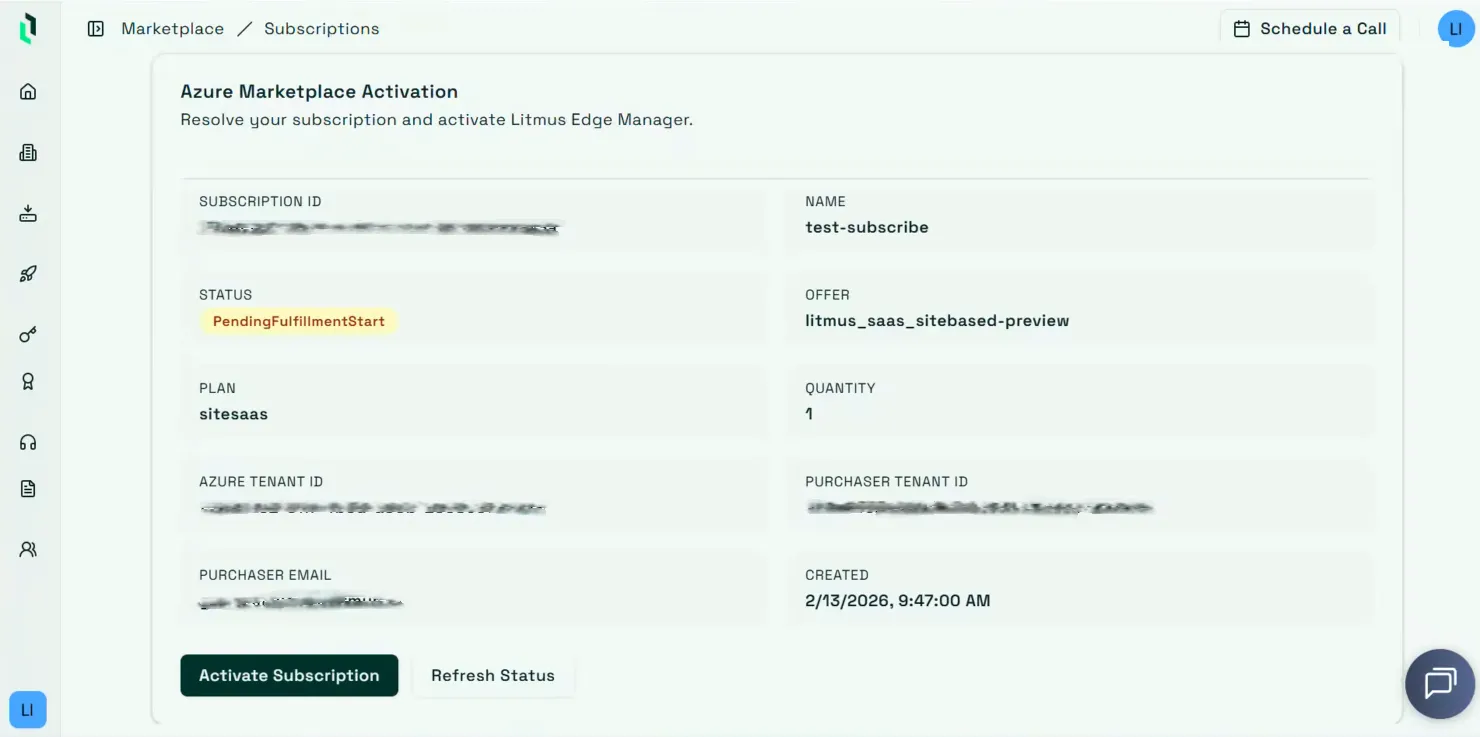
A message displays indicating that Microsoft is finalizing the activation.
- When complete, click Deploy to Azure. You also receive an email from Microsoft confirming that the SaaS subscription is active.
Step 4: Deploying to Azure
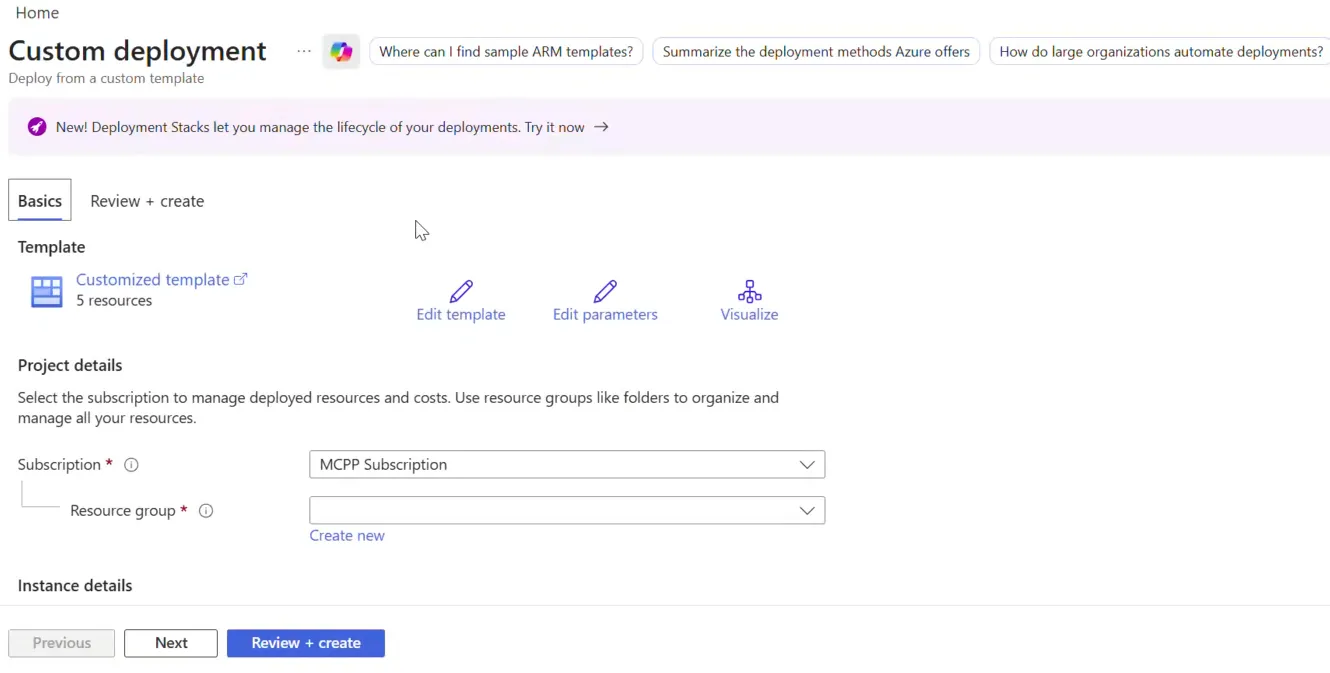
In the Custom deployment page in Azure, specify template settings for the deployment.
Required Parameters
Parameter | Description |
|---|---|
sshPublicKey | SSH public key for VM administrator account |
VM Configuration
Parameter | Description | Default value |
|---|---|---|
projectName | Name prefix for generating resource names (3-10 chars) | lem |
location | Azure region for deployment | Resource group location |
vmSize | VM size (minimum recommended: Standard_B4ms) | Standard_B4ms |
adminUsername | VM administrator username | lemadmin |
osDiskSizeGB | OS disk size in GB (128-1024) | 160 |
Network Configuration
In the downloaded template, you can modify the subnetAddressPrefix or use it as is. For example, modify the parameter to accept a /32 single IP.
Parameter | Description | Default value |
|---|---|---|
virtualNetworkNewOrExisting | Create new or use existing VNet | new |
virtualNetworkName | Name of virtual network | lem-vnet |
virtualNetworkResourceGroup | Resource group of existing VNet | Current RG |
virtualNetworkAddressPrefix | Address prefix for new VNet | 10.0.0.0 |
subnetName | Name of subnet | lem-subnet |
subnetAddressPrefix | Address prefix for new subnet | 10.0.0.0/24 |
Public IP Configuration
Litmus Edge Manager does not require a public IP. It only needs to be reachable from the Litmus Edge instances that connect to it and Litmus Edge Manager users. Where reachability is provided privately (VNet peering, VPN, or ExpressRoute) set publicipneworexistingornone to none.
Parameter | Description | Default value |
|---|---|---|
publicIpNewOrExistingOrNone | Create new, use existing, or none (private only) | new |
publicIpName | Name of public IP address | lem-pip |
publicIpResourceGroup | Resource group of existing public IP | Current RG |
Tags
Enter tags in the parameter field as JSON using the following syntax.
{"environment": "production", "costCenter": "IT-12345", "owner": "[email protected]"}
Parameter | Description |
|---|---|
vmTags | Tags for the virtual machine |
networkSecurityGroupTags | Tags for the NSG |
virtualNetworkTags | Tags for the VNet |
publicIpTags | Tags for the public IP |
networkInterfaceTags | Tags for the NIC |
Step 5: Accessing Litmus Edge Manager
After deployment completes, you can:
- Access the LEM administration console at https://<public-ip>:8446.
- Access the web interface at https://<public-ip>.
- SSH to the VM using: ssh <adminUsername>@<public-ip>. Note that port 22 (SSH) is blocked by the firewall by default. Create an inbound rule that allows TCP traffic on port 22 before you connect.