Increase Disk Size Of Azure Virtual Machine
You can add data disks to your existing Azure Virtual Machine (VM) if you encounter issues due to insufficient disk space or legacy applications.
Caution: Remember that you can only resize a disk to a larger size.
Before You Begin:
- Access to Azure portal and a VM running on Azure.
Step 1: Increase the Disk Size
As you deploy more applications, increase the load of your databases, or require more resources, you can add data disks to the existing VM to increase its disk size.
To increase the size of your virtual machine data disk:
Important: Changing the size of the disk can also change the level of the disk tier and may have extra costs. For more information, see Performance tiers for managed disks.
- Open the Microsoft Azure home page, and then navigate to Virtual Machines.
Select the VM you want to resize and in the toolbar, click Stop.
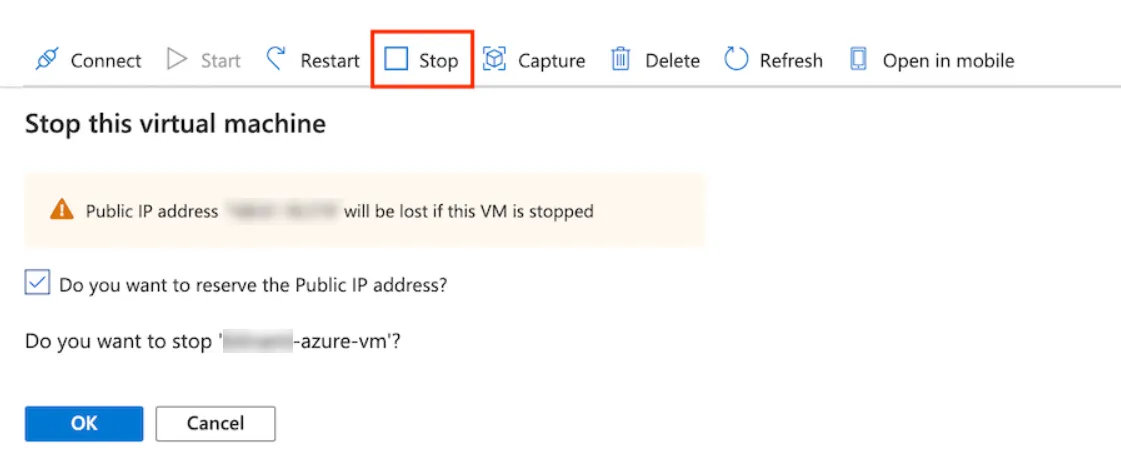 Virtual Machines pane
- After stopping the machine, navigate to the Settings section and click on Disks.
From the list of attached disks to your VM, select the one you want to resize.
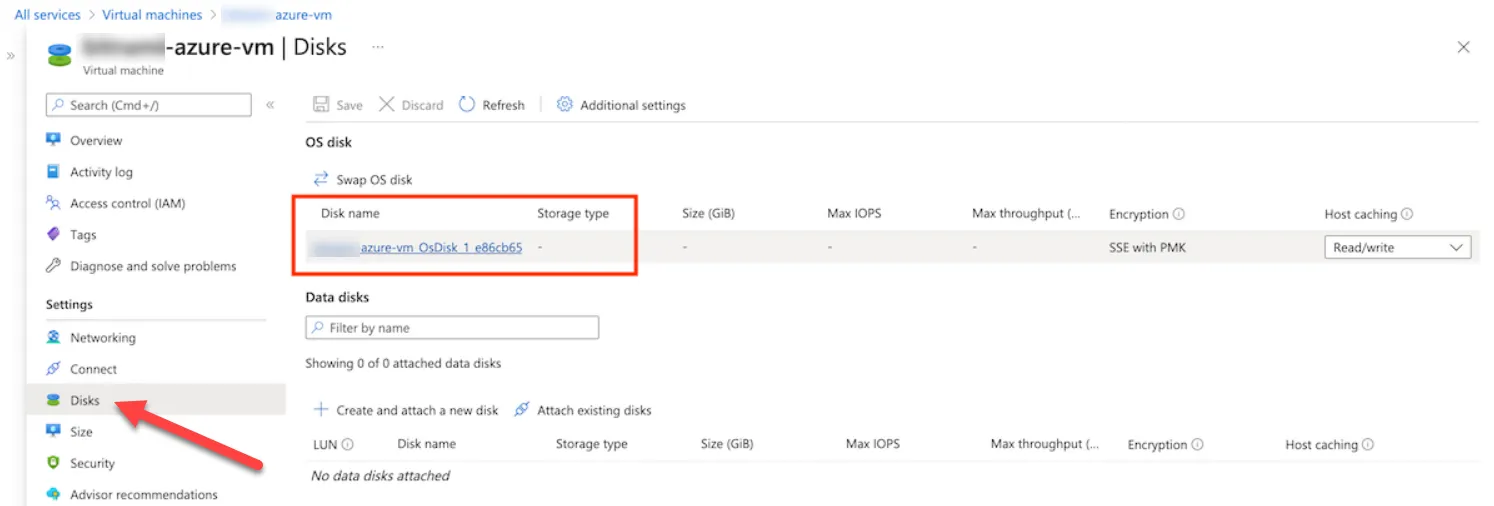 Disks page
- From the Disk Overview page, scroll to Essentials pane. You can see the default size of your disk in Disk Configuration.
To increase its storage capacity, navigate to Size + performance under the Settings section.
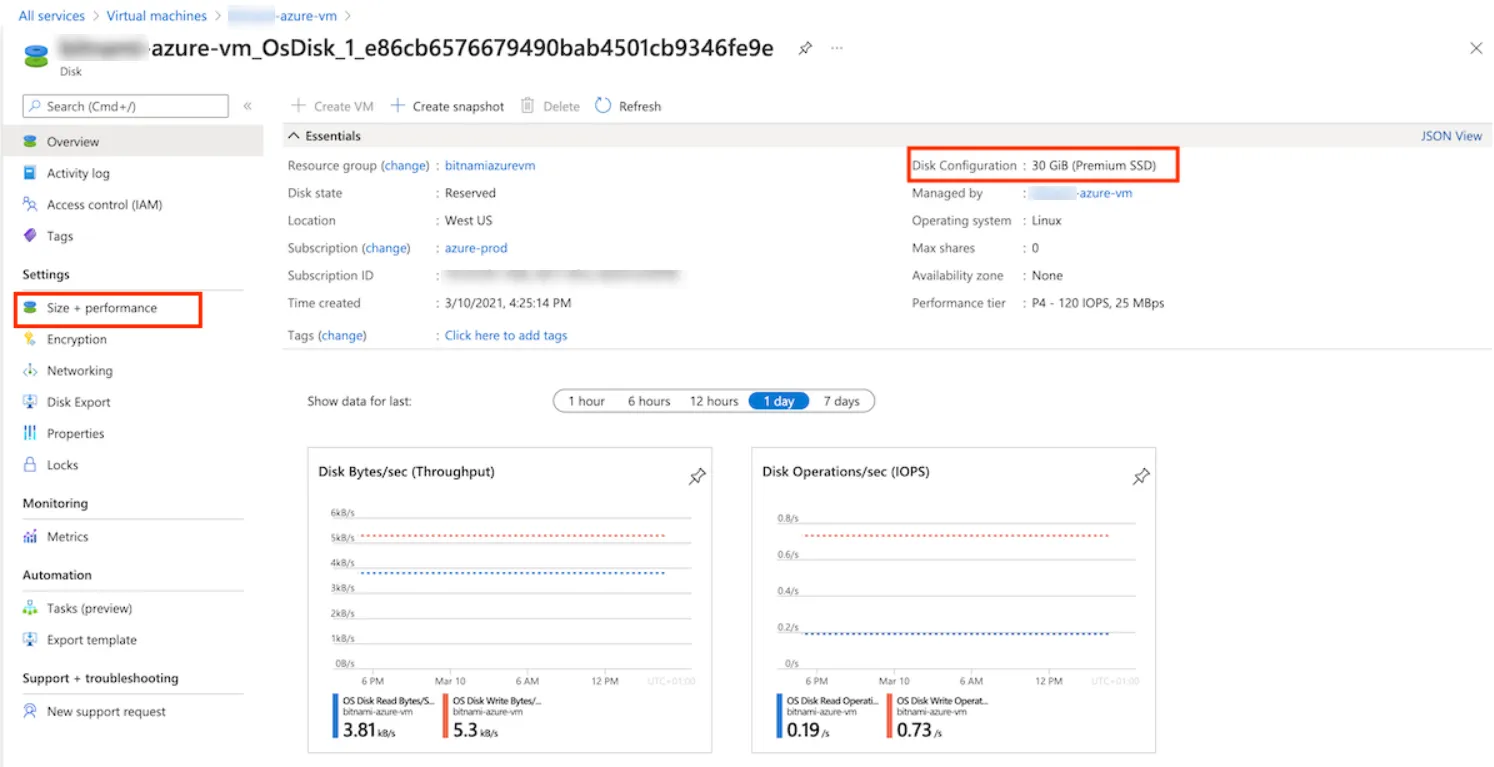 Disk Overview page
On the resulting screen, modify the value of the Custom disk size (GiB) section and click the Resize button to finish the process. In this example, the size was increased from 30 to 64 GB and the performance tier has also changed accordingly from P4 to P6 as shown below.
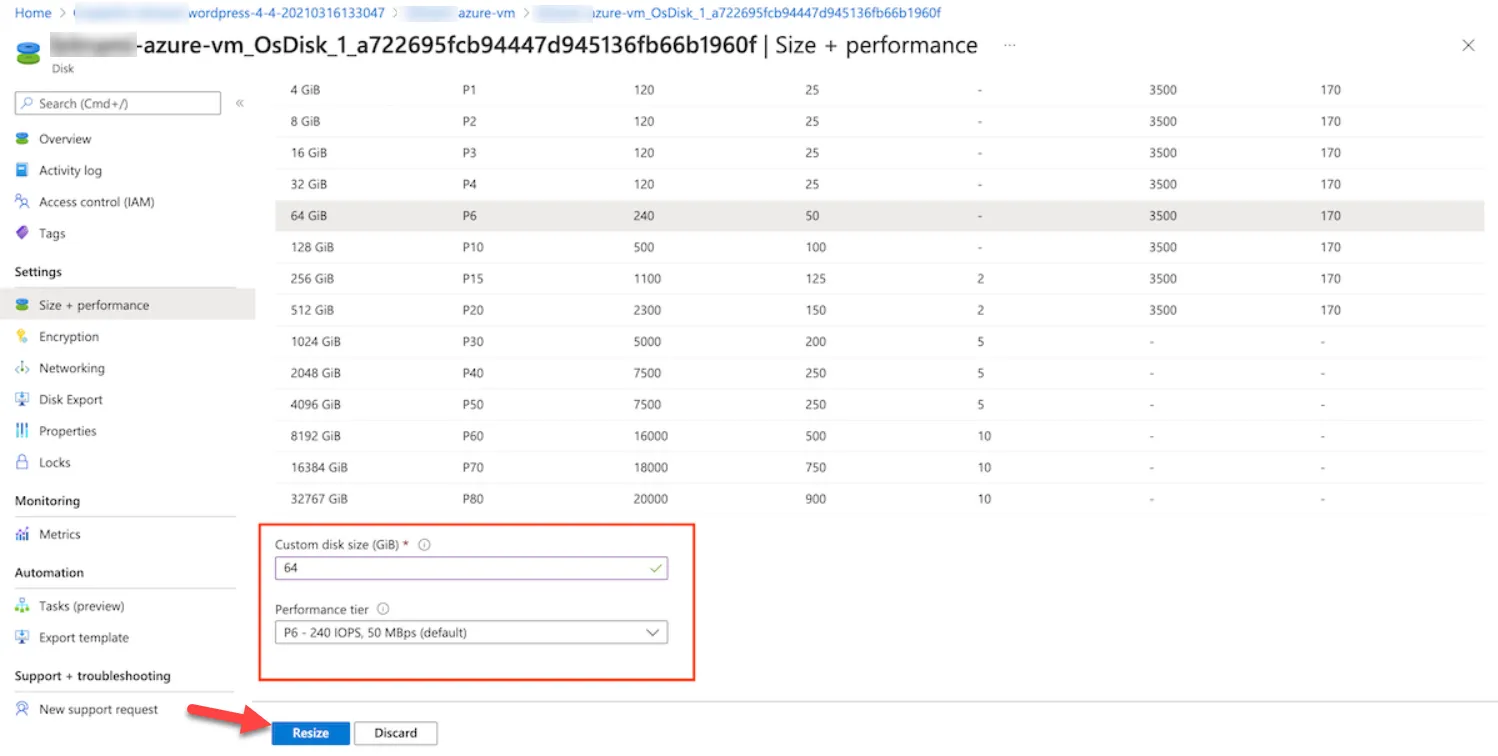 Size + performance page
- Navigate back to Virtual Machine home page to start the VM.
- Click the Start button and wait until the Status section changes from Stopped (deallocated) to Running.
Step 2: Verify the Disk Size
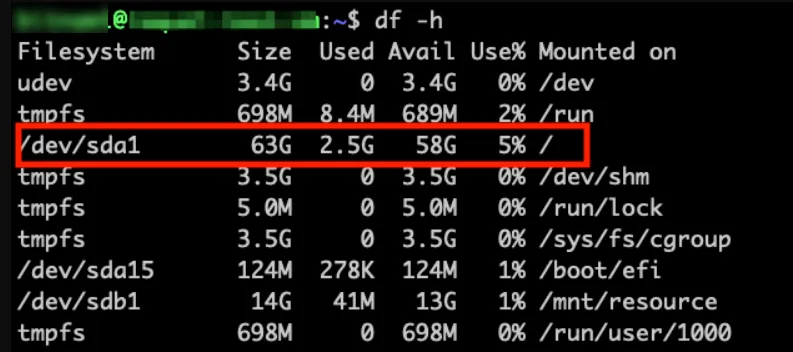
The next step is to verify that both the partition and filesystem have been successfully resized to ensure that the disk can now be used with the new storage space size.
To do this, connect to the VM through SSH and execute the following command:
$ df -dhThe output shows that the disk space was correctly resized.