Create a Custom Table in a MySQL Database
You can use the Show Mapping option in SQL-connector integrations to create a custom table.
User Scenario
In your manufacturing plant there is one PLC that tracks the temperature. You want to store the temperature value in a database with a timestamp, but don't need the additional data provided in the payload of DeviceHub devices. You also want to convert the values that are calculated in Celsius to Fahrenheit as integer values.
For this guide, you will do the following:
- Simulate temperature values coming from a PLC
- Convert the values to Fahrenheit
- Deploy a MySQL container in Litmus Edge
- Create a custom table in the MySQL database
- Configure a connection to the database through the MySQL connector
- Send the data through the connector into the custom table
Step 1: Add a Device
Follow the steps to Connect a Device and configure the following parameters.
- Device Type: Simulator
- Driver Name: Generator
- Enable Alias Topics: Select the checkbox.
Step 2: Add Tag
After connecting the device, Add a Tag to the device.
Tag 1
- Name: Select S - Random value generator.
- Value Type: Select int64.
- Polling Interval: Enter 5.
- Tag Name: Enter Tag1.
- Min_value: Enter 100.
- Max_value: Enter 129.
Step 3: Create Analytics Flow
You can now create the analytics flow that will convert the temperature values into Celsius.
To create the analytics flow:
- Navigate to Analytics > Instances.
Click Add Flow. The Create Flow dialog displays.
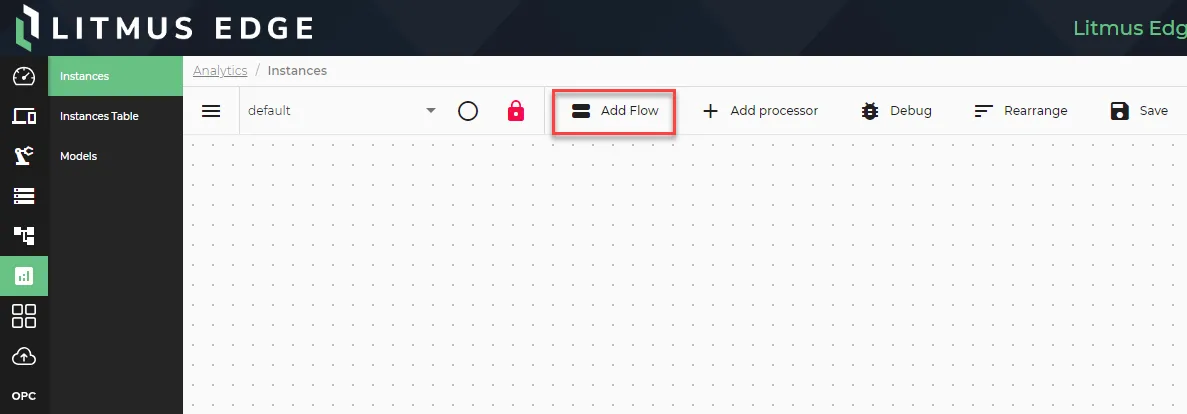
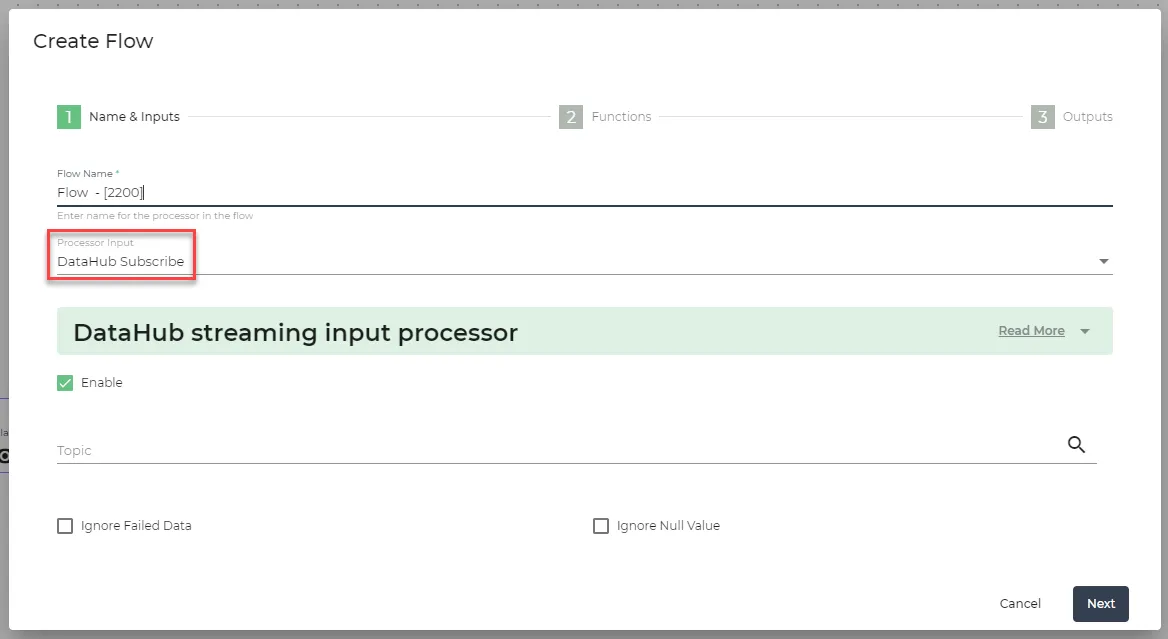
For Processor Input, select DataHub Subscribe.
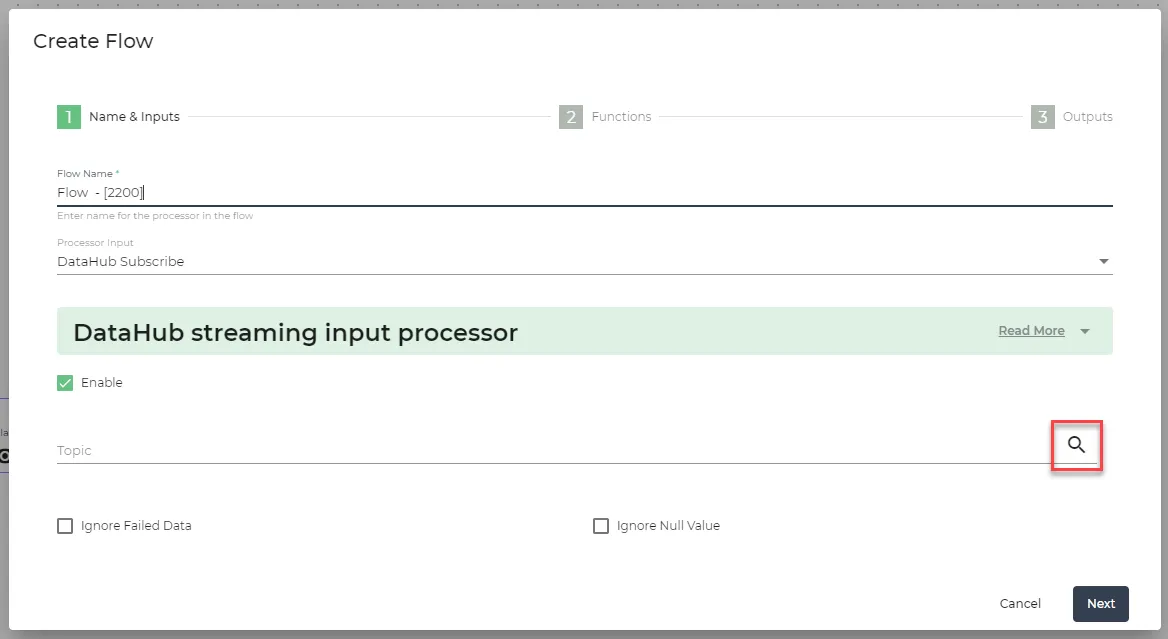
Click the Search icon and select the device and tag you previously created.
- Click Next.
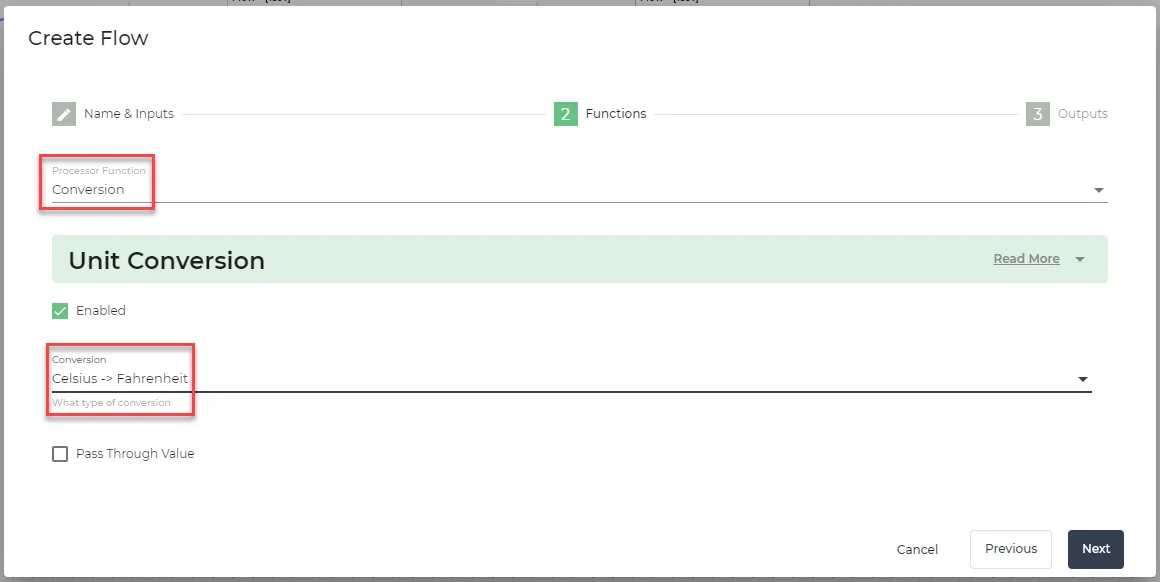
For Processor Function, select Conversion. Then, select the Celsius > Fahrenheit conversion.
- Click Next.
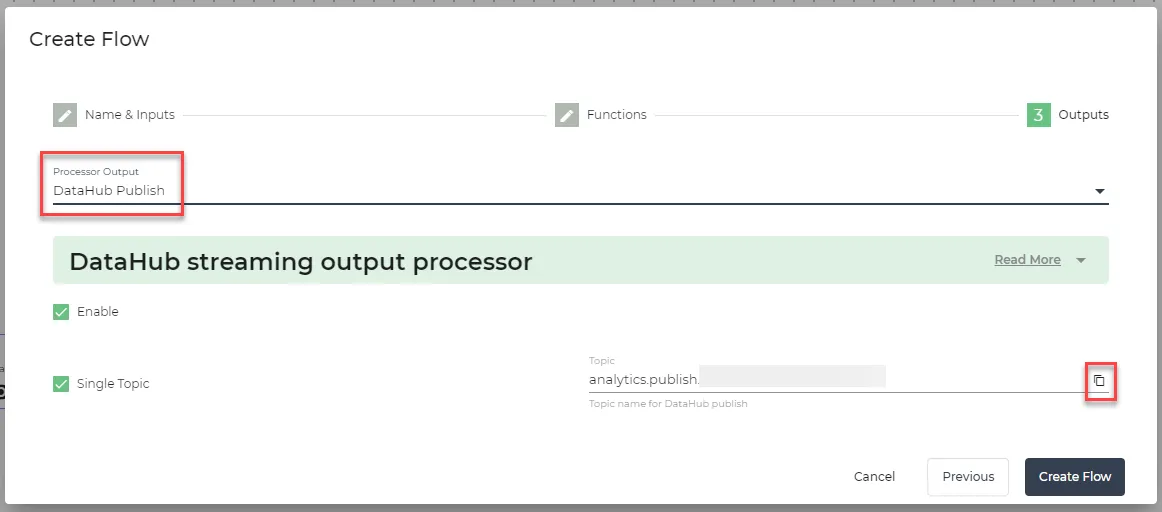
For Processor Output, select DataHub Publish, Then, copy the topic name and store it somewhere securely for reference later.
- Click Create Flow.
- Click Save to save the analytics flow on the canvas.
Step 4: Create Flow
Since the only data needed from the device is the converted temperature value and the timestamp, you will create the flow that will parse the data and only provide the required data in the payload.
To create the flow:
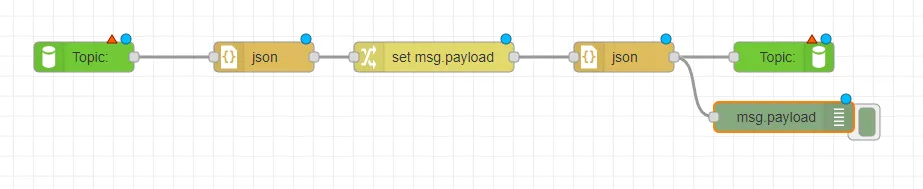
Connect the following nodes together: DataHub Subscribe json change json DataHub Publish debug (connected to second json node)
- Configure the nodes.
DataHub Subscribe
The DataHub Subscribe node will be configured to subscribe to the topic that publishes the converted temperature values from the analytics flow.
To configure the DataHub Subscribe node:
- Double-click the DataHub Subscribe node.
- In the Topic field paste the topic name copied from the DataHub Publish processor in the analytics flow.
- If needed, configure the Datahub Subscribe connection. See the Step 3: Configure Connector Nodes section in Create a Flow to learn more.
- Optionally, enter a name for the node.
- Click Done.
JSON Nodes
The two json nodes will do necessary parsing of data between JSON string and object. No configurations are needed for these nodes.
Change
The change node will delete the unnecessary data in the payload from the subscribed topic.
To configure the change node:
- Double-click the change node.
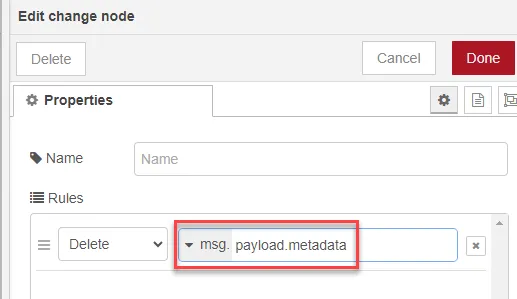
Update Set to Delete.
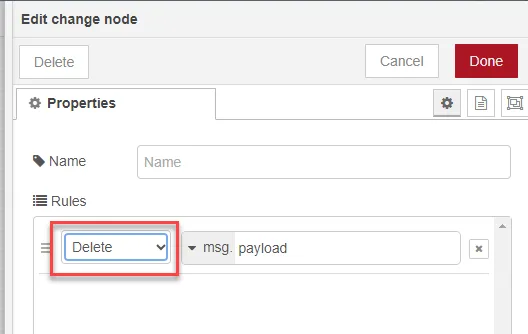
In the msg. field, enter payload.metadata.
Click +add.
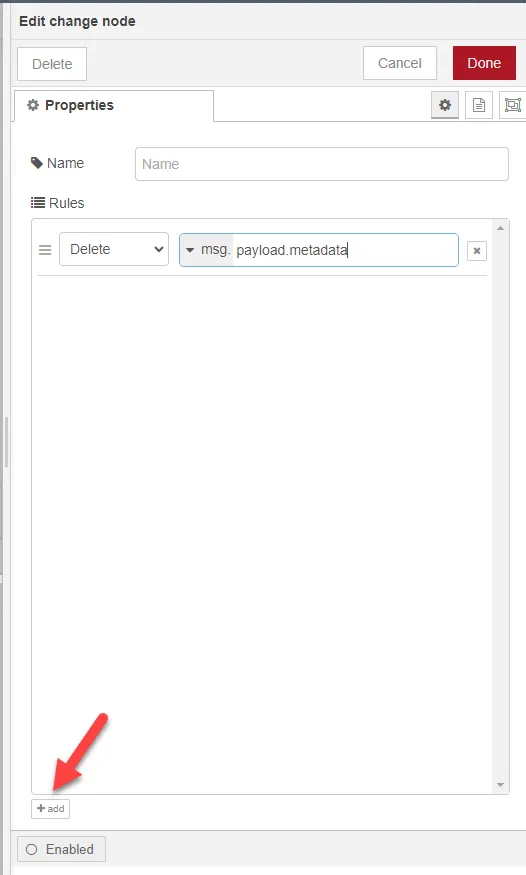
- Continue adding the following deletions.
- payload.registerId
- payload.tagName
- payload.success
- payload.description
- payload.datatype
- payload.deviceName
- payload.deviceID
- Click Done.
DataHub Publish
The DataHub Publish node will be used by the MySQL connector to write data into the database table.
- Double-click the DataHub Publish node.
In the Topic field enter a topic name. You will refer to this name later.
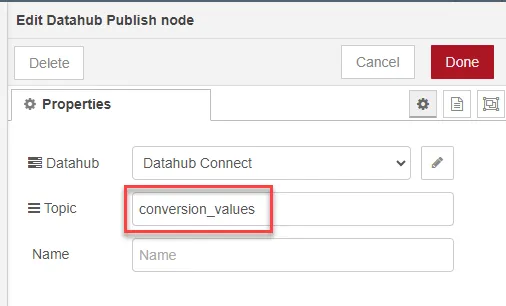
- Click Done.
Debug
The debug node will be used to review the updated payload and ensure the output is correct.
To review the payload:
- On the flow canvas, click Deploy to save the changes to the flow.
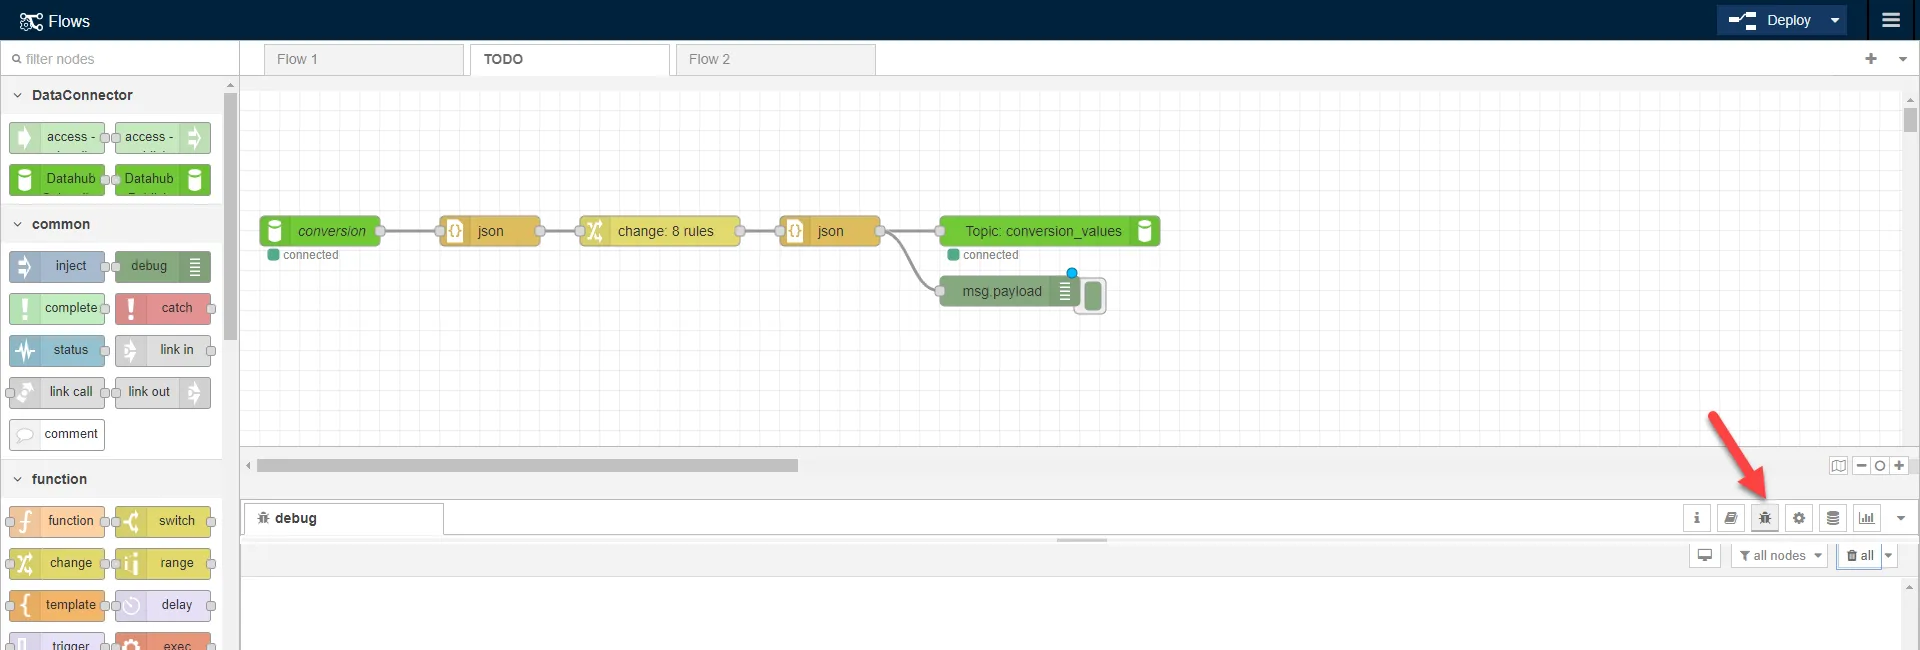
Expand the message window beneath the flow.
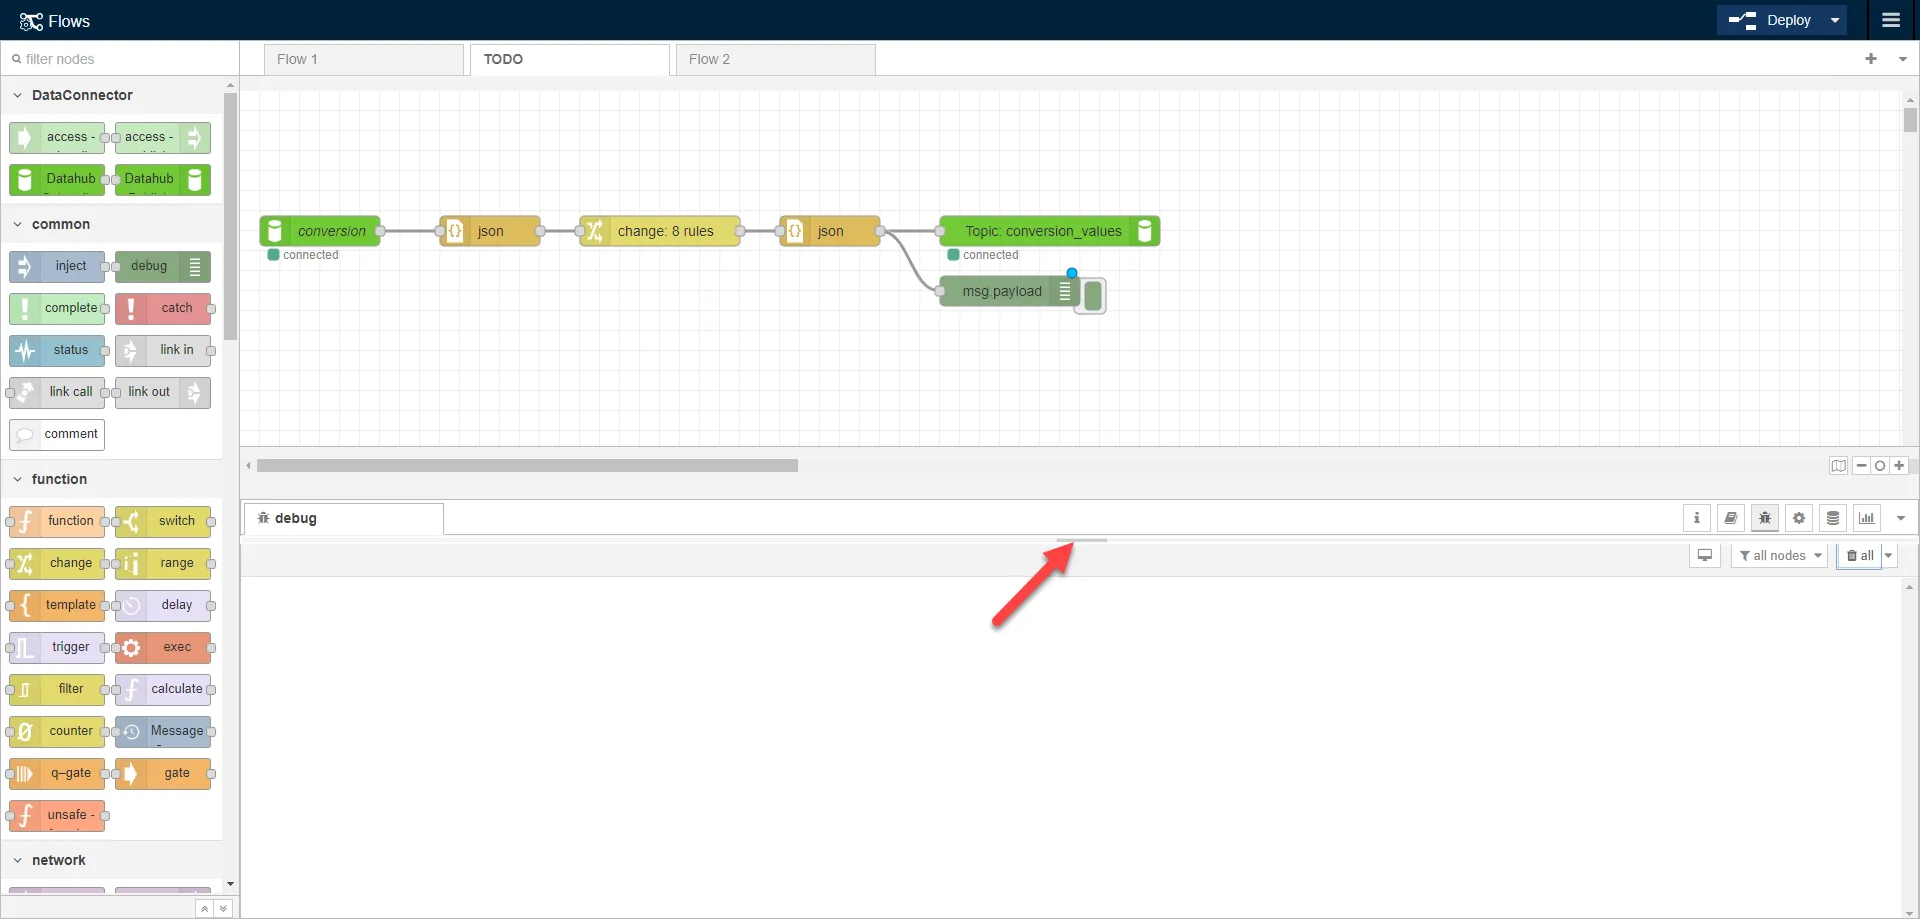
Click the Debug icon to view the data output.
Confirm that the output is only including two items in the payload: value and timestamp.
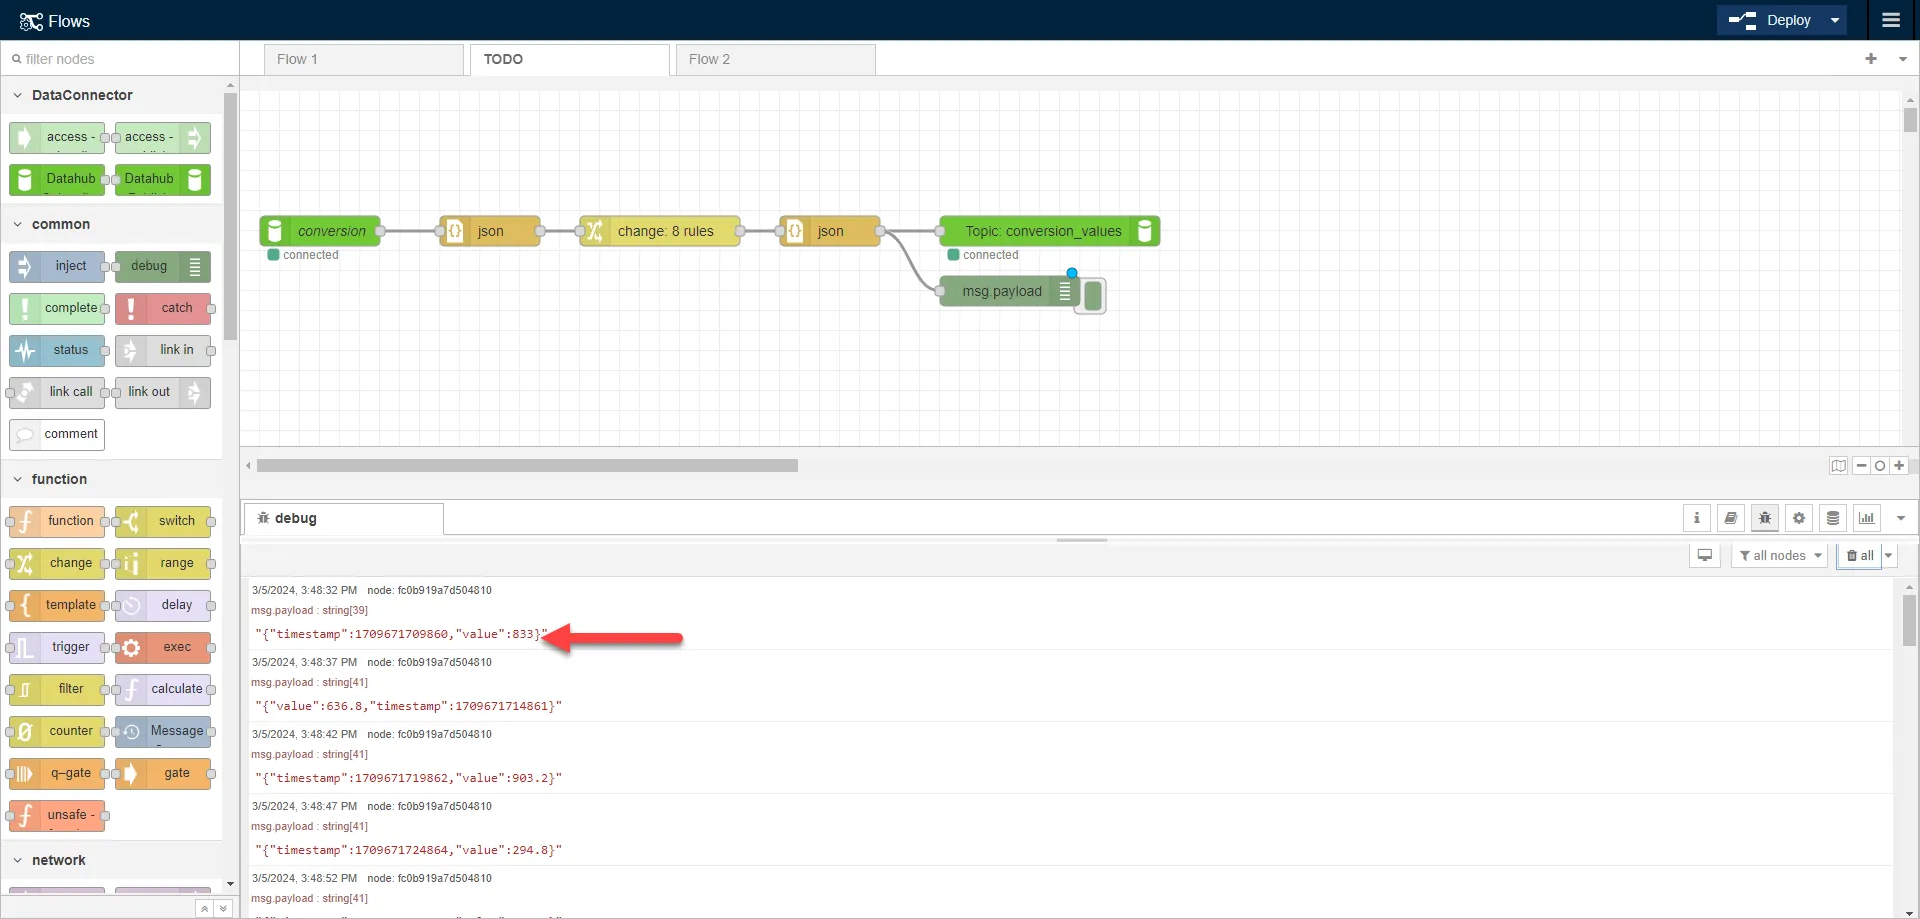
- Click Deploly to save the flow.
Step 5: Add MySQL Marketplace Application
You can now add the MySQL application to Litmus Edge. You can customize the parameters to your own preferred configurations.
Note: The version used in this guide for MySQL version is 8.0. See the MySQL 8.0 Reference Manual for more information.
To add the MySQL Marketplace Application:
- In Litmus Edge, navigate to Applications > Marketplace.
- Click Marketplace List and select Default Marketplace Catalog.
- Click the MySQL application tile.
- From the Installation script version drop-down list, select latest.
- Configure the following parameters.
- Name: Enter MySQL.
- Database: Enter sample.
- User: Enter user.
- Password: Enter the user password.
- MySQL password: Enter the same value as the Password parameter.
- Click Launch.
- Navigate to Applications > Catalog Apps. The MySQL application appears, pulls the image, and then starts the application. The MySQL application shows as running.
- Navigate to Applications > Containers. The MySQL application Container is running.
- Copy the IP address for the MySQL application.
Step 6: Create Custom Database Table
You will need to create the custom table in the database before data can be written into it.
Update the credentials, database name, and table name to your own specific configurations.
To create the custom table:
- In Litmus Edge, navigate to Applications > Containers.
Click the Terminal icon next to the MySQL container. The MySQL shell opens.
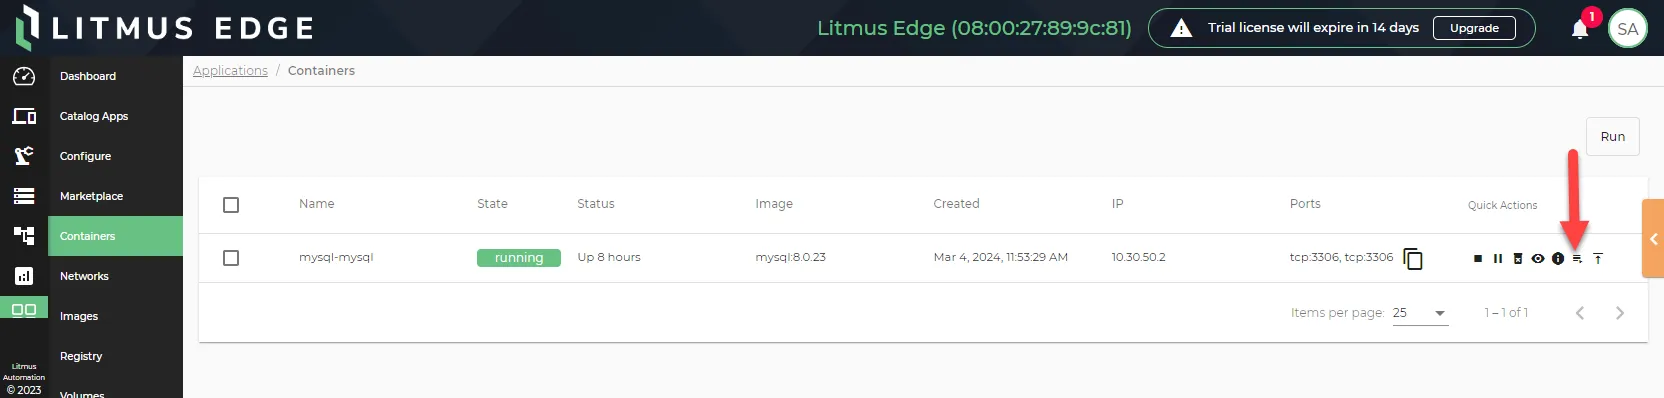
- From the MySQL container terminal, enter mysql -u user -p and press ENTER. Enter password: appears.
- Enter your user password, and then press ENTER. Welcome to the MySQL monitor appears.
- Enter show databases;, and then press ENTER. The database names appears.
- Enter use sample;, and then press ENTER. Reading table information for completion of table and column names appears in the console. This allows you to use the database.
- Enter create table conversion_values( timestamp bigint null, value int null );, and press ENTER.
The custom table is created with the following:
- The table name conversion_values
- The column names timestamp and value
- The column timestamp has the data type bigint and value has the data type int
- Both columns allow null values
Step 7: Configure MySQL Connector
Follow the steps to Add a Connector and select the DB - MySQL provider.
Configure the following required parameters.
- Name: Enter a name for the connector.
- Hostname: Paste the IP address you copied in Step 5.
- Port: Confirm the MySQL Server port. The default value is 3306.
- Username: Enter user or the username configured in Step 5.
- Password (Optional): Enter the password configured in Step 5.
- Database: Enter sample or the database configured in Step 5.
- Table: Enter conversion_values or the table name configured in Step 6.
- Show Mapping: Enter the following key/value pairs and click + Add.
- Key 1: timestamp
- Value 1: {{.timestamp}}
- Key 2: value
- Value 2: {{.value}}
- Create table: Make sure the checkbox is not selected.
Configure the following optional parameters as needed.
- Commit timeout: Enter the transaction commit timeout in (ms).
- Max transaction size: Enter the maximum number of messages before a transaction is committed, regardless of timeout parameter.
- Bulk insert count: To enable this option, enter the number of messages to group together and send as one bulk insert statement. Enabling this option can improve how quickly data is processed when dealing with high volumes of tags.
- Throttling limit: The maximum number of messages per second to be processed. The default value is zero, which means that there is no limit.
- Persistent storage: When enabled, this will cause messages to undergo a store-and-forward procedure. Messages will be stored within Litmus Edge when cloud providers are online.
- Queue Mode: Select the queue mode as lifo (last in first out) or fifo (first in first out). Selecting lifo means that the last data entry is processed first, and selecting fifo means the first data entry is processed first.
Step 8: Add Outbound Topic
You will need to add the DataHub Publish topic you configured on the flow canvas as an outbound topic in the MySQL connector.
To add the outbound topic:
- Navigate to Integration.
- Click the MySQL connector tile.
Click the Topics tab.
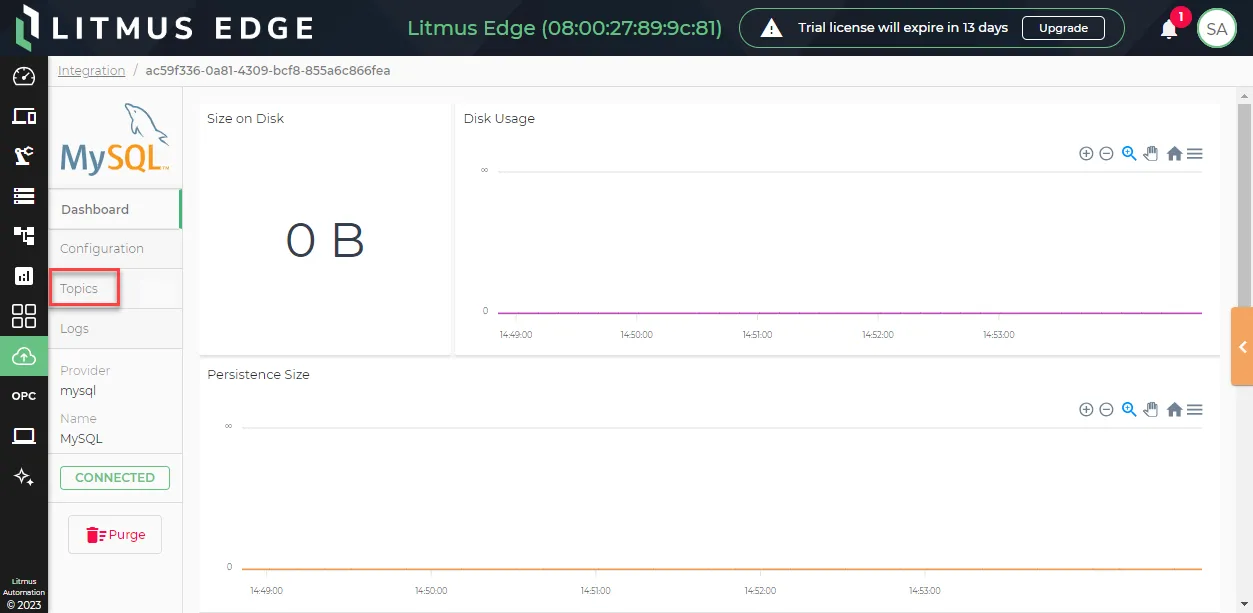
Click the Add icon and select Add a new subscription.
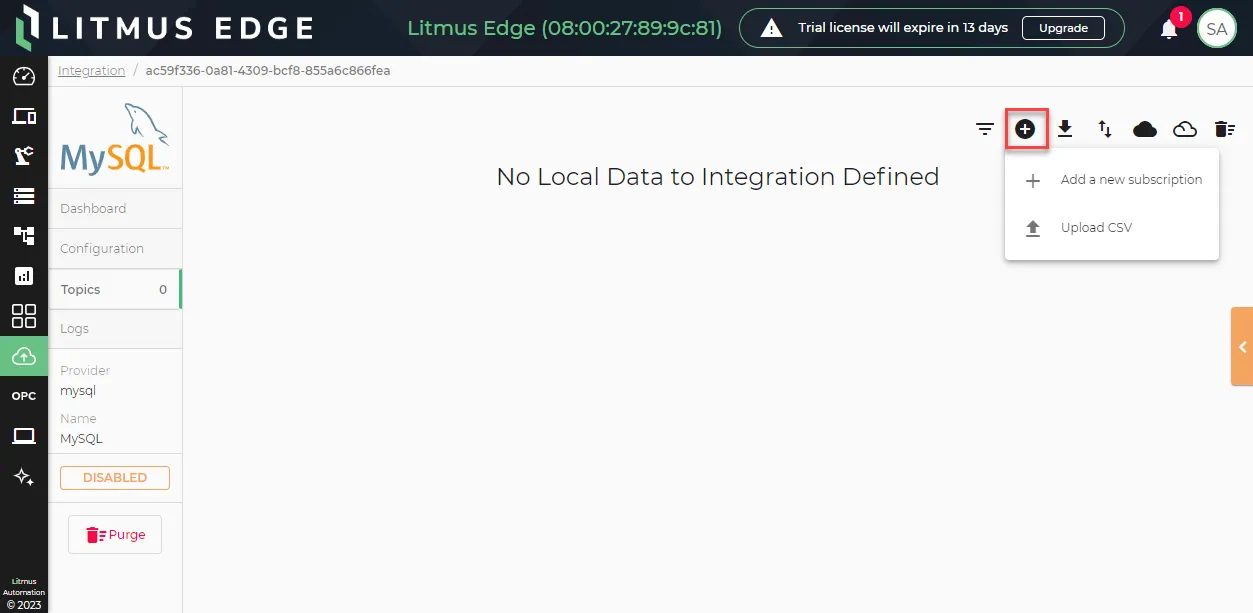
- Configure the parameters for the topic.
- Data Direction: Select Local to Remote - Outbound.
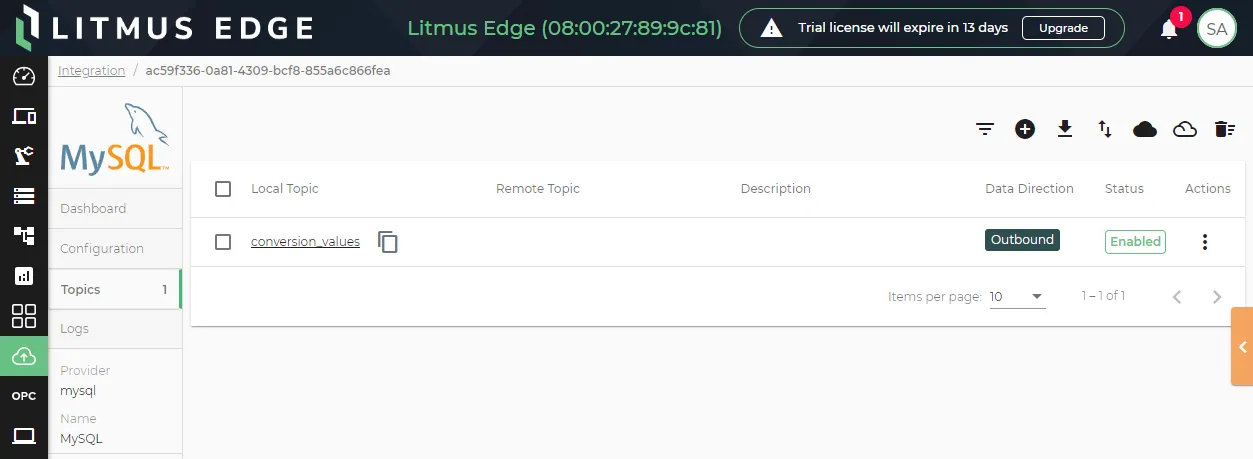
- Local Data Topic: Paste or enter the DataHub Publish topic name configured in the flow canvas in Step 4. In our example, enter conversion_values.
- Remote Data Topic: Optionally, enter your desired topic name that will be used to write the data into the database table.
- Description: Optionally, enter a description.
- Enable: Click the toggle to enable the topic.
- Click OK. The new topic appears on the Topics pane and is enabled. This topic will write data to the MySQL database table.
Step 9: Verify Connection
Use the command line in the MySQL application to confirm data is successfully being written into the database.
Update the credentials, database name, and table name to your own specific configurations.
To verify the connection:
- In Litmus Edge, navigate to Applications > Containers.
Click the Terminal icon next to the MySQL container. The MySQL shell opens.
- From the MySQL container terminal, enter mysql -u user -p and press ENTER. Enter password: appears.
- Enter your user password, and then press ENTER. Welcome to the MySQL monitor appears.
- Enter use sample;, and then press ENTER. Reading table information for completion of table and column names appears in the console.
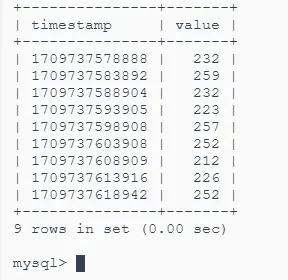
- Enter select * from conversion_values;, and press ENTER.
The data in the custom table displays.