Google Cloud Pub/Sub Integration Guide
Review the following guide for setting up an integration between Litmus Edge and Google Pub/Sub service.
Once the integration is set up, you can use it for the following:
- Publishing data from a topic in your edge device to a Subscription topic in the Google Cloud Platform (GCP)
- Subscribing to data published by a Publication topic in the Google Cloud Platform
Note: With Persistent Storage enabled, ensure that you have sufficient network stability and bandwidth to stream large amounts of data to the Cloud. The publishing process starts when Litmus Edge publishes data and ends when receiving acknowledgement from Pub/Sub. If publishing takes longer than 20 seconds, the connector timeouts, enters a failed state and adds a "timeout" error to the connector log files.
Before You Begin
- You need to create a Google Service Account. Make sure the account has the correct roles and permissions required for setting up the connection.
- Refer to the following Google resources for learning more about Pub/Sub and configuring connections:
- Configure Private Google Access for on-premises hosts > Domain Options (information regarding private access to GCP services)
- Supported products and limitations > Pub/Sub (information regarding private access to GCP services)
Set up the Outbound Connection (Publish to Google Pub/Sub)
Follow the steps below to set up the outbound connection.
Step 1: Create Publication Topic in Google Cloud Platform
In the Google Cloud Platform, create a publication topic. A matching subscription topic is created automatically, with the -sub suffix appended to the topic name.
Step 2: Add Device
Follow the steps to Connect a Device. The device will be used to store tags that will be eventually used to create outbound topics in the connector. Make sure to select the Enable Data Store checkbox.
Step 3: Add Tags
After connecting the device in Litmus Edge, you can Add Tags to the device. Create tags that you want to use to create outbound topics for the connector.
Step 4: Add the Google Cloud Pub/Sub Connector
Follow the steps to Add a Connector and select the Google Cloud Pub/Sub Connector provider.
For more information about message publication settings, see the SDK on Publish Settings.
Configure the following parameters.
- Name: Enter a name for the connector.
- Service Account Key (.json): Copy or save the JSON key from your Google Cloud Platform and paste or upload it here.
- The project ID of the cloud project: Copy the ID from your Google Cloud Platform and paste it here.
- The private key ID of the cloud project: Copy the key ID from your Google Cloud Platform and paste it here.
- The client email of the cloud project: Enter the email from your Google Cloud Platform.
- Integration Topic: Copy the name of the Publication topic (without the "-sub" suffix) from your Google Cloud Platform and paste it here.
- Custom Attributes: You can add custom attributes in key/value pairs for further data processing. Refer to the following to learn more:
- Parallel Publish Count: The number of messages being published simultaneously. The default value is 100.
- Parallel byte threshold: The minimum size of a batch (in bytes) for the batch to be published. The default value is zero, which means that there is no threshold (limit).
- Publish count threshold: The minimum number of messages in a batch for the batch to be published. The default value is zero, which means that there is no threshold (limit).
- Publish delay threshold (Milliseconds): The maximum time that the client will attempt to publish a batch of messages. The default value is zero, which means that there is no threshold (limit).
- Throttling limit: The maximum number of messages per second to be processed. The default value is zero, which means that there is no limit.
- Persistent storage: When enabled, this will cause messages to undergo a store-and-forward procedure. Messages will be stored within Litmus Edge when cloud providers are online.
- Queue Mode: Select the queue mode as lifo (last in first out) or fifo (first in first out). Selecting lifo means that the last data entry is processed first, and selecting fifo means the first data entry is processed first.
Step 5: Enable the Connector
After adding the connector, click the toggle in the connector tile to enable it.
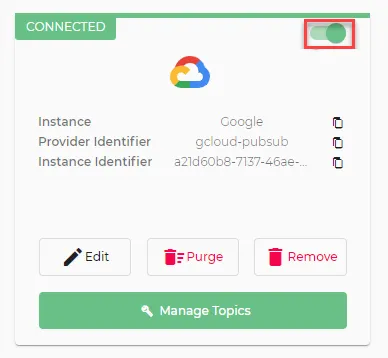
If you see a Failed status, you can review the Connector Logs and relevant error messages.
Step 6: Create Outbound Topics for Connector
You will now need to import the tags you added in Step 2 to the connector as topics.
To create outbound topics:
- Click the connector tile. The connector Dashboard appears.
- Click the Topics tab.
- Click the Import from DeviceHub tags icon. The DeviceHub Import dialog box appears.
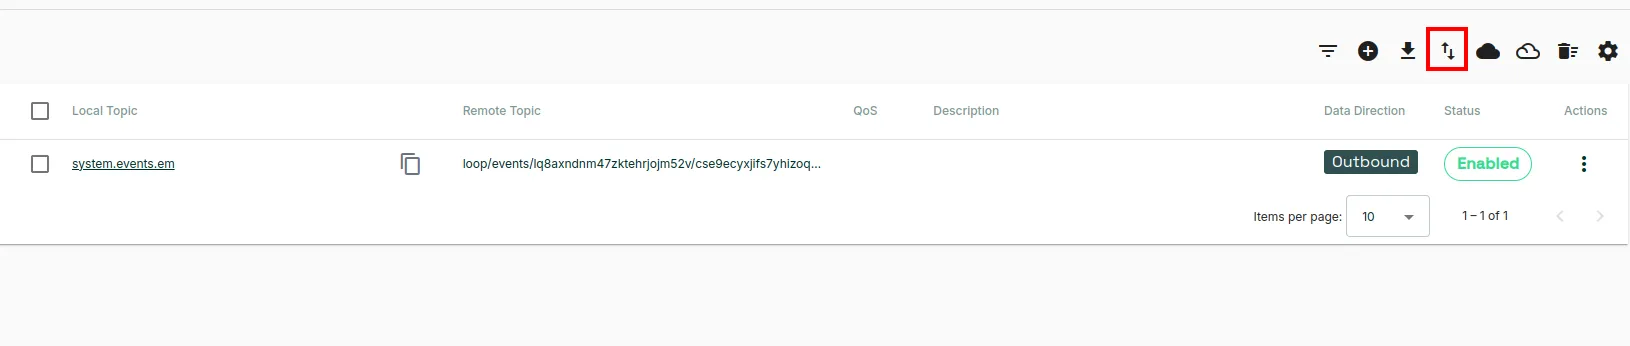
After importing the tag(s), do the following:
- Edit the tag and configure the Remote Data Topic. Copy and paste the name of the Subscription topic (with the -sub suffix) from your Google Cloud Platform.
- Make sure the connector has a CONNECTED status.
Step 7: Enable Topics
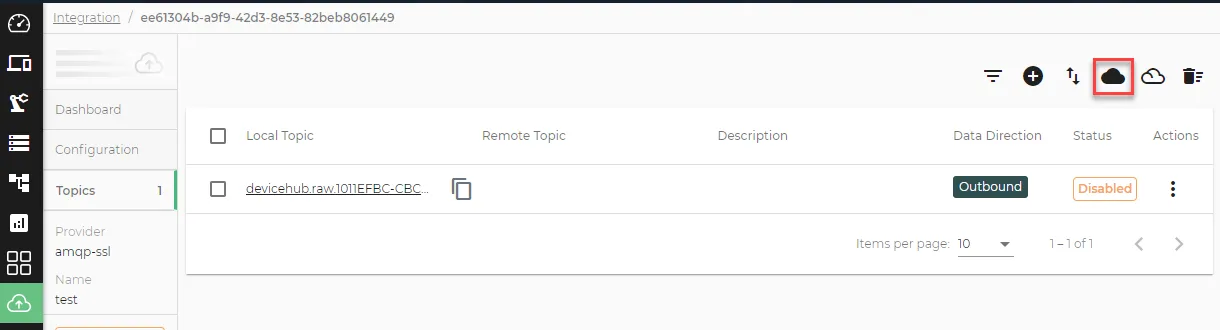
Because you imported DeviceHub tags for a CONNECTED connector, all topics will be disabled.
To enable the topics, return to the Topics tab and click the Enable all topics icon.
Step 8: Verify Connection in Google Cloud Platform
To verify the connection in Google Cloud Platform:
Pull the subscription topic to see messages it receives from the Litmus Edge outbound topics created previously.
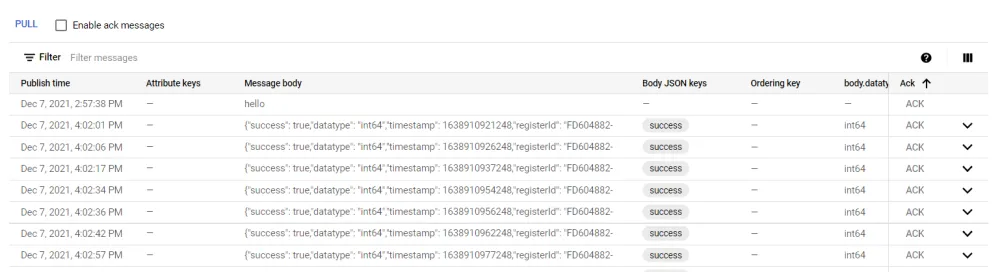 List of Litmus Edge outbound topics
View the subscription statistics.
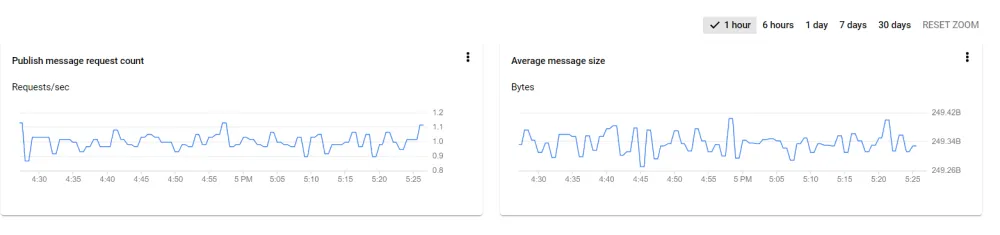 Graph of subscription statistic
Set up the Inbound Connection (Subscribe to Google Pub/Sub)
Follow the steps below to set up the inbound connection.
See Publish messages to topics to learn more about publishing messages in Google Pub/Sub.
Step 1: Create Publication Topic in Google Cloud Platform
In the Google Cloud Platform, create a publication topic.
Step 2: Add the Google Cloud Pub/Sub Connector
Follow the steps to Add a Connector and select the Google Cloud Pub/Sub Connector provider.
Configure the following parameters.
- Name: Enter a name for the connector.
- Service Account Key (.json): Copy or save the JSON key from your Google Cloud Platform and paste or upload it here.
- The project ID of the cloud project: Copy the ID from your Google Cloud Platform and paste it here.
- The private key ID of the cloud project: Copy the key ID from your Google Cloud Platform and paste it here.
- The client email of the cloud project: Enter the email from your Google Cloud Platform.
- Integration Topic: Copy the name of the Publication topic (without the "-sub" suffix) from your Google Cloud Platform and paste it here.
- Custom Attributes: You can add custom attributes in key/value pairs for further data processing. Refer to the following to learn more:
- Parallel Publish Count: The number of messages being published simultaneously. The default value is 100.
- Parallel byte threshold: The minimum size of a batch (in bytes) for the batch to be published. The default value is zero, which means that there is no threshold (limit).
- Publish count threshold: The minimum number of messages in a batch for the batch to be published. The default value is zero, which means that there is no threshold (limit).
- Publish delay threshold (Milliseconds): The maximum time that the client will attempt to publish a batch of messages. The default value is zero, which means that there is no threshold (limit).
- Throttling limit: The maximum number of messages per second to be processed. The default value is zero, which means that there is no limit.
- Persistent storage: When enabled, this will cause messages to undergo a store-and-forward procedure. Messages will be stored within Litmus Edge when cloud providers are online.
- Queue Mode: Select the queue mode as lifo (last in first out) or fifo (first in first out). Selecting lifo means that the last data entry is processed first, and selecting fifo means the first data entry is processed first.
Step 3: Enable the Connector
After adding the connector, click the toggle in the connector tile to enable it.
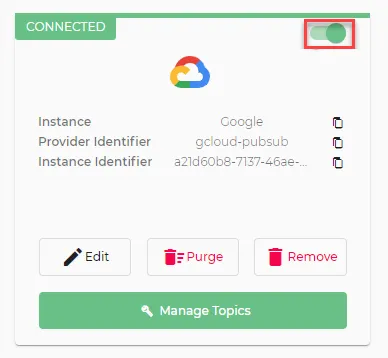
If you see a Failed status, you can review the Connector Logs and relevant error messages.
Step 4: Create Inbound Topic for Connector
You will now need to create a topic in Litmus Edge from the Google Cloud Platform publication topic created in Step 1.
To create inbound topics:
- Navigate to Integration.
- Click the connector tile.
- Click the Topics tab.
Click the Add a new subscription icon. The Data Integration dialog box appears.
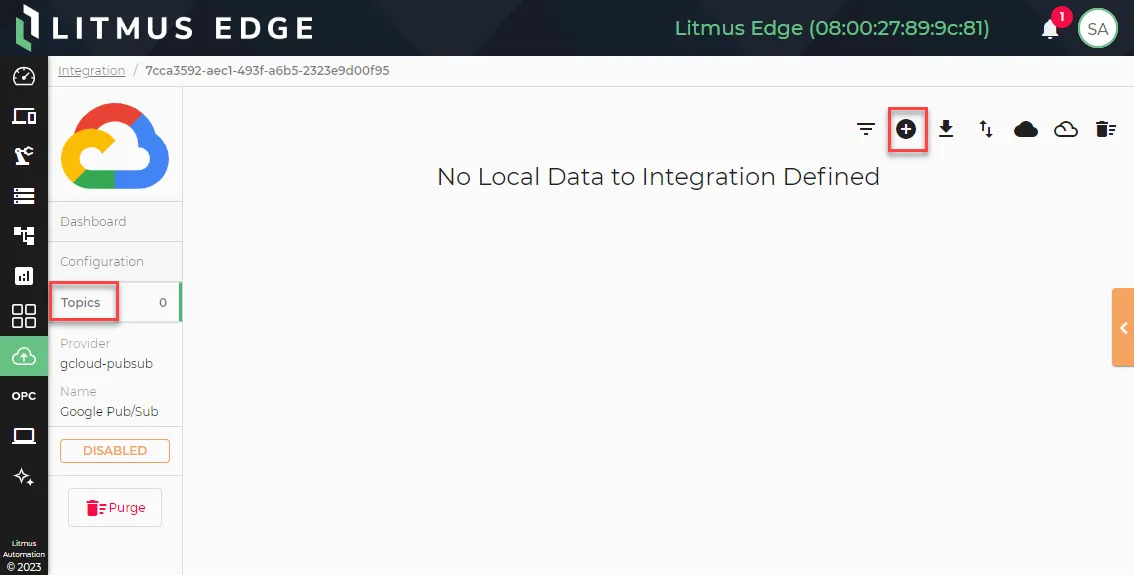
- Configure the following parameters.
- Data Direction: Select Remote to Local - Inbound.
- Local Data Topic: Enter a name for the topic name in Litmus Edge.
- Remote Data Topic: Copy and paste the Publication topic from your Google Cloud Platform.
- Enable: Select the toggle to enable the topic.
- Click Yes to add the topic.
- From the connector tile, ensure the connector is not disabled and still shows a CONNECTED status. Also verify the topic shows an Enabled status.
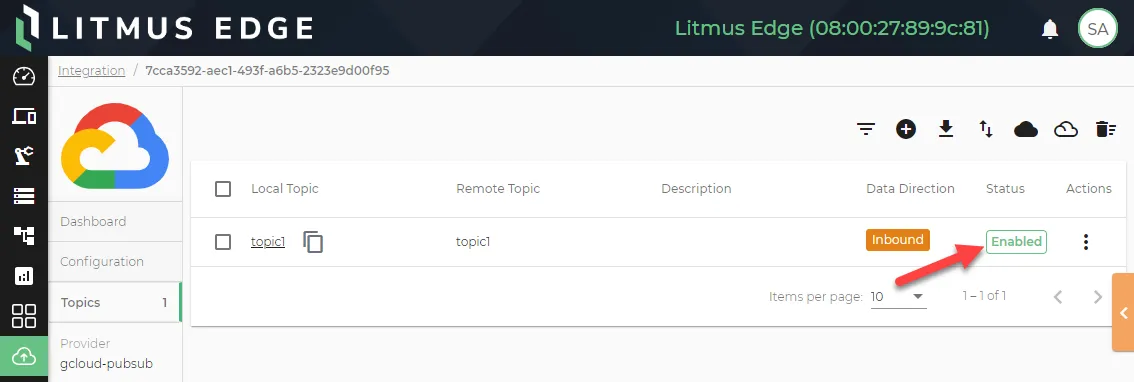
Step 5: Send Messages in Google Cloud Platform
Start sending messages through the publication topic (created in Step 1) from the Google Cloud Platform. See Publish messages to topics to learn more.
Step 6: Verify Connection in Litmus Edge
You can do one of the following to verify the connection in Litmus Edge. When configuring the Flow or application, use the the Local Data Topic name configured in Step 4.