Create a Cloud Storage Sync Job
4 min
You can create Cloud Storage sync jobs by navigating to Integration > Object.
Before You Begin
Before you can start leveraging Cloud Storage Sync, you will need to set up the source directory. See Set Up Cloud Storage to learn more.
Create Cloud Storage Sync Job
To create a cloud storage sync job:
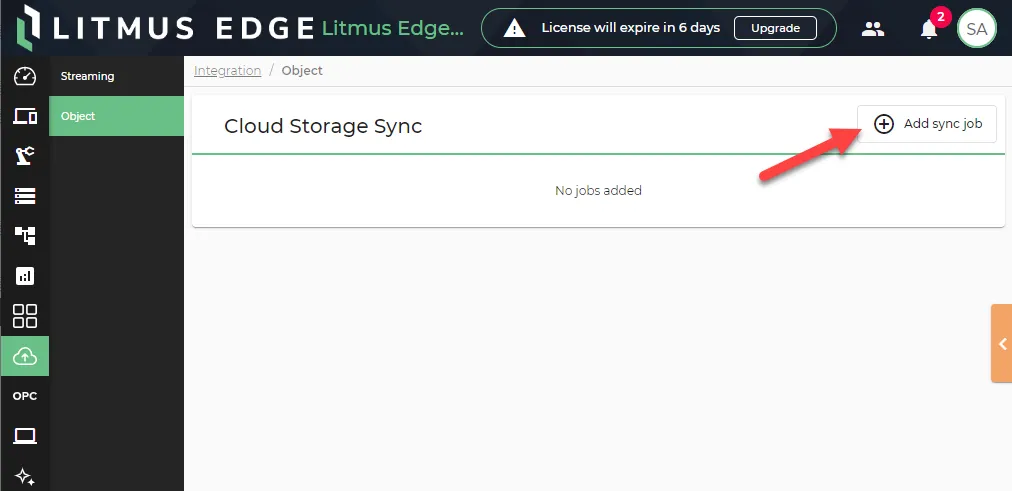
- Navigate to Integration > Object.
- Click Add sync job. The Add Cloud Sync Job dialog box displays.
- Enter a name for the job.
- Select a provider for the job.
Configure the parameters for the provider.
AWS S3
- Region: Enter the region name. See Amazon Simple Storage Service endpoints and quotas to learn more.
- Access key ID: Enter the appropriate access key ID. See AWS security credentials to learn more.
- Secret access key: Enter the appropriate secret access key. See AWS security credentials to learn more.
- Source: Enter the file path to the local directory. For example: /var/lib/customer/ftp-data/s3-sync. Make sure you have started the Litmus Edge FTP server and created the necessary folders for the file path. See Set Up Cloud Storage to learn more.
- Destination: Enter the remote S3 bucket name.
- Transfer mode: Select a transfer mode: Copy or Move.
- Run every: Configure the time interval for the sync job in minutes, hours, or seconds.
Azure Blob Storage
- Access Key: Enter the access key. See the following resources to learn more.
- Access Name: Enter the storage account name.
- Source: Enter the file path to the local directory. For example: /var/lib/customer/ftp-data/azure-sync. Make sure you have started the Litmus Edge FTP server and created the necessary folders for the file path. See Set Up Cloud Storage to learn more.
- Destination: Enter the Azure Blob Storage container name.
- Transfer mode: Select a transfer mode: Copy or Move.
- Run every: Configure the time interval for the sync job in minutes, hours, or seconds.
Google Cloud Storage
- JSON Key FIle: Pase or upload the JSON key file.
- Source: Enter the file path to the local directory. For example: /var/lib/customer/ftp-data/gcp-sync. Make sure you have started the Litmus Edge FTP server and created the necessary folders for the file path. See Set Up Cloud Storage to learn more.
- Destination: Enter the remote GCP bucket name.
- Transfer mode: Select a transfer mode: Copy or Move.
- Run every: Configure the time interval for the sync job in minutes, hours, or seconds.
Databricks Unity Catalog Volume
- Workspace URL: Enter the Databricks workspace URL. See Get identifiers for workspace objects to learn more.
- Authentication Option:
- Personal Access Token: If you select this, then:
- Access Token: You can paste the access token here. See Databricks personal access token authentication to learn more.
- Source: Enter the file path to the local directory. For example: /var/lib/customer/ftp-data/databricks-sync. Make sure you have started the Litmus Edge FTP server and created the necessary folders for the file path. See Set Up Cloud Storage to learn more.
- Destination: Enter the file path to Databricks directory.
- Transfer mode: Select a transfer mode: Copy or Move.
- Run every: Configure the time interval for the sync job in minutes, hours, or seconds
- See Databricks Unity Catalog Volume guide to configure the Databricks Unity Catalog Volume on the Litmus Edge webUI to send files directly to the Databricks Unity Catalog.
When done configuring the provider, click Save.
Once the job is created, you can enable or disable it. To manage the job, you must disable the job first.
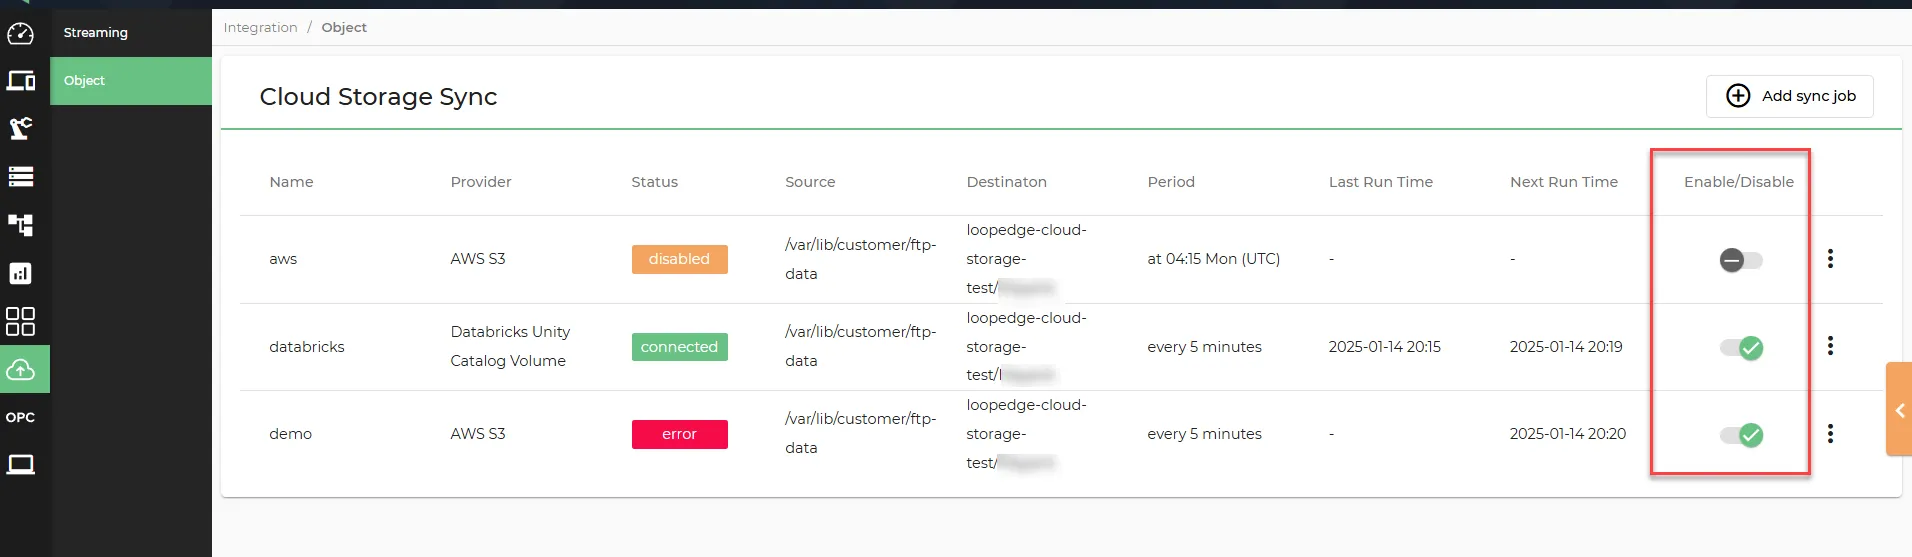
Enable/Disable status for sync jobs