Use the Compliance and Loss KPI
The Compliance and Loss KPI mainly deals with manufactured units and defective units.
For this KPI, two input definitions are required: manufactureEnd and defectiveUnit. These are event triggers, signifying the end of the manufacturing cycle and the discovery of a defective unit, respectively. When the input tag associated with the defectiveUnit goes from one value to another, it indicates that the unit was defective.
The compliance rate is calculated by subtracting the number of defective units from the total manufactured units. The loss percentage is defined as the ratio of defective units to the total manufactured units.
User Scenario
Review the following scenario for the compliance and loss KPI processor. Then, using an input processor, you will simulate PLC data and calculate the compliance rate and production loss.
In a manufacturing setting, the Compliance and Loss KPI is essential for monitoring product quality. For instance, a production manager can use this KPI to identify manufacturing issues and ensure product quality. For example, if 40 out of 100 products are defective, it indicates a 40% production loss, prompting the need for process improvement to maintain high-quality standards.
Step 1: Add a Device
Follow the steps to Connect a Device and configure the following parameters:
- Device Type: Simulator
- Driver Name: Generator
- Enable Alias Topics: Select the checkbox.
Step 2: Add Tags
After connecting the device, add the following tag. See Add Tags to learn more.
Tag 1: manufacture
- Name: Select S - Random value generator.
- Value Type: Select float64.
- Polling Interval: Enter 1.
- Tag Name: Enter manufacture.
Tag 2: defective
- Name: Select S - Random value generator.
- Value Type: Select float64.
- Polling Interval: Enter 1.
- Tag Name: Enter defective.
Step 3: Create Analytics Flow
You can now create the analytics flows using data from the device and tag you previously created.
To create an analytics flow with the Compliance and Loss Processor function:
- In Litmus Edge, navigate to Analytics.
On the analytics canvas, click Add processor. The Create a processor dialog box displays.
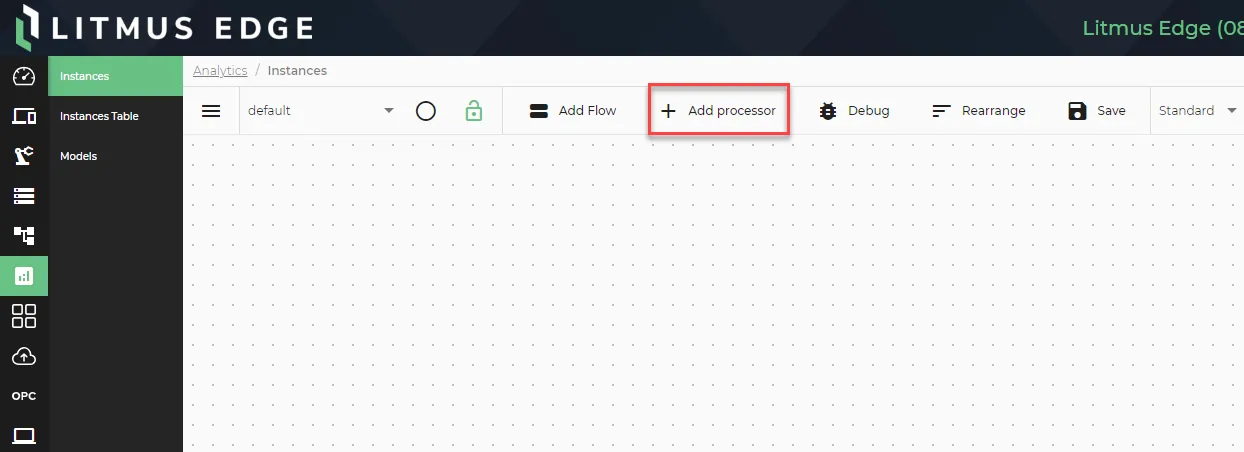 The Add processor option
- Select DataHub Subscribe.
In the Topic field, click the Search icon, select the device you previously created, and then select the alias topic for tag1: manufacture.
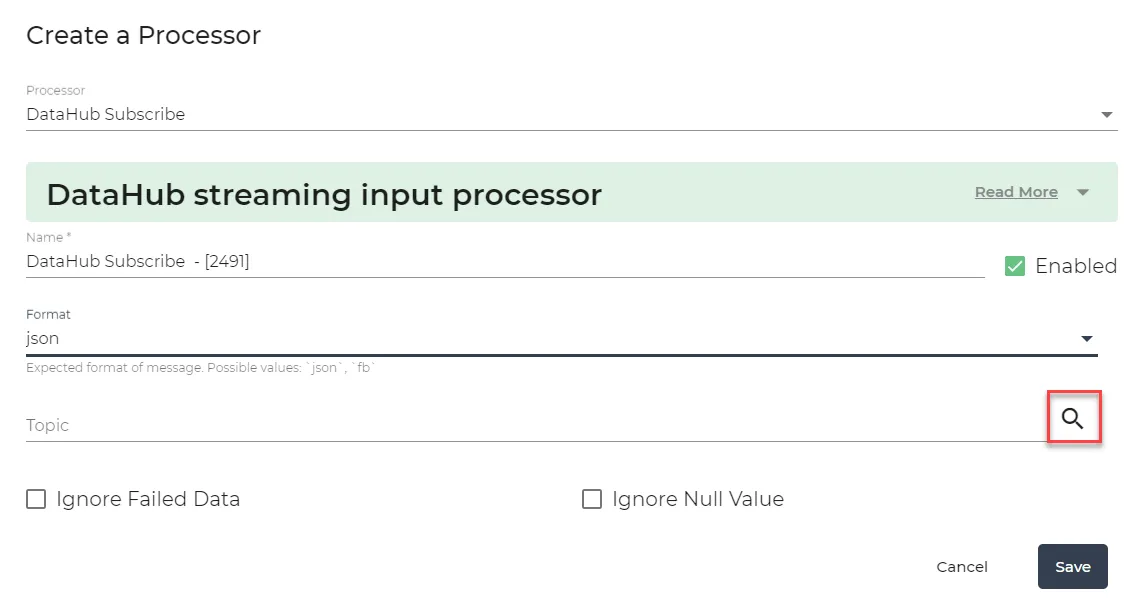 Create a Processor dialog box
- Click Save.
Repeat steps 2-5 to add another DataHub Subscribe processor for the defective tag.
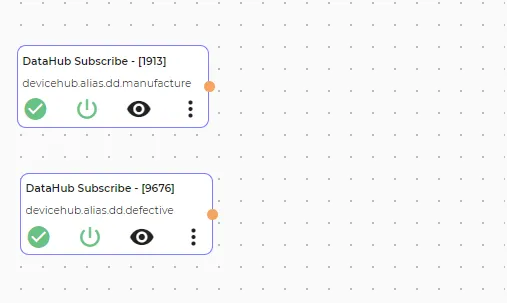 Canvas flow with two DataHub Subscribe processor
- Click Add processor again and select the Compliance and Loss processor. The following information defines this function:
- Defective From & Defective To: If your input changes Defective From value to Defective To value, it will trigger a defective unit.
- Manufacture From & Manufacture To: If your input changes Manufacture From value to Manufacture To value, it will trigger the end of the manufacturing cycle.
- Time Interval: If the tag publishes at the expected interval, it is better to disable this timer by entering 0 in the field.
Click Save.
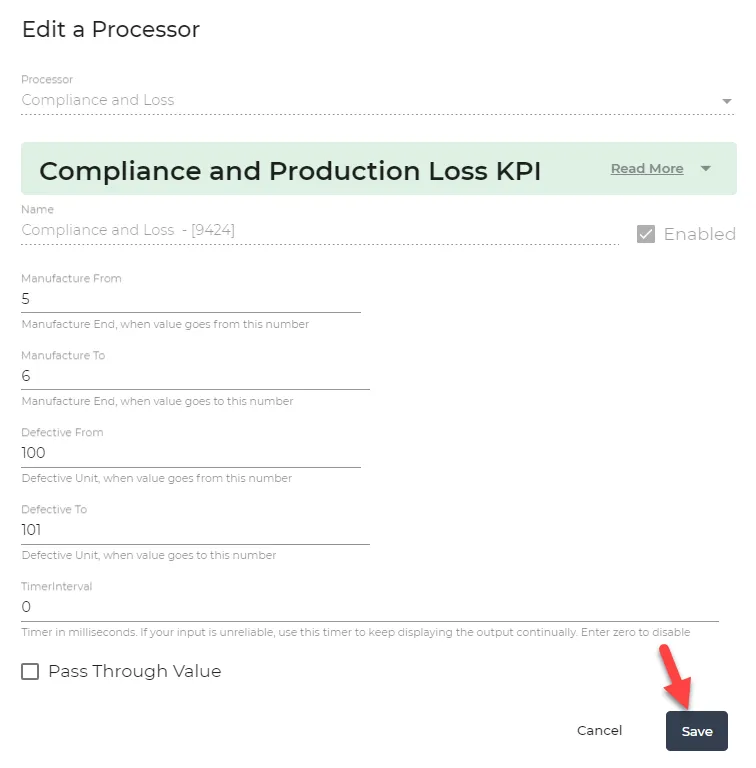 Edit a Processor dialog box
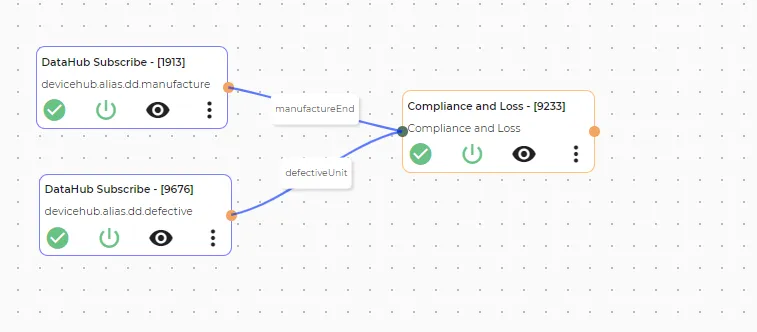
- Connect the DataHub Subscribe processor (tag: manufacture) to the Compliance and Loss processor with a wire. Use the Events connection and enter a definition of manufactureEnd for the connection.
- Repeat step 8 for tag: defective and enter a definition of defectiveUnit for the connection.
- On the analytics canvas, click Save.
The configured analytics flows should look like the following:
Step 4: View Output of Processor
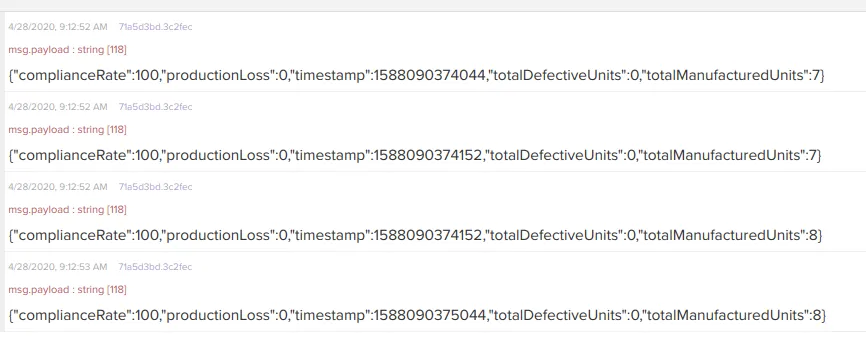
Click the View icon in the Compliance and Loss processor to view the output values.
The output displays the calculated compliance rate and production loss using data from the previously created device and tags.