Deployment of Litmus Edge Manager on Azure Kubernetes Service (AKS)
You can deploy Litmus Edge Manager on Azure Kubernetes Service (AKS). You deploy with the following steps:
Before You Begin
Before you begin, make sure that you have:
- A valid Microsoft Azure subscription with permissions to create and manage Kubernetes clusters. See the Azure Kubernetes Service (AKS) documentation for more details.
- Familiarity with the Azure Portal and Azure CLI.
- Installed Azure CLI on your local machine.
- Available Litmus Google registry credential key file (for example, LEM_pull_Key_file.json).
Minimum Virtual Machine Requirements
You can meet virtual machine requirements using a single node or multiple smaller nodes. Recommended specifications for production environments depend on your individual use cases.
The minimum virtual machine (VM) requirements are:
- Recommended node size: 8 CPU and 20 GB memory
- Storage Configuration: 100 GB local storage
- Suggested node pool strategy:
- Single node, for example Standard_D8s_v3 or Standard_D8as_v*
- Multi-node with smaller nodes where combined resources meet or exceed 8 CPU cores and 20 GB RAM
Step 1: Set up your AKS Cluster in your Azure Portal account
- Log in to your Azure account.
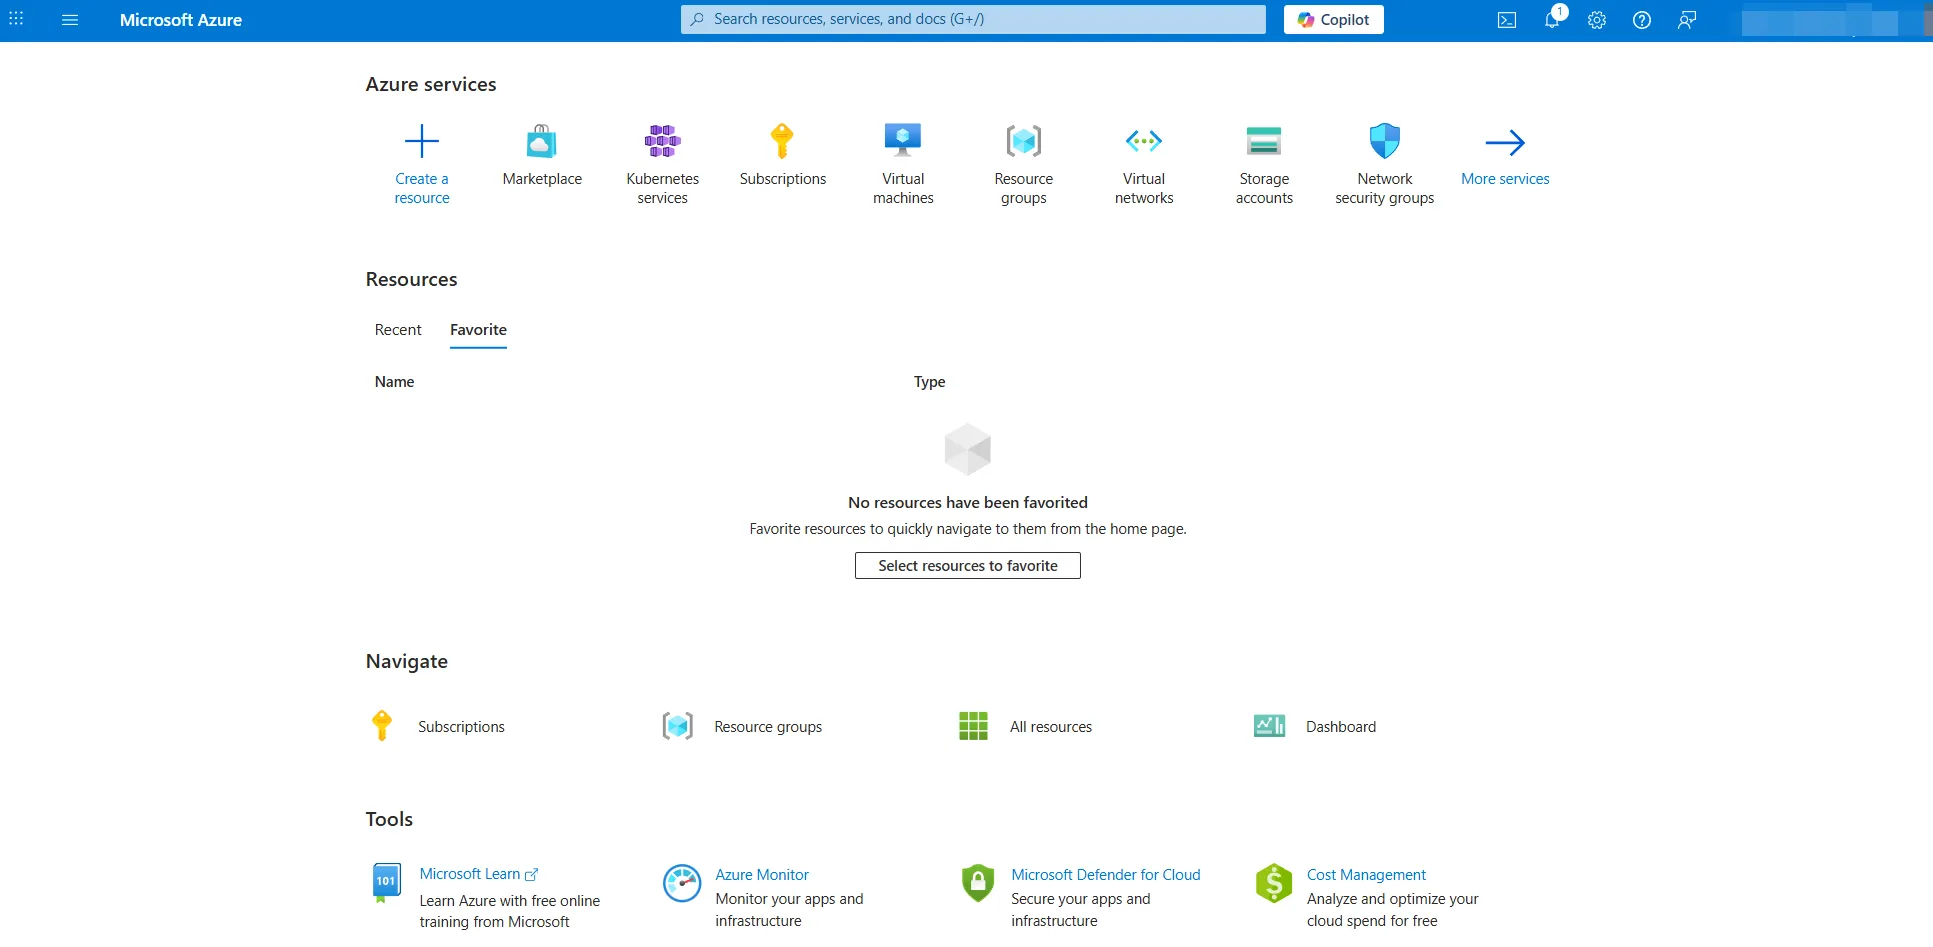
- Open Azure Kubernetes Service.
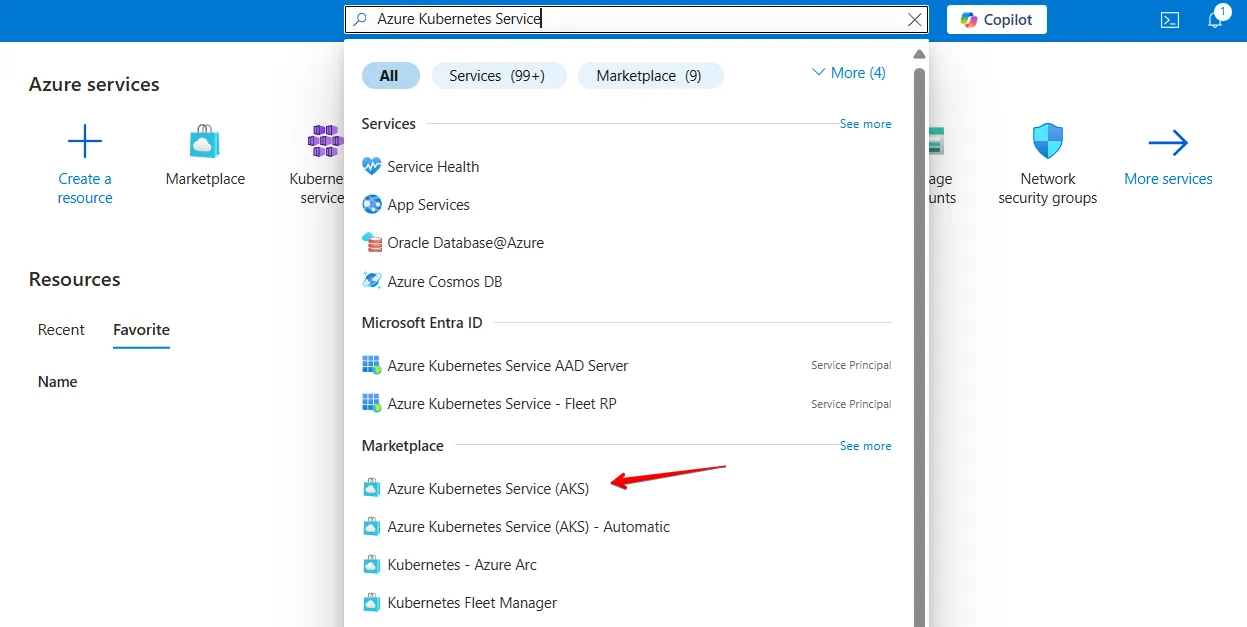
- Select your subscription and plan: Azure Kubernetes Service (AKS). Click Create.
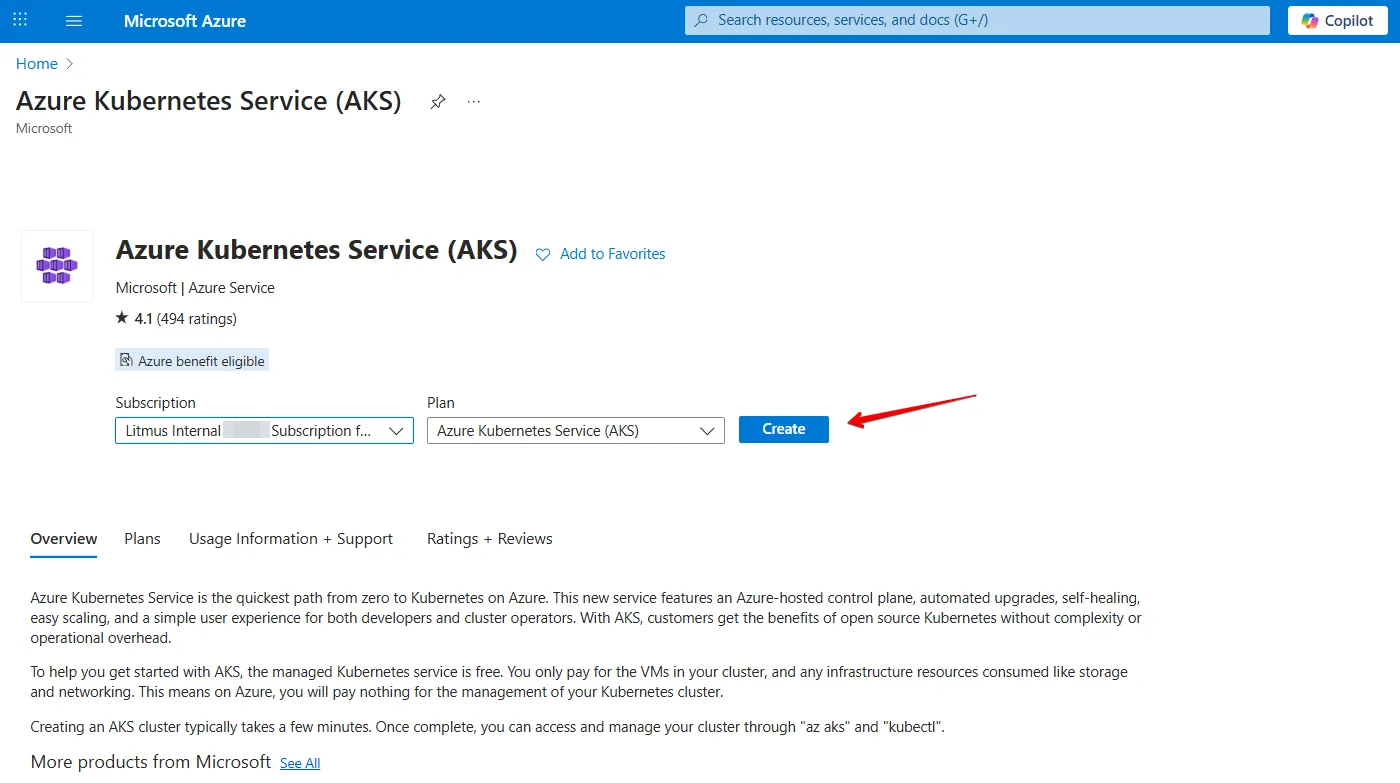
- In Create Kubernetes cluster > Basics, set the following:
- Subscription Your subscription is selected already.
- Resource Group Create a new resource group to contain the cluster resources.
- Cluster preset configuration Select Dev/Test.
- Kubernetes cluster name Set any desired name for the cluster.
- Region Set any or (US) East US.
- Kubernetes version Set any or 1.32.6 (default).
- Authentication and Authorization Local accounts with Kubernetes RBAC.
- Other options Leave default values or modify as required.
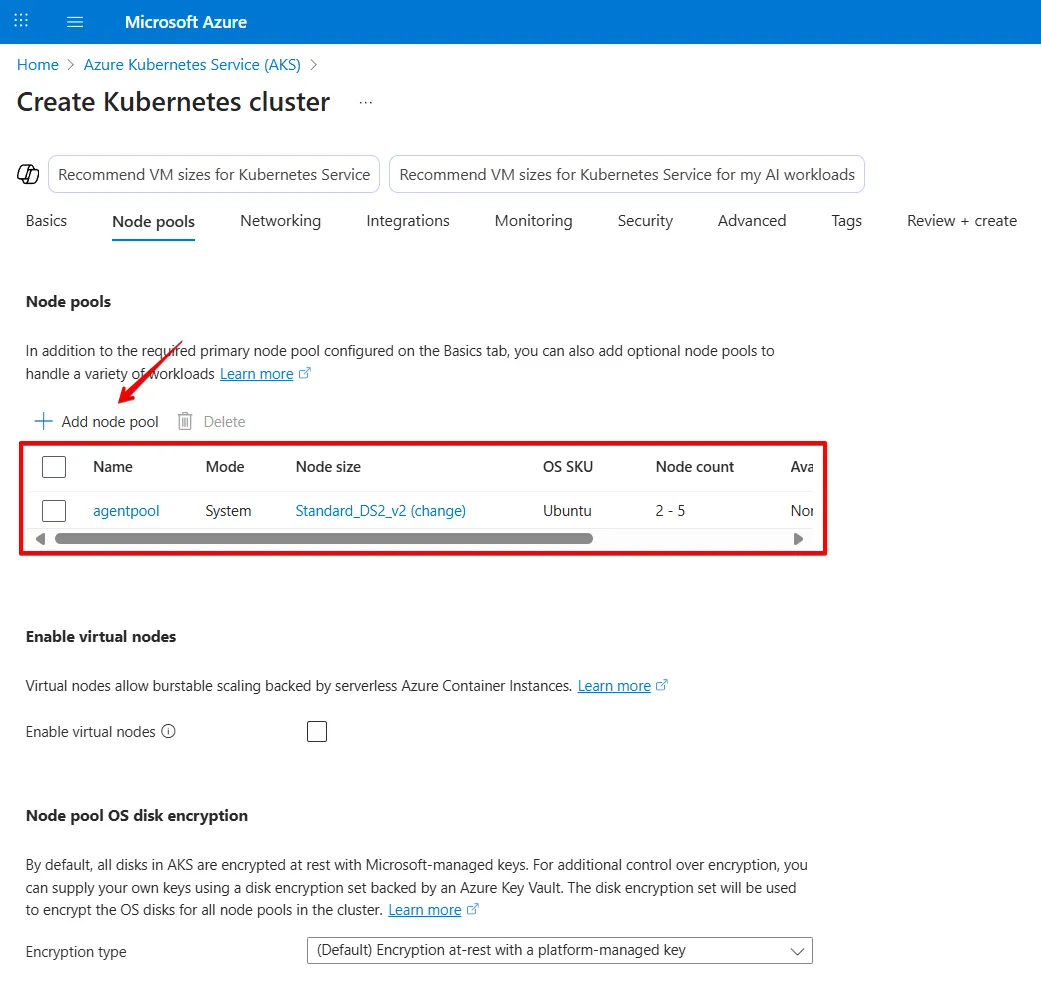
- In the Node Pools tab:
- Confirm that the agentpool node pool is created for you already.
- Make sure the node pool is using Ubuntu Linux and the minimum node count is 2.
- Optionally, create a custom node pool by clicking on Add node pool. Note: Pay attention to the maximum node count. The deployment will fail if this is set to 2 and the Max pods per node is set to 40 or below. In this case, the cluster would need an additional node (3) to distribute all the pods.
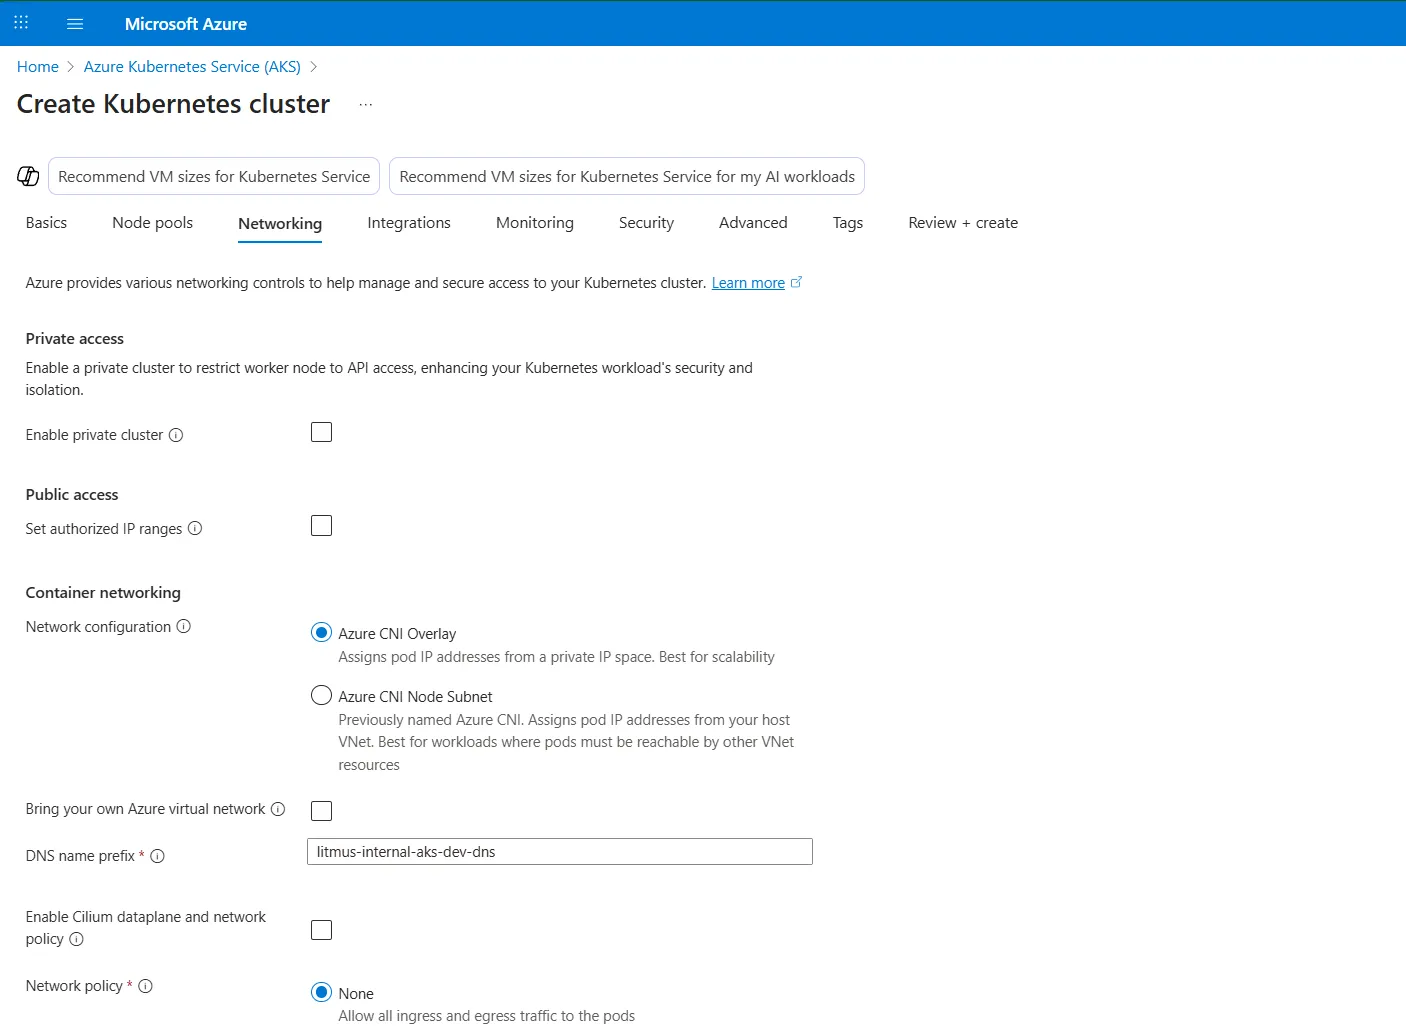
- Set the following in the Networking tab:
- Enable private cluster Leave this unselected.
- Set authorized IP ranges Leave this unselected.
- Network configuration Azure CNI Overlay.
- DNS name prefix Set your custom DNS name prefix.
- Network policy None or modify is needed.
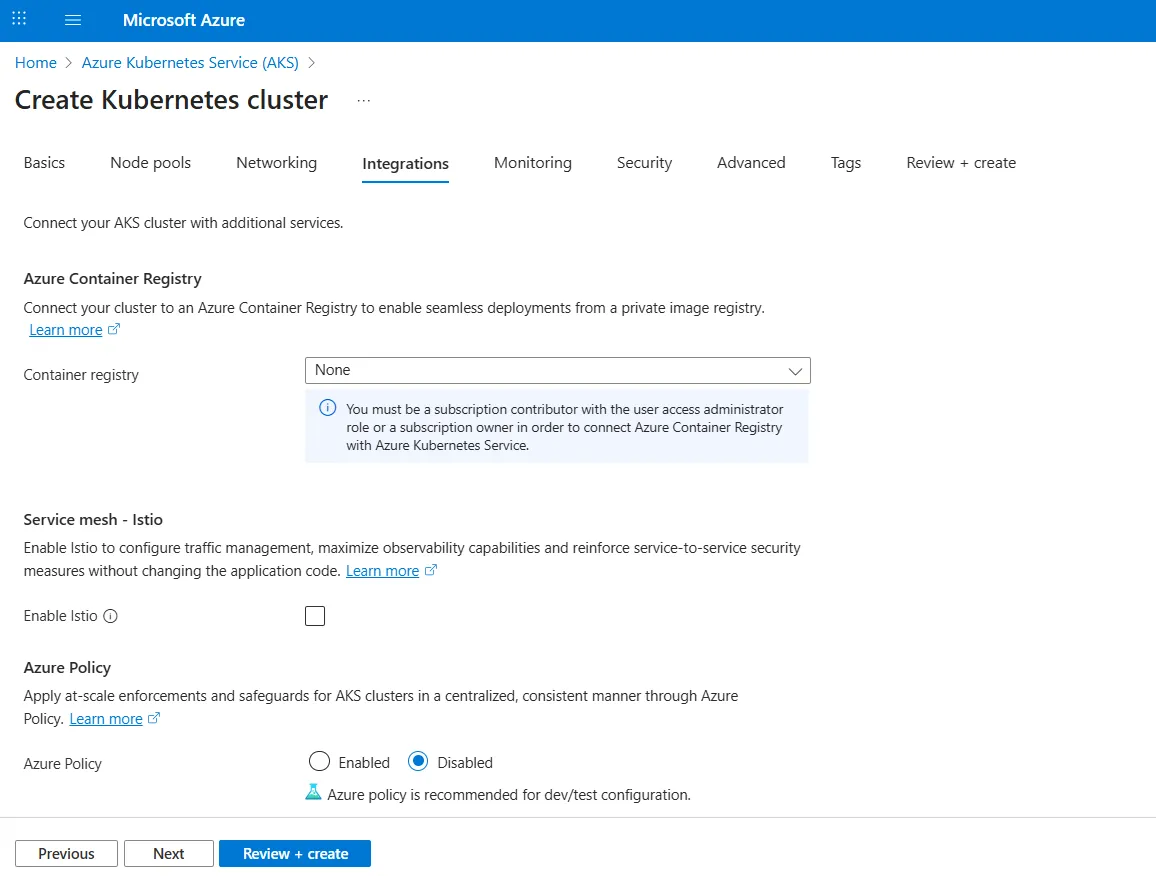
- In the Integrations tab, use the default values.
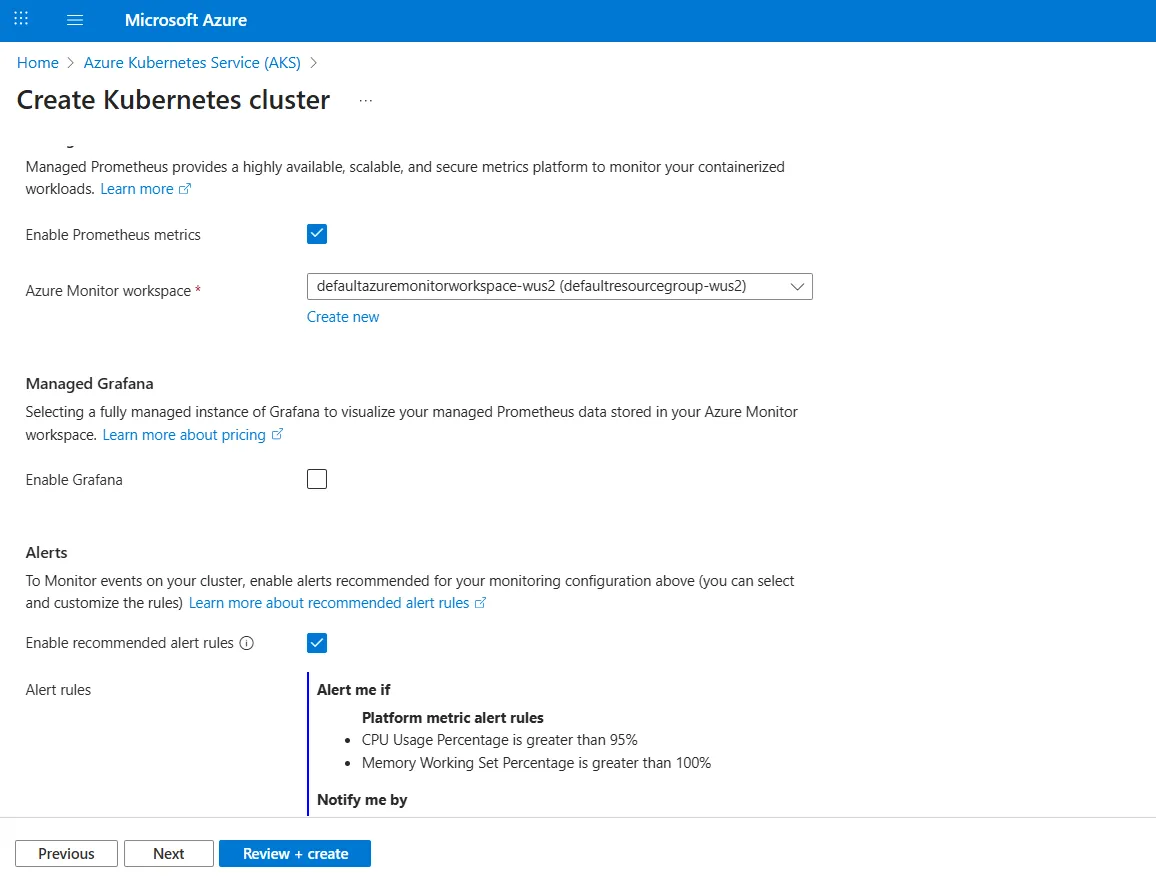
- In the Monitoring tab:
- Select Enable Prometheus metrics.
- Azure Monitor workspace Your workspace is already selected.
- Select Enable recommended alert rule.
- Alert rules Review details and confirm the email for alerts.
- Use the default values in the Security and Advanced tabs.
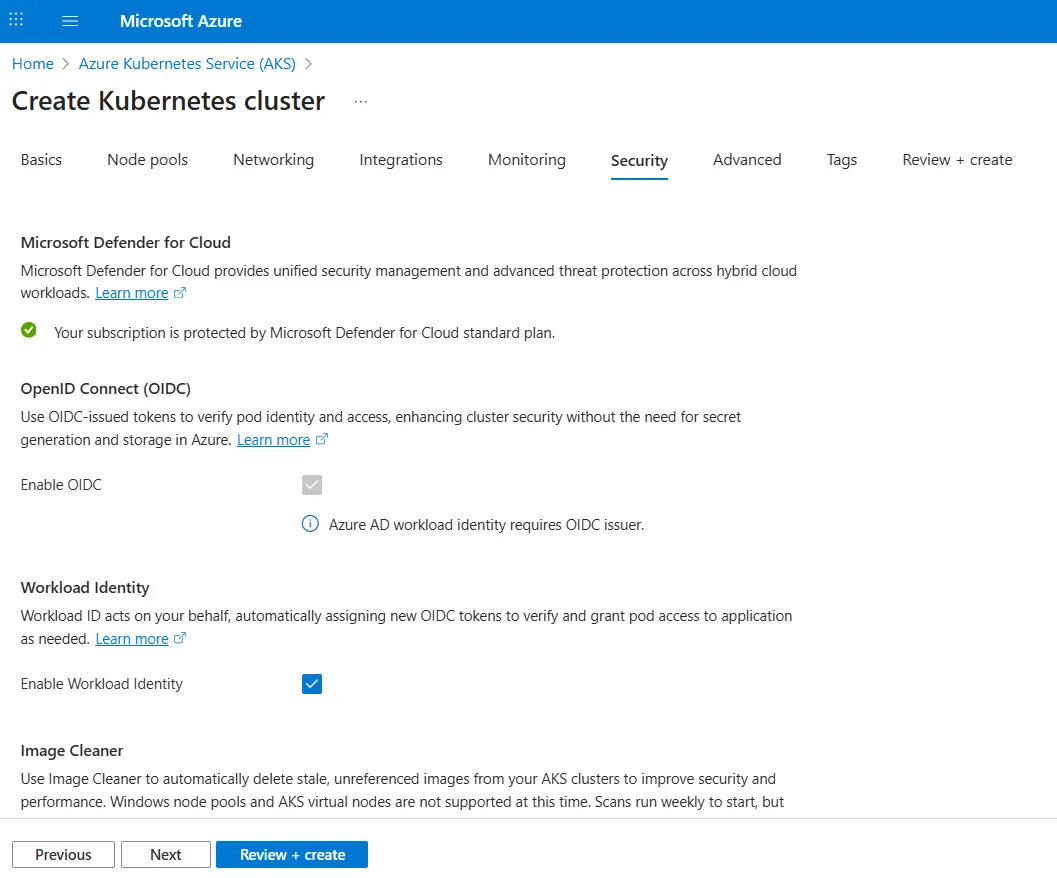
- In the Tags tab:
- Add your tags as desired.
- Add the tags to all resources.
- Click Review + create.
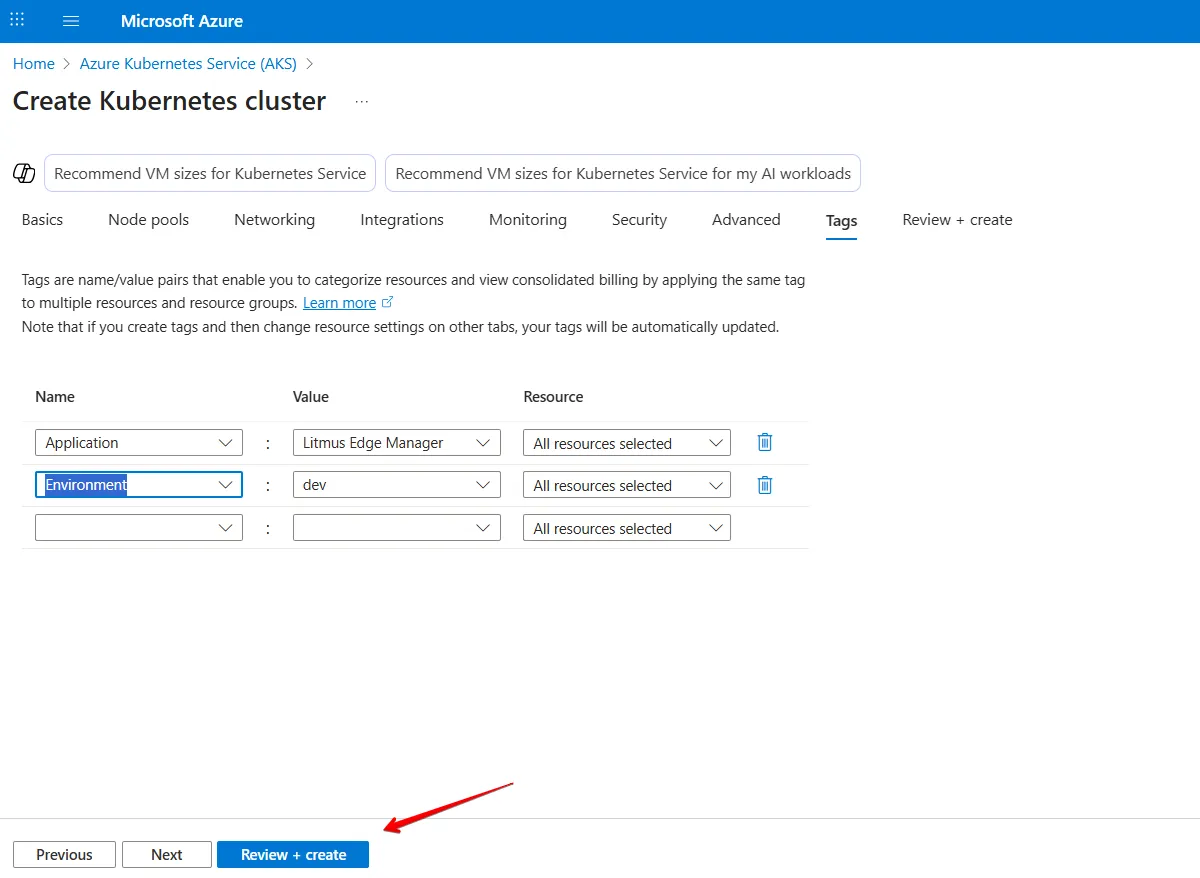
- In Review + create:
- Review your settings.
Note: Double-check the following minimum VM requirements:
- The nodes use Ubuntu Linux OS
- Architecture is AMD64
- VM: 8 CPU cores and 20 GB Memory
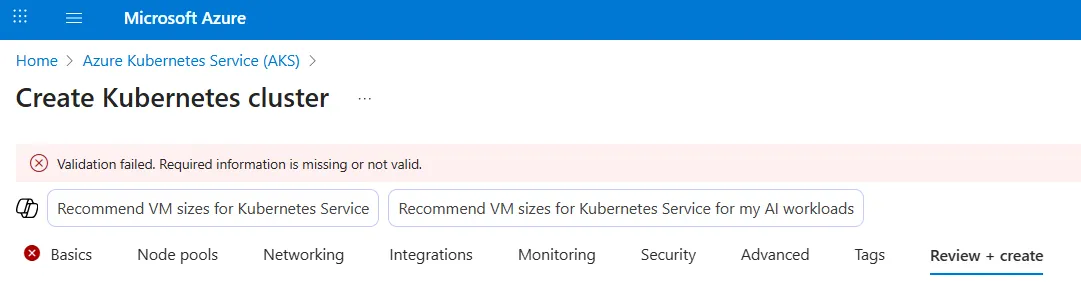
- Ensure that the validation passes.
Note: If you see Validation failed. Required information is missing or not valid. return to that tab and add or correct the required information.
- Click Create.
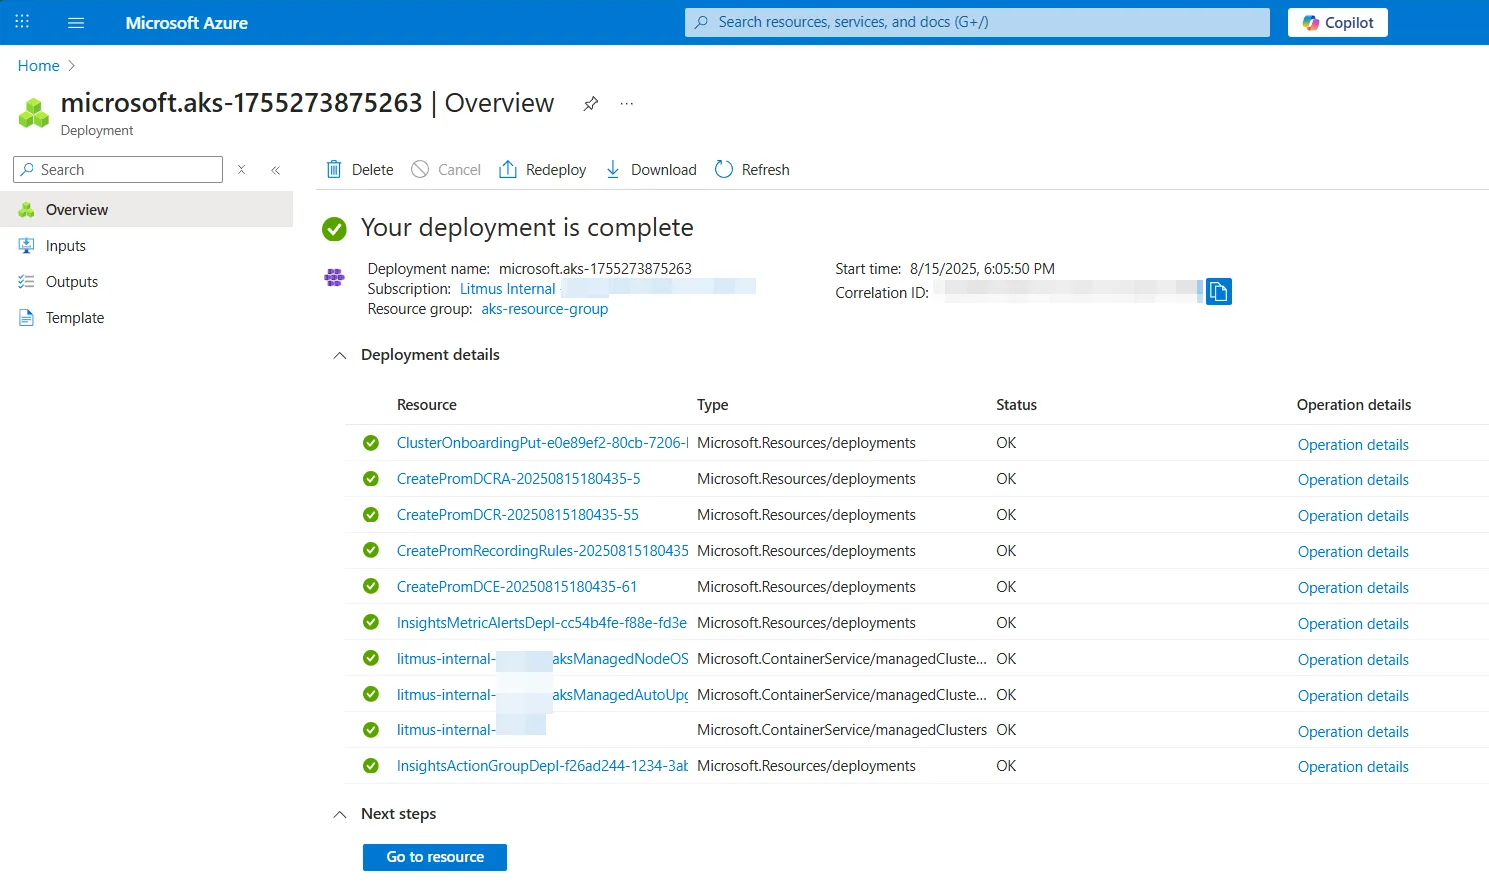
Note: Creating a cluster takes a few minutes depending on the settings you choose. Check the status or notifications for the latest information about your cluster.
Step 2: Connect to Your Cluster
Open your terminal and log in with Azure CLI.
- In the Terminal window, type in az login.
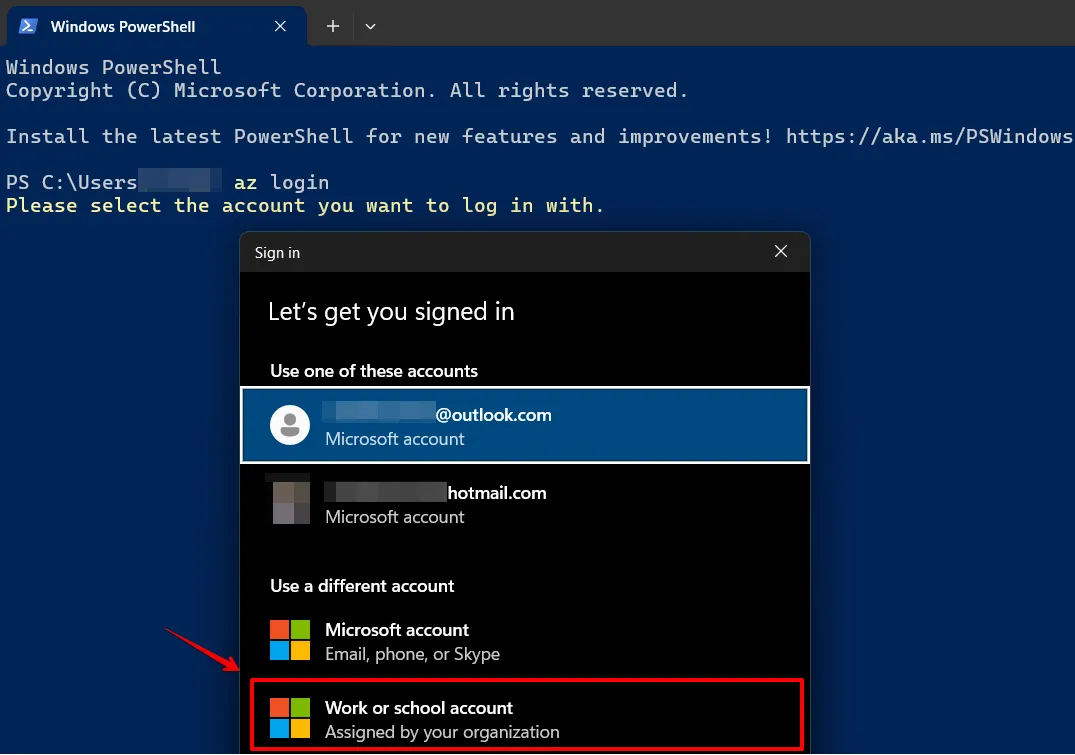
- In the Auth UI dialog, select the Microsoft Azure account that has access to the AKS service. Enter your credentials.
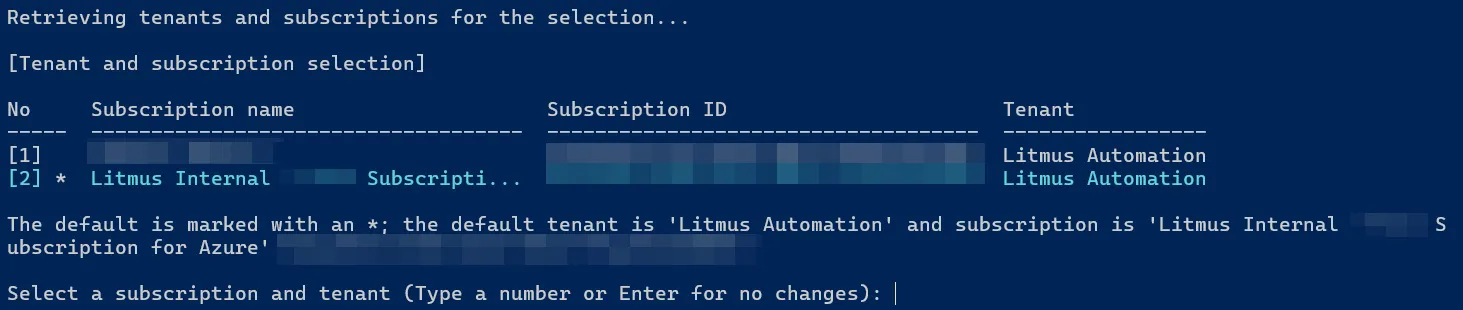
- In the Terminal window, select a subscription and tenant. Make sure you select the subscription where your AKS cluster is created.
Next, connect to your cluster.
- Open the Azure portal and navigate to Kubernetes services.
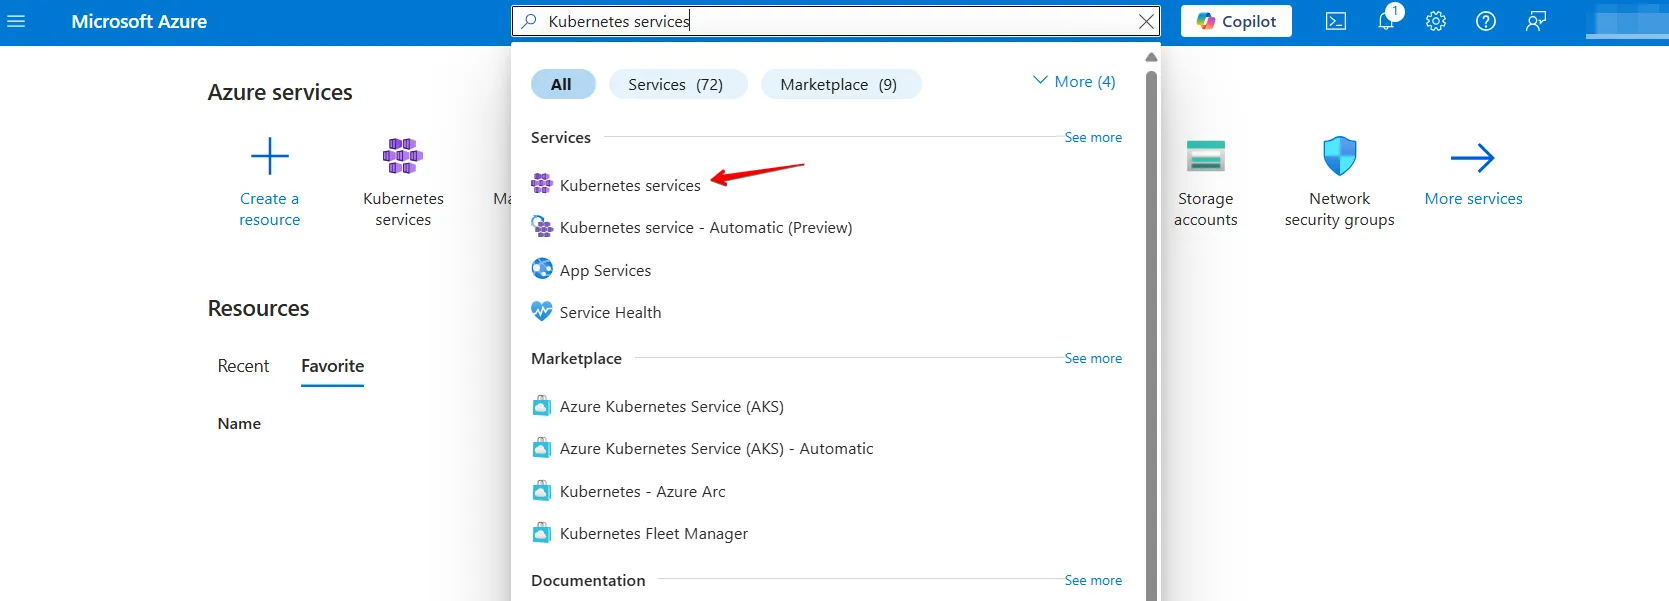
- In Kubernetes services, select your cluster.
- In the cluster page, click Connect.
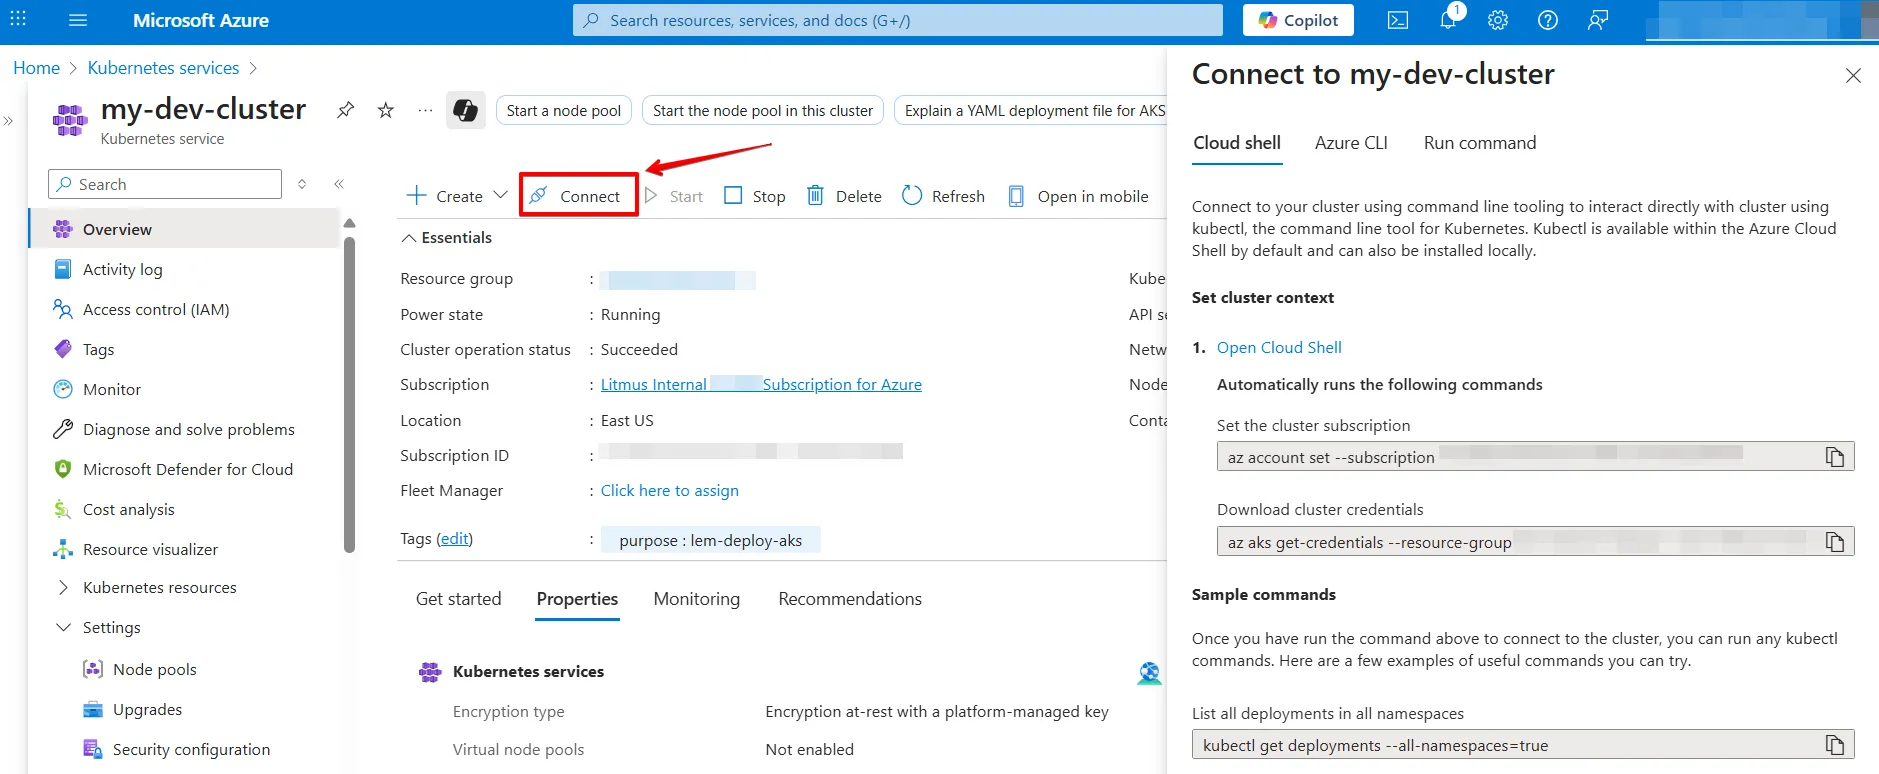
- In the Cloud shell tab, copy the second command:
az aks get-credentials --resource-group <my-resource-group> --name <my-dev-cluster> --overwrite-existing- In the Terminal window, paste the command with updated values for <my-resource-group> and <my-dev-cluster>.
- Submit the command.
You should see similar output in your terminal:
The cluster setup is now complete.
Step 3: Execute Kubectl and Helm Commands in your Terminal
In this section you create an lem namespace and pull secret, configure the load balancer and install Helm.
- Create an lem namespace.
kubectl create ns lem- Create a pull secret. Change the command accordingly based on the location of your pull key file on the local machine.
kubectl create secret docker-registry lem-helm-secret \
--docker-server=us-east1-docker.pkg.dev \
--docker-username=_json_key \
--docker-password="$(cat LEM_pull_Key_file.json)" -n lem
[email protected] -n lem- Next specify values to configure the load balancer, where:
- lem.platform: aks specifies the AKS annotation set.
- lem.loadbalancer.internal: true or false specifies whether the chart injects the AKS internal LB annotation.
- lem.loadbalancer.ip.frontend and .remote enable you to assign static IPs for the two LB services (nginx + remote).
# values-aks.yaml
lem:
  platform: aks
  loadbalancer:
    internal: false        # set true for internal/private LB
    ip:
      frontend: ""         # optional: reserved static IP for nginx LB
remote: "" # optional: reserved static IP for UDP 51820 LB- Install Litmus Edge Manager using the following command, where <lemversion> is the LEM version that you are installing, for example --version 2.31.0
helm install lem oci://us-east1-docker.pkg.dev/litmus-public/lem-chart-ga/lem \
  --version <lem_version> \
  -n lem \
  -f values-aks.yaml
Note:
- The command initiates the pull of the required container images. This process may take several minutes.
- Make sure the secret name is lem-helm-secret and that you don’t override it with --set "imagePullSecrets[0].name.
- After the deployment is completed, wait approximately five minutes before applying the Litmus Edge Manager (LEM) URLs and credentials.
- Instructions for accessing these URLs and credentials print for you in the console.
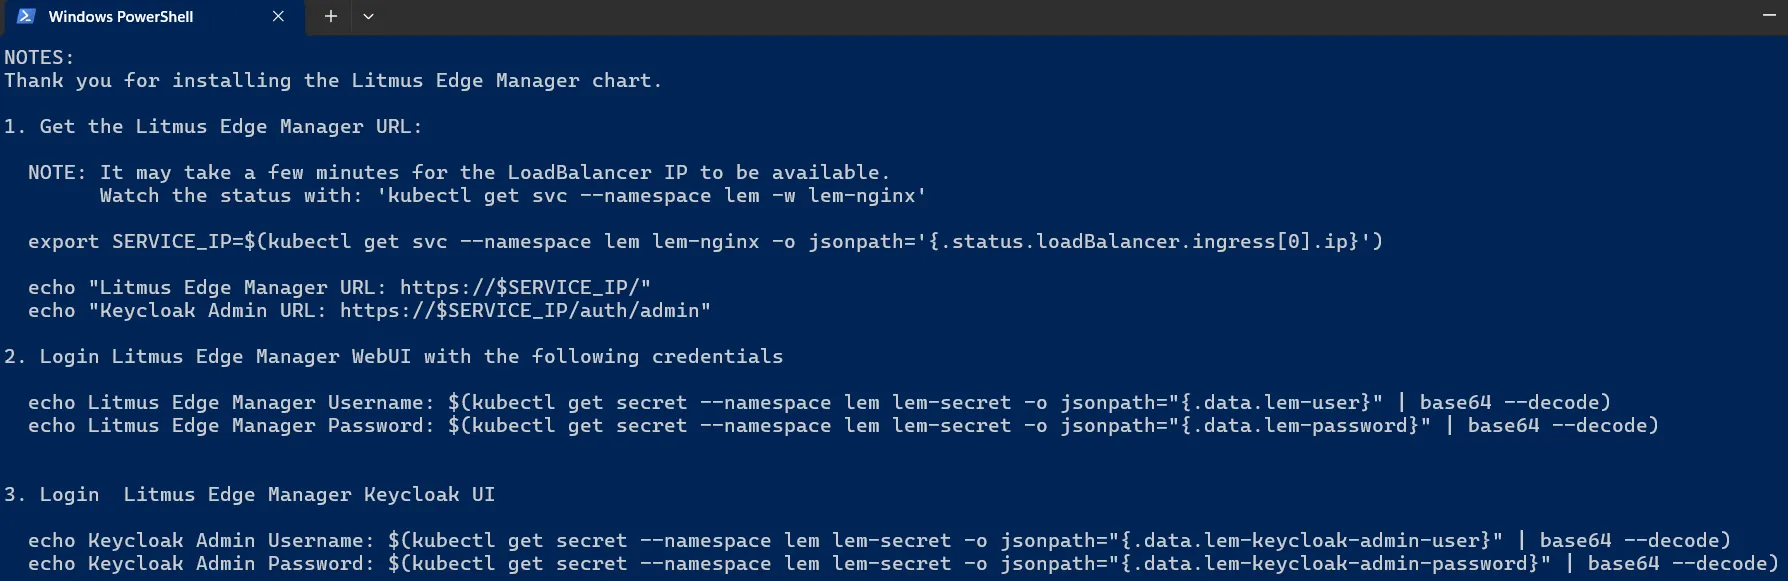
To get URLs and credentials for Litmus Edge Manager:
- In case you need URLs and credentials after the deployment, execute the following:
helm get notes lem -n lem- To get Litmus Edge Manager's external IP, run the following, where <release_name>-nginx is your service name:
kubectl get svc lem-nginx -o jsonpath='{.status.loadBalancer.ingress[0].ip}' -n lem- To get the LEM username and password, run:
# username
kubectl get secret --namespace lem lem-secret -o jsonpath="{.data.lem-user}" | base64 --decode

# password
kubectl get secret --namespace lem lem-secret -o jsonpath="{.data.lem-password}" | base64 --decode
Step 4: Upgrading the Helm Chart
If you are upgrading Litmus Edge Manager to a new version, first upgrade the Helm chart.
- Before the upgrade, scale down Prometheus:
kubectl -n lem scale deployment lem-prometheus-server --replicas=0- If upgrading from a version before 2.31.1, delete EMQX resources:
kubectl -n lem delete statefulset lem-emqx
kubectl -n lem delete configmap lem-emqx-acl
kubectl -n lem delete configmap lem-emqx-env
kubectl -n lem delete configmap lem-emqx-loaded-modules
kubectl -n lem delete configmap lem-emqx-loaded-plugins
kubectl -n lem delete service lem-emqx
kubectl -n lem delete service lem-emqx-headless- Run the Helm upgrade. Use the actual chart version instead of the <LEM_VERSION> placeholder.
helm upgrade lem oci://us-east1-docker.pkg.dev/litmus-public/lem-chart-ga/lem --version <LEM_VERSION> --namespace lem- After the upgrade, scale Prometheus back up:
Step 5: Access the Litmus Edge Manager UI using the obtained IP address
See Access Litmus Edge Manager for details.
Note: Get the Site License key from your Litmus account executive to activate your license.
Litmus Edge Manager is now deployed and operational on your AKS cluster. You can now access the manager’s UI using the external IP address and perform any additional configuration through the admin console, such as license activation.