ISO Installation on an Industrial PC (IPC)
You can install Litmus Edge with a physical gateway from a USB.
Important: The data storage visualization technology RAID (redundant array of inexpensive disks) is not supported when installing Litmus Edge on an industrial PC.
Before You Begin
- Make sure you have a basic knowledge of BIOS and selecting bootable media.
- Adjust the system clock using the BIOS prior to installing Litmus Edge. UTC is recommended. The 15-day trial period may be rejected and invalidated by the license server if the system clock is not adjusted. If this happens, contact your Litmus representative.
- Adjust the Boot Mode setting to UEFI using the BIOS prior to installing.
- Obtain a valid file in the ISO format (example filename: <litmusedge-std_3.1.5.0-amd64>.iso). You can get the ISO file from Litmus or download it from the Litmus Central portal.
- Make sure you have more than 16GB disk space to run 3.x images on a Bare Metal server.
To use a physical gateway to install Litmus Edge, you will need to do the following:
- Step 1: Download ISO File
- Step 2: Create a Bootable USB Flash Drive
- Step 3: Install On a Device
- Step 4: Log in to Litmus Edge
Step 1: Download ISO File
Download the Litmus Edge ISO file from the Litmus Central portal.
Step 2: Create a Bootable USB Flash Drive
You will need to create a bootable USB flash drive and then load the ISO file onto the flash drive.
Important
- The boot mode should be UEFI.
- If you are using balenaEtcher, you must skip the validation step while creating the flash drive. Otherwise, Litmus Edge won't install successfully.
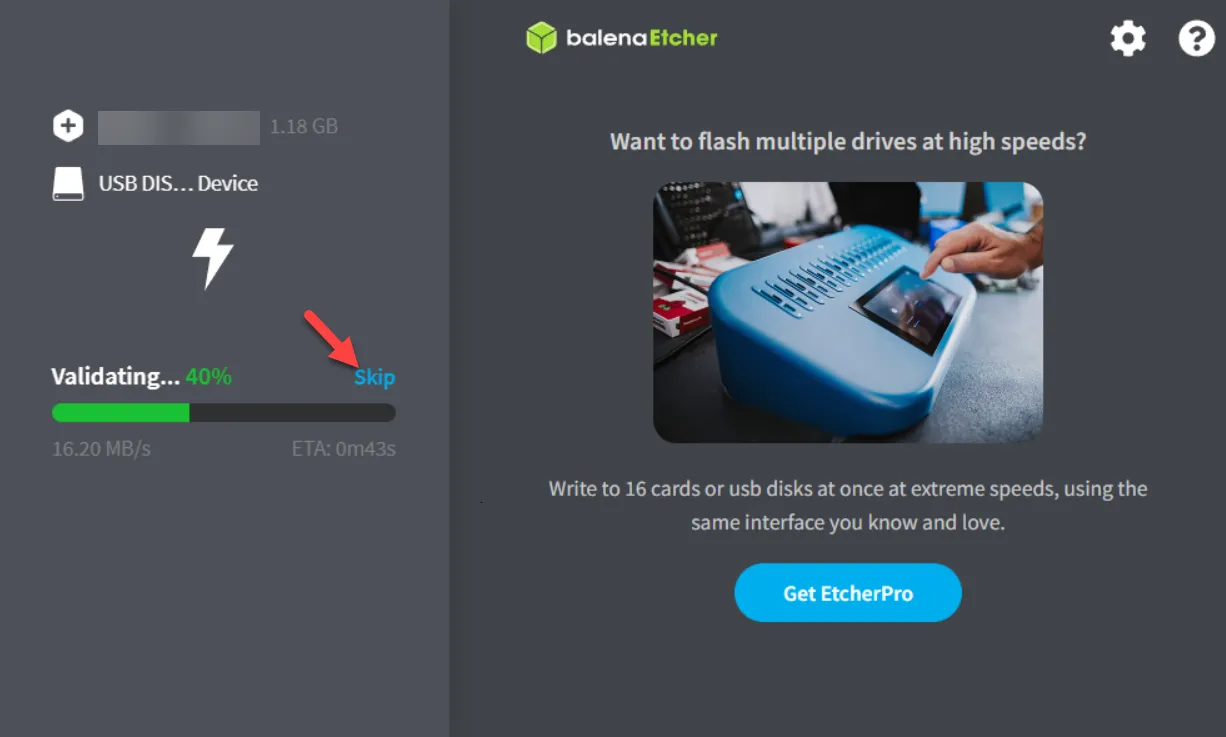
After preparing the USB drive, choose the instructions that are relevant for the device for which you are installing Litmus Edge.
Step 3: Install on a Device
There are two methods to installing Litmus Edge on a device:
- Install on a Device with Graphic Capability
- Install on a Device with No Graphic Capability (Headless Installer)
Select the method relevant for your device.
These instructions are applicable for VGA devices that can render the graphics displayed in the installer.
Notes:
- During the installation, the progress bar may decrease at times due to partitioning.
- The time to complete the installation is based on the size of the hard disk drive. Large disk drives will cause the installation to take longer to partition the disk and therefore longer to complete setting up the virtual machine.
Install on a Device with Graphic Capability
Complete these steps to install from a USB flash drive.
To install on a device with graphic capability:
- Insert the USB flash drive (USB installation media) that contains the Litmus Edge Installer image into the USB port on the gateway device. To execute the installer, the gateway device must boot from the USB flash drive.
- Perform one of the following:
- Start the gateway device.
- Reboot the gateway device from the USB flash drive to begin the installation. If the gateway device is not booting from the USB drive, bring up a list of boot devices. Each manufacturer has a specific button which must be pressed immediately after the device has been turned on or rebooted. The button is briefly displayed when the device boots after or while the logo is displayed. Common buttons are F12, the Windows key, and F9. Refer to your IPC manufacturer for more information.
- After the device initiates the installer, respond to the questions in the terminal user interface (TUI). Welcome to Operating System Installer. Are you installing over Serial (for advanced users)? Yes/No :
- Enter No, and then press Enter.
Select Install Operating System, and then select OK. Use the arrow keys to navigate to selections.
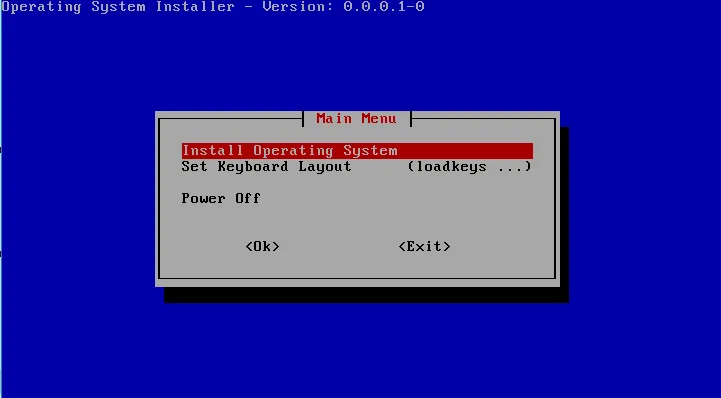 Install Operating System option
Select the partition to install, and then select Ok. The list is device-specific. Typically, the installation location is sda. If the device/gateway has embedded MMC (eMMC) components, the partition name may be listed as mmcblk instead of sda. Make sure you select the correct hard-drive location.
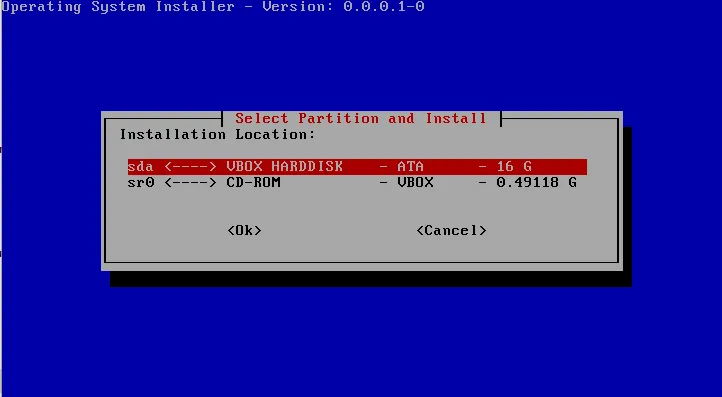 Select Partition and Install option
Verify the OS installation location by selecting Yes. If you select No, you are returned to the beginning of the installation.
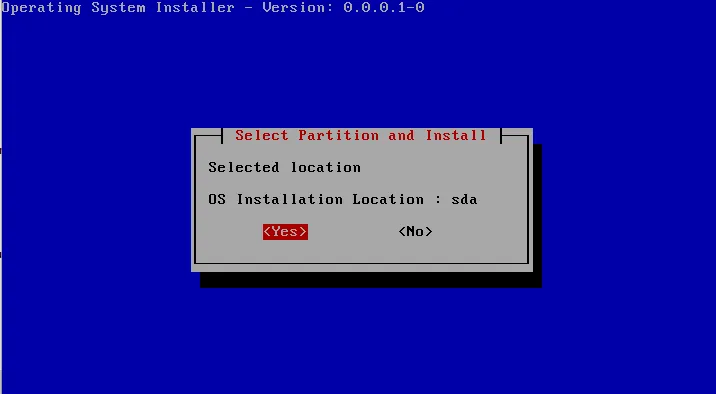 Select Partition and Install message
A second verification ensures that you are overwriting the correct device partition during the formatting process. Select Yes to continue formatting the device and installing the operating system. The installer indicates its progress, followed by a success message.
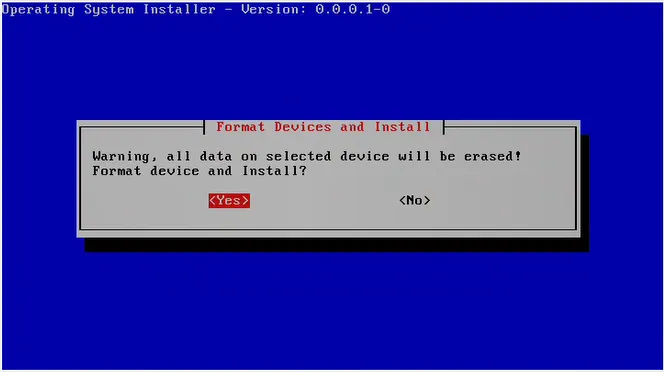 Format Devices and Install message
Power off the device and remove the USB drive (installation media).
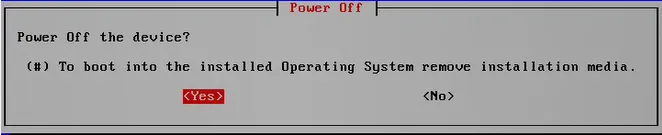 Power off message
- Reboot the gateway device.
The terminal window displays the URL that must be used to access the device using the Web UI.
Note: If several URLs are displayed, the first one is used for accessing the device through the Web UI.
You can now jump to "Step 3: Log in to Litmus Edge".
Install on a Device with No Graphic Rendering Capabilities (Headless Installer)
Complete these steps to install from a serial device.
To install on a device with no graphic rendering capabilities:
- Insert the USB flash drive (USB installation media) that contains the Litmus Edge Installer image into the USB port on the gateway device. To execute the installer, the gateway device must boot from the USB flash drive.
- Perform one of the following:
- Start the gateway device.
- Reboot the gateway device from the USB flash drive to begin the installation. If the gateway device is not booting from the USB drive, bring up a list of boot devices. Each manufacturer has a specific button that must be pressed immediately after the device has been turned on or rebooted. The button is briefly displayed when the device boots after or while the logo is displayed. Common buttons are F12, the Windows key, and F9. Refer to your IPC manufacturer for more information.
- After the device initiates the installer, respond to the questions in the terminal user interface (TUI). Welcome to Operating System Installer. Are you installing over Serial (for advanced users)? Yes/No :
- Enter Yes to continue with a text-only interface, and then press Enter. A list of partitions are displayed. This list is specific to the device.
Enter the partition name. In this example, sda. If the device/gateway has embedded MMC (eMMC) components, the partition name may be listed as mmcblk instead of sda. Make sure you select the correct hard drive location. You must type the name of the device. If you press Enter without typing the name, the installation fails.
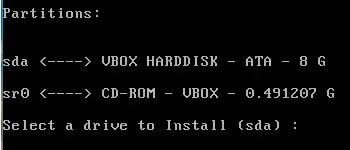 partition name prompt
Confirm the installation and format partitions, enter Yes, and then press Enter. The installer displays the installation status, followed by a success message.
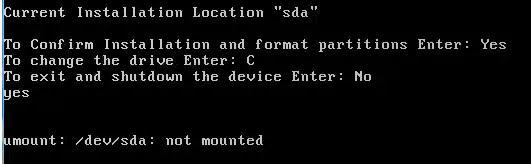 Confirmation message
- Remove the USB flash drive.
- Reboot the gateway device.
The terminal window displays the URL that must be used to access the device using the Web UI. If several URLs are displayed, use the first one.
Step 4: Log in to Litmus Edge
- See Access the Terminal User Interface for instructions on how to navigate and log in for the first time.