VirtualBox OVA
You can use Oracle VirtualBox to install Litmus Edge using an OVA file.
- Prepare your environment for running virtualization by using Oracle VirtualBox.
- The virtual machine will run on the same physical network card as the host environment. To ensure that the device can communicate with data sources such as PLC, DCS or CNC and can be accessed through the Web UI, make sure that communication can be established.
- Adjust the system clock for the host environment prior to installing Litmus Edge. UTC is recommended. The 15-day trial period may be rejected and invalidated by the license server if the system clock is not adjusted. If this happens, contact your Litmus representative.
- Obtain a valid file in the OVA (Open Virtualization Alliance) format (example filename: <litmusedge-std_3.1.5.0-amd64>.ova).
To use Oracle VirtualBox to install Litmus Edge using an OVA file, you will need to do the following.
- Step 1: Create a Virtual Machine
- Step 2: Enable EFI
- Step 3: Configure Network Adapters
- Step 4: Log in to Litmus Edge
To jump to a specific section, refer to the Table of Contents on the right side and click the corresponding step.
You will first need to create the virtual machine that will run Litmus Edge.
To create the virtual machine:
- Start the Oracle VirtualBox application.
- From the File menu, select the Import Appliance option. The Appliance to import dialog box appears.
- Click the Browse icon, navigate to the desired .ova file, click Open, and then click Next. The Appliance settings dialog box appears.
- (Optional) From the Appliance settings dialog box, modify the default settings:
- The name of the virtual machine.
- The number of CPU cores assigned to the virtual machine.
- The amount of RAM assigned to the virtual machine.
- The base folder where the configuration for this virtual machine is stored by Oracle VirtualBox.
- Click Import.
The virtual machine is created along with the Litmus Edge operating system.
The deployed virtual machine appears in the left pane of the Oracle VirtualBox application.
After you create the virtual machine, you must configure the network adapters.
See VirtualBox only Showing 32-bit and no 64-bit Versions if you only see a 32-bit version when installing VirtualBox.
After installing the virtual machine, you must enable the EFI option for VirtualBox deployment.
To enable EFI:
- From the open Oracle VirtualBox application, select the deployed virtual machine from the left pane, and then click the Settings icon in the right pane. The Settings dialog box appears.
- Click System in the left pane. The System dialog box appears.
- From the Motherboard tab, select the Enable EFI (special OSes only) check box from Extended Features.
- Click OK.
You will now need to configure the network adapters for the VM.
To configure the network adapters:
- From the open Oracle VirtualBox application, select the deployed virtual machine from the left pane, and then click the Settings icon in the right pane. The Settings dialog box appears.
- Click Network in the left pane. The Network dialog box appears.
- Click the Adapter 1 tab, and do the following:
- Make sure the Enable Network Adapter check box is selected.
- From the Attached to drop-down list, select Bridged Adapter.
- From the Name drop-down list, select the appropriate network card name, and then click OK.
- From the Oracle VirtualBox application, click Start.
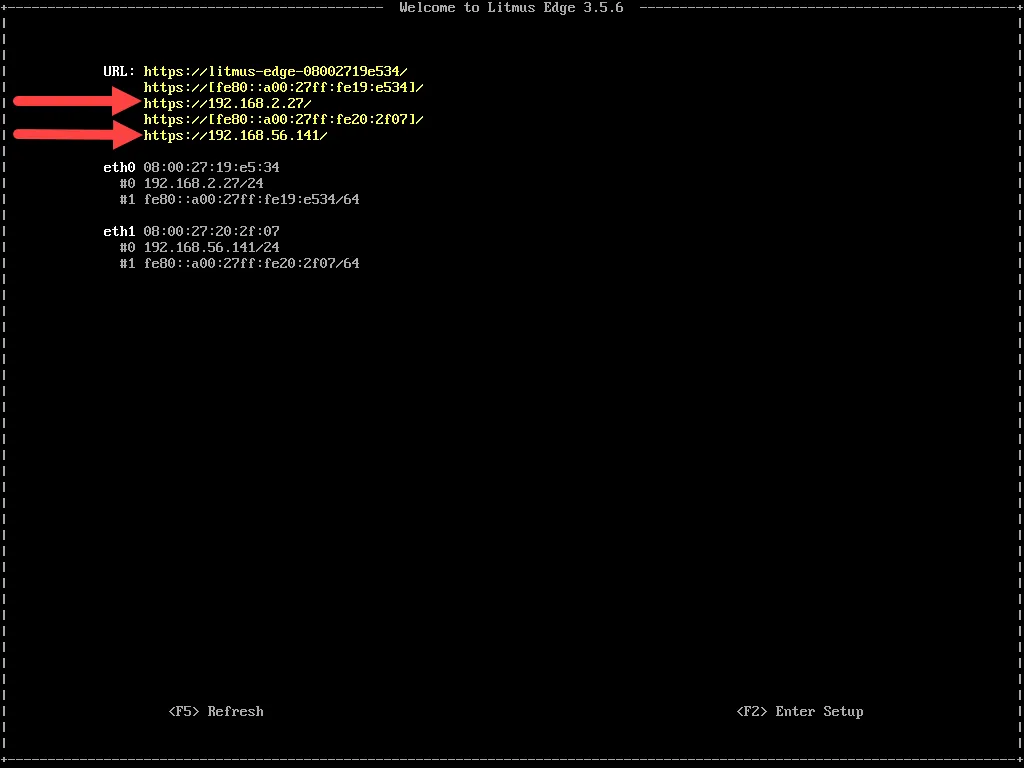
The VM starts up and the terminal window displays the URLs to be used to access the edge device through the Web UI. If several URLs are shown, use the first one.

- See Access the Terminal User Interface for instructions on how to navigate and log in for the first time.
If you don't see an option for a 64-bit version and only see a 32-bit version, refer to VirtualBox only Showing 32-bit and no 64-bit Versions.