Use the OPC UA Client Advanced driver for OPC UA Alarms & Events
Note: This feature is available from Litmus Edge 3.16.2 release.
You can use the OPC UA Client Advanced driver in Litmus Edge to browse, integrate, and manage OPC UA Alarms & Events (A&E).
These events are imported as tags within your device configuration and can be customized to include specific event properties. This includes attributes such as EventType, Message, Severity, ReceiveTime, EventId, SourceName, SourceNode, and more.
Before You Start
Make sure you meet the following prerequisites before configuring your device:
- A stable network connection between your Litmus Edge device and the OPC UA server to send alarms and events data.
- Your OPC UA login details, including authentication tokens or certificates.
Use the OPC UA Client Advanced for OPC UA Alarms & Events
Follow the steps below to add an OPC UA Client Advanced device, browse event tags, and view the event data using the Analytics DataHub Subscribe function node.
Step 1: Add OPC UA Client Advanced Device to DeviceHub
- In Litmus Edge, navigate to DeviceHub > Devices.
Click the Connect a Device box. The Connect Device dialog box appears.
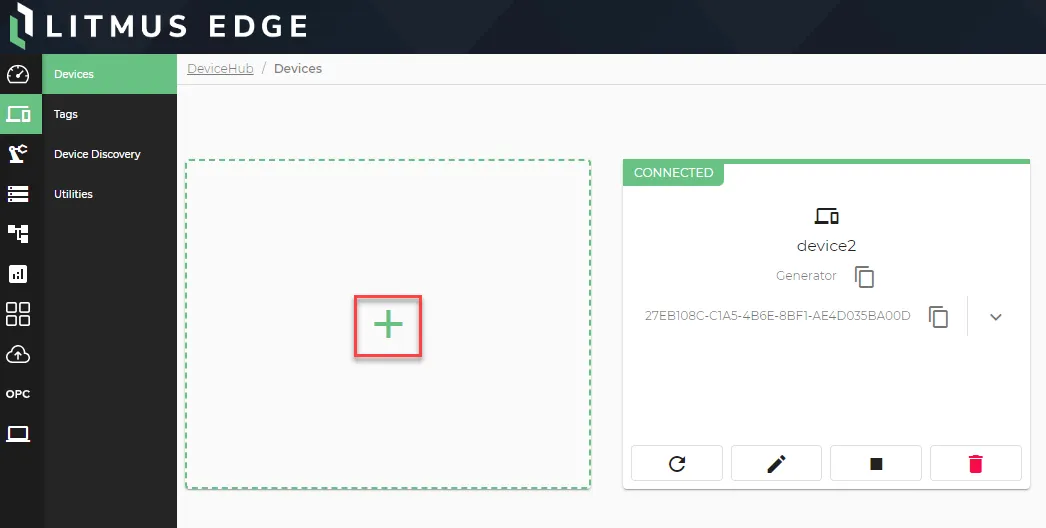 Connect a Device box
- In the Driver Name drop-down list, select OPC UA > OPC UA Client Advanced.
- Configure the parameters for the device. See Connect a Device and OPC UA or OPC UA Client Advanced to learn more.
Step 2: Set Up the OPC UA Client Advanced Browse Tags
- In DeviceHub, click on the OPC UA Client Advanced device you just added.
- Navigate to Tags section and click the Add Tag (+) icon.
Select Browse Tags to open the Browse Parameters dialog box.
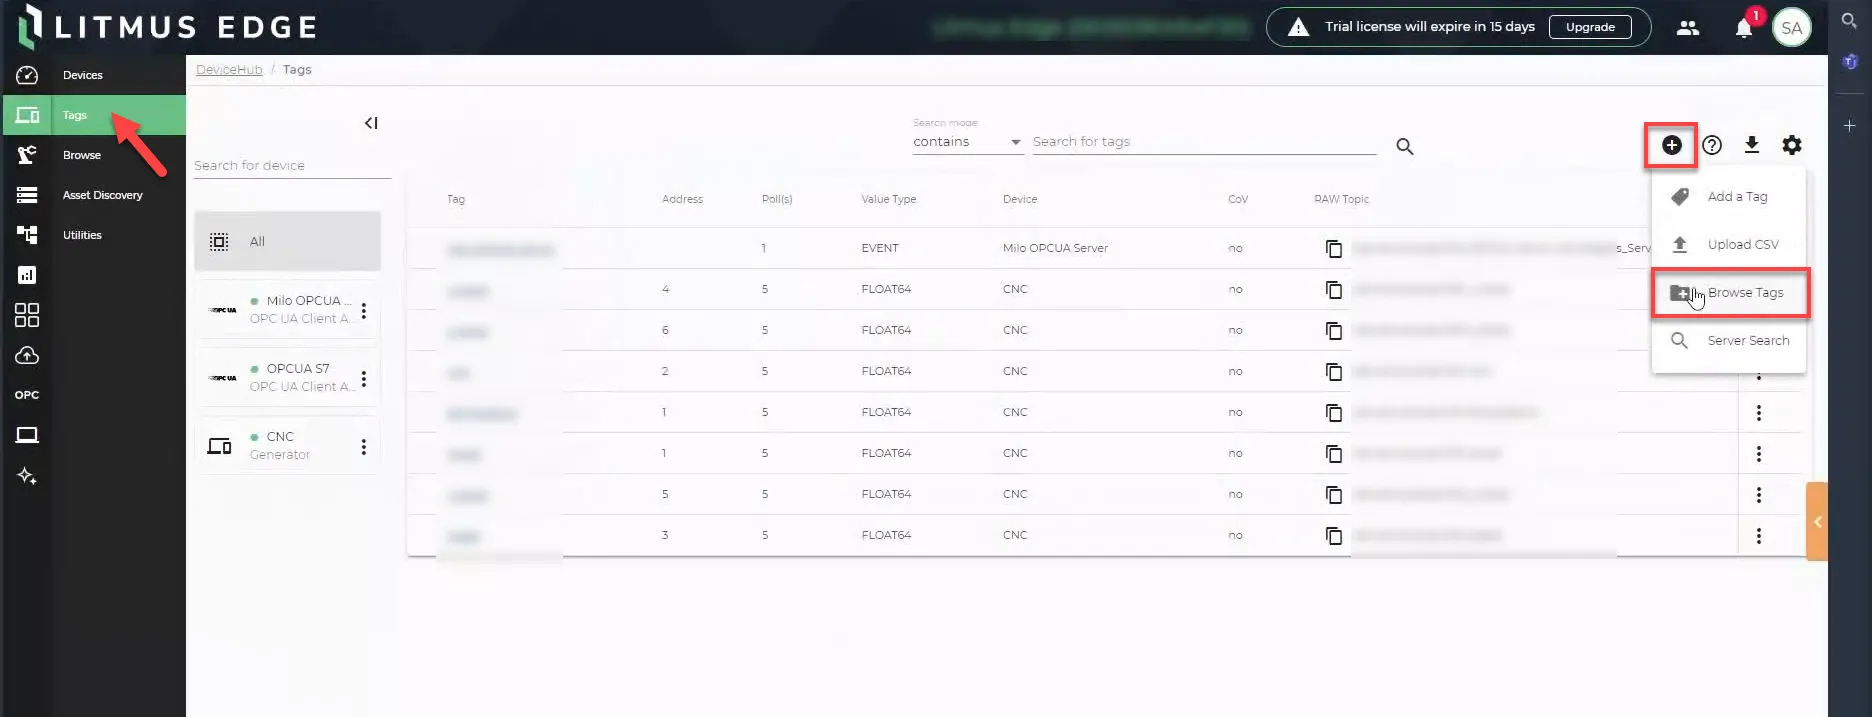 Tags section
- Choose between two options for Browse Mode:
- Data Access: For accessing real-time data variables.
- Events: To monitor alarms and conditions. For this guide, select Events.
Click Apply parameters to open the OPC UA server’s tag tree for exploration.
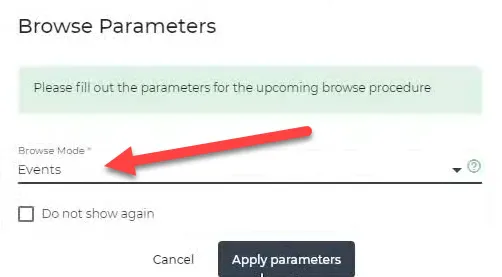 Browse Parameters dialog box
- Expand the tag tree to find the events you want to track (e.g., Alarms & Conditions).
Select the desired alarms/events from the tree structure and click Add to include them as tags.
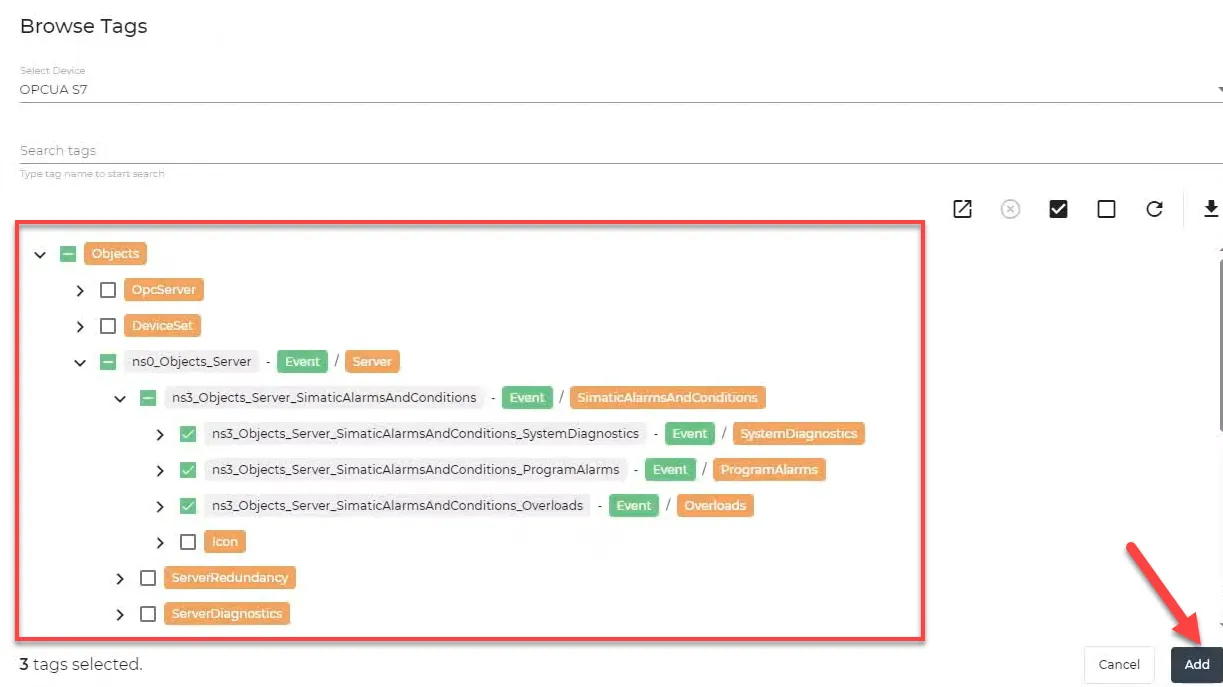
Important Note
Understanding the significance of the Namespace Index values linked to Event Properties is crucial when adding an OPC UA A&E tag in Litmus Edge. The Namespace Index is mandatory for the unique identification of the event property within the OPC UA server's address space. Every OPC UA event property is distinctly identified by both its Name and Namespace Index.
Finding the Namespace Index
To determine the correct Namespace Index for a specific event property beyond the default set, you may need to use an OPC UA client tool, such as UaExpert, to inspect the details of the events available from your OPC UA server. These tools typically display the Namespace Index associated with each property.
When you select an OPC UA A&E tag, a standard set of event properties (such as EventId, EventType, SourceNode, SourceName, and Time) will be added by default to the tag configuration. These are defined by the OPC UA A&E specification.
Namespace Index Ordering Behavior
For nested and non-nested OPC UA event properties, the order of Namespace Index values affects Litmus Edge's responses. See Manage Tags for more details.
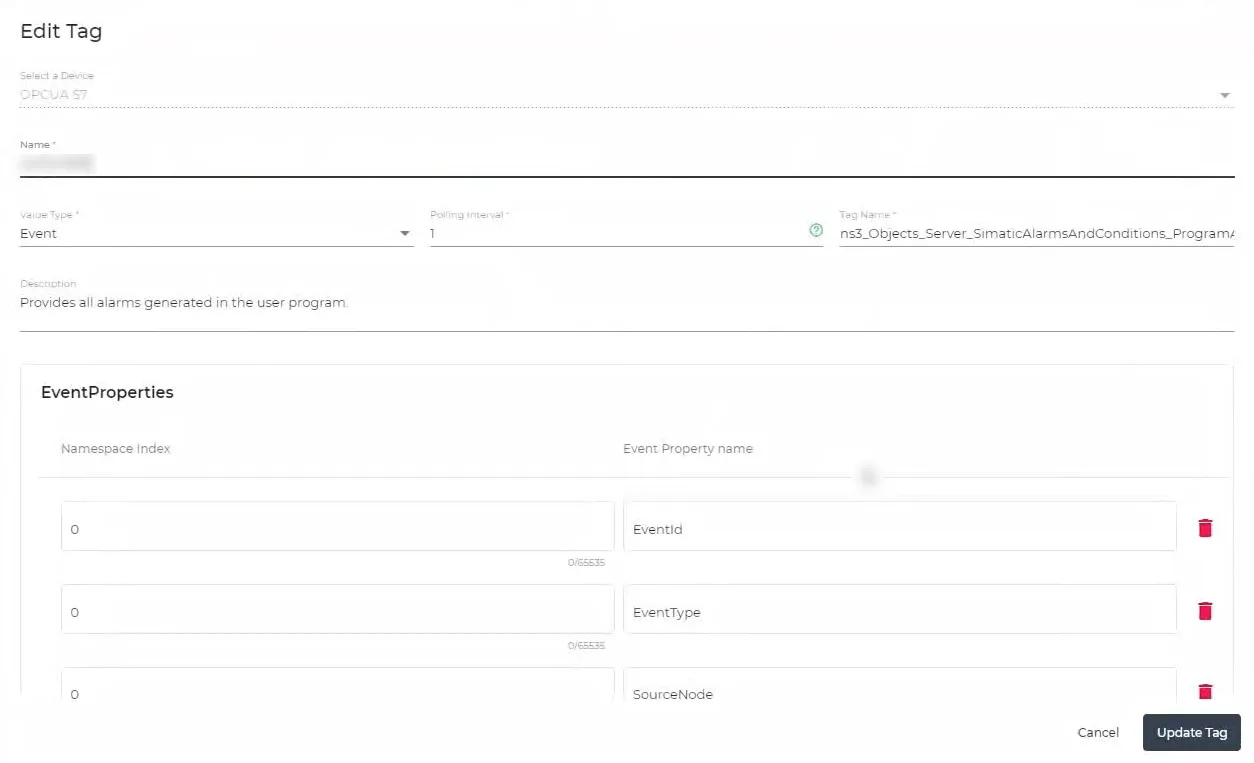
Step 3: Modify Event Properties in Edit Tag Dialog Box
To add or customize event properties beyond this default set, click the Add Item button within the Edit Tag dialog box.
This will allow you to enter the Namespace Index and the Event Property name of the additional property you wish to include in the tag's payload.
Key Points:
- Enter the correct Namespace Index value obtained from your OPC UA server information (potentially via a tool like UaExpert), and the precise name of the event property. Incorrect values will lead to incorrect or missing data.
- The OPC UA A&E model defines a hierarchy of event types and their properties. Litmus Edge offers a standard set of commonly used properties, but not all OPC UA specification or custom extension event properties are shown in the Edit Tag view initially. This design prioritizes relevant information.
- However, using the Add Item function and specifying the Namespace Index and Event Property name allows you to access and include additional properties in your data.
- While adding the nested and non-nested event properties, the ascending Namespace Index ordering is important as an incorrect sequence may lead to unresolved or missing nested data.
To add a custom event property:
- To add a custom event property which, upon inspection in your OPC UA client tool, has a Namespace Index of 1.
- In the Edit Tag dialog box, click the Add Item button.
- In the Namespace Index field, enter 1.
- In the Event Property name field, enter a suitable name.
- Click Update Tag to save your changes.
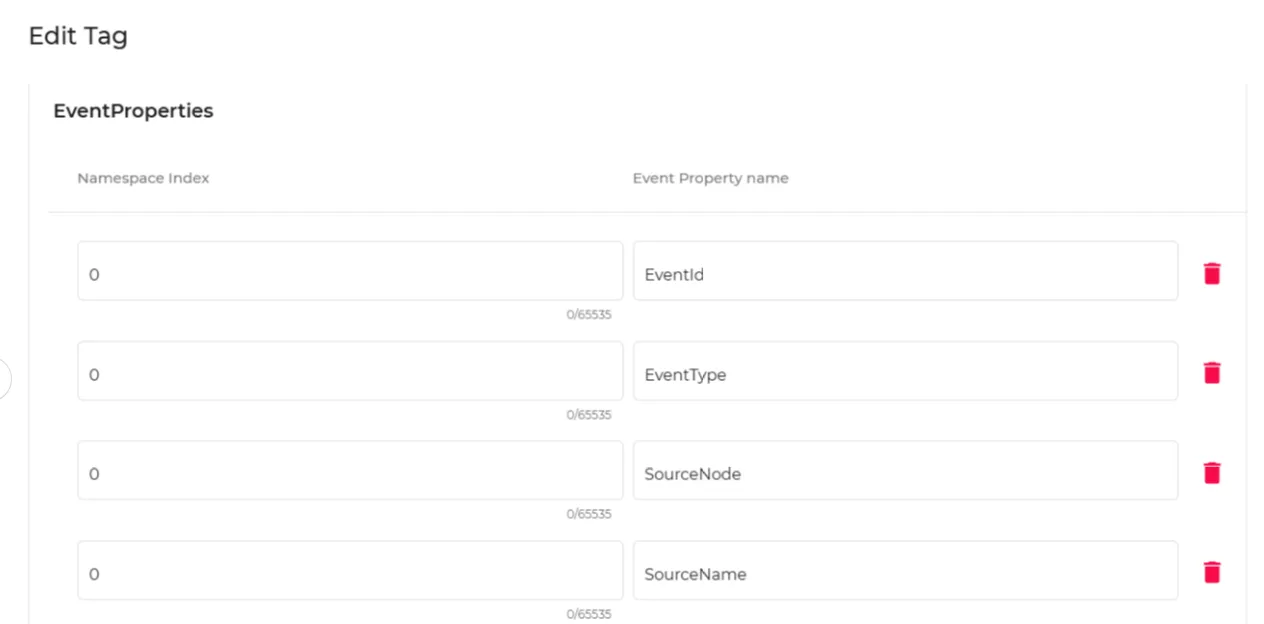
Step 4: Enable the Connector
After adding the connector, click the Start icon in the connector tile to enable it.
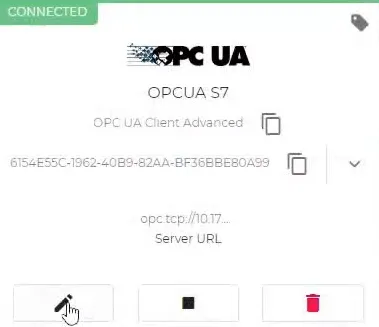
If you see a Failed status, you can review the Connector Logs and relevant error messages.
Step 4: Copy the Raw Topic
- Click the OPC UA Client Advanced connector tile.
Navigate to Tags section and click the OPC UA device in the side menu.
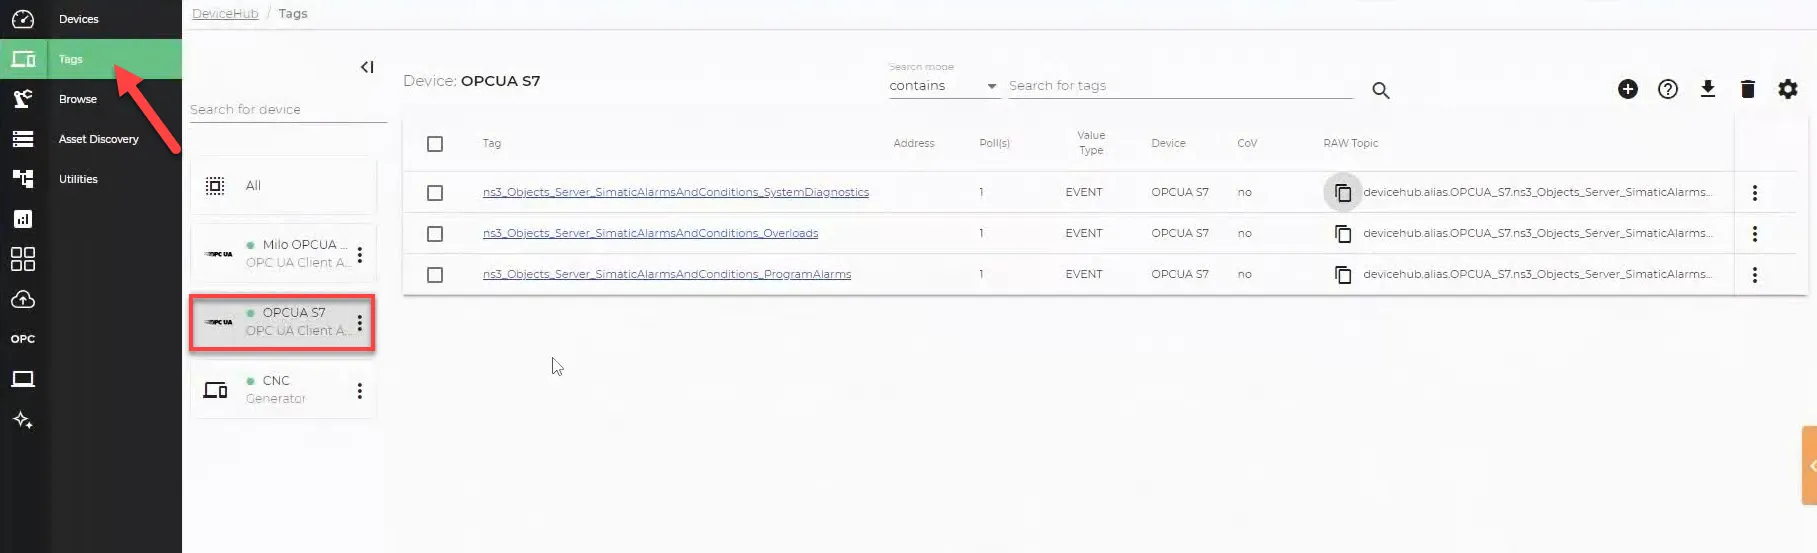 Tags section
Find the Raw Topic field in the tag details and click the Copy button to copy the topic.
 Tags section
- Save this topic somewhere safe. You'll need it to configure the Analytics node later.
Step 5: Use Analytics to Verify the Data Transfer
- In Litmus Edge, navigate to Analytics.
On the analytics canvas, click Add processor. The Create a processor dialog box displays.
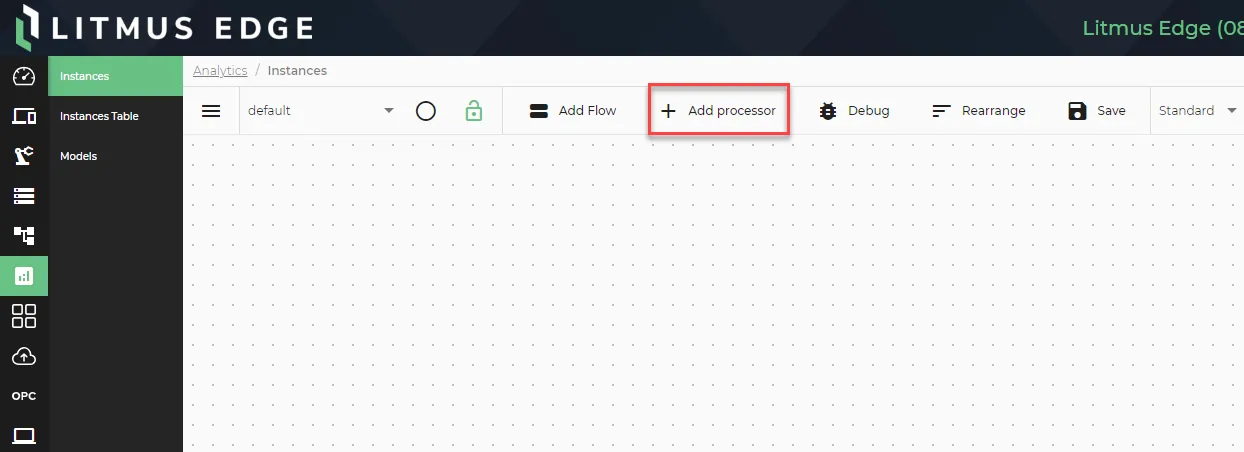 The Add processor option
- Select DataHub Subscribe.
In the Topic field, paste the Raw Topic you copied earlier from Step 4.
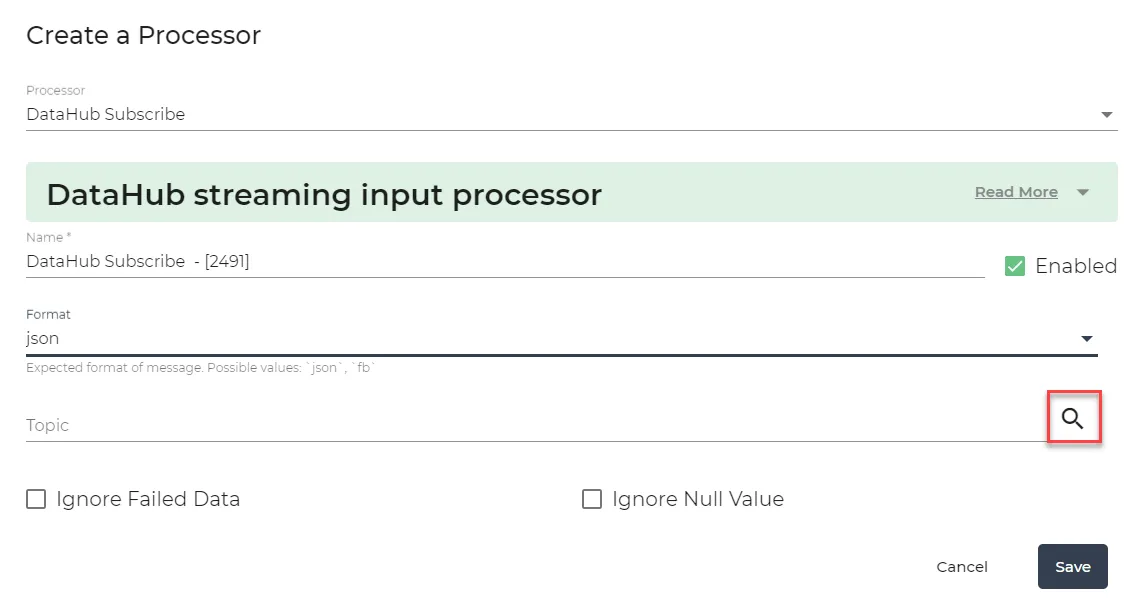 Create a Processor dialog box
- Click Save.
On the analytics canvas, click Save. The configured analytics flows should look like the following:
 Completed Flows Canvas
- Click the View icon in the DataHub Subscribe processor to view the event data.
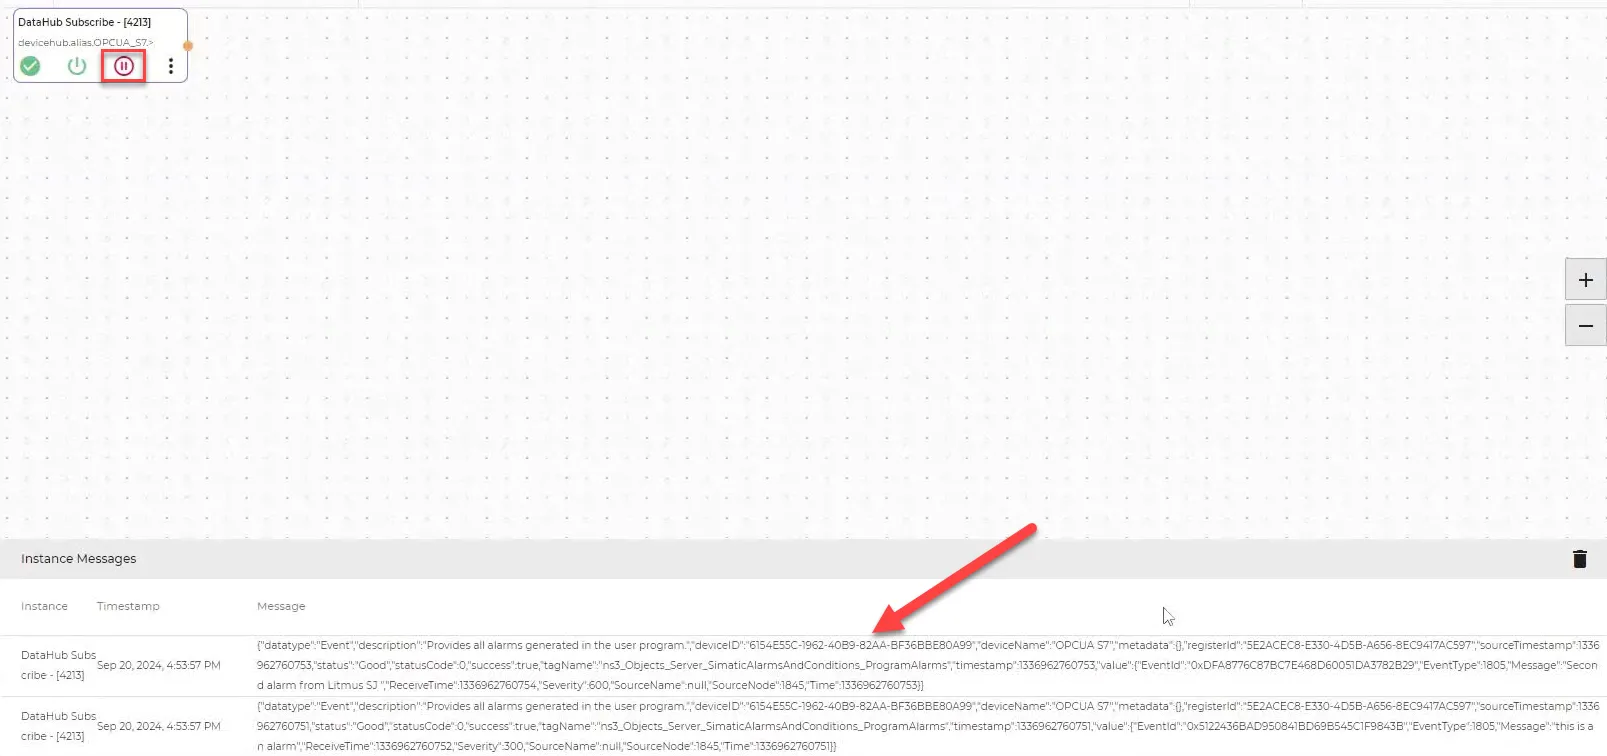
Monitor the real-time event data published to the Litmus Edge message broker, which includes key-value fields such as EventId, EventType, Message, ReceiveTime, and Severity.