Deploying Litmus Unify on Kubernetes cluster with ArgoCD
5 min
You can deploy Litmus Unify using ArgoCD to ensure your Kubernetes cluster is equipped with the necessary configurations and resources.
Before You Begin
- Ensure you have ArgoCD set up and connected to a working Kubernetes cluster.
Important Notes:
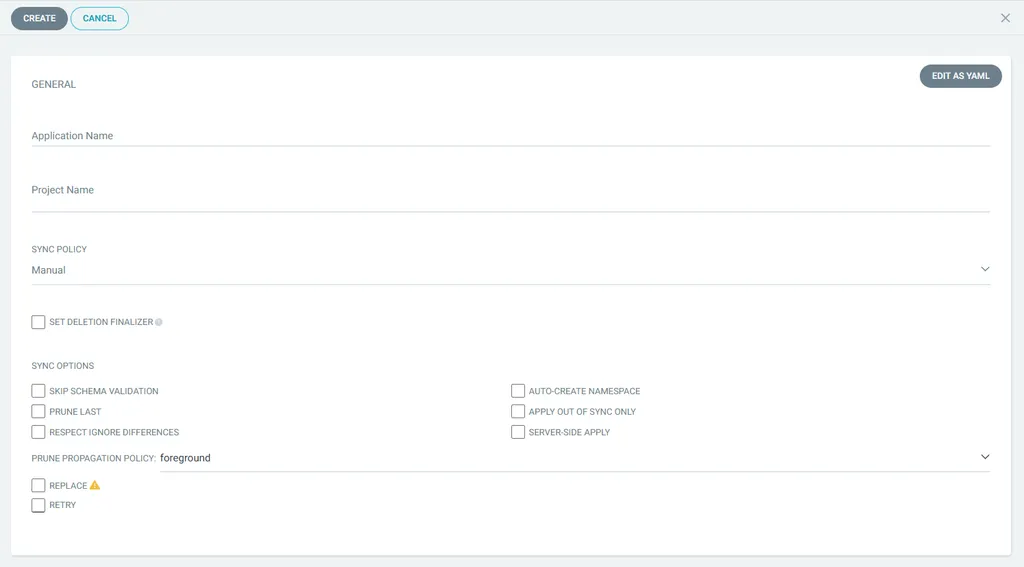
- Do not enable the PRUNE function.
- The current version of Unify may result in specific resources remaining out of sync within the ArgoCD application.
- These include the litmus-uns-creds , luns-default-tls and mqtt-migration pods.
- (While these limitations exist, they do not affect the overall functionality of your deployment.)
- It's crucial to understand that both litmus-uns-creds and luns-default-tls are essential resources and should not be removed.
- This is why the PRUNE function is not applicable during update or upgrade procedures.
- As for the mqtt-migration pods, they can be manually deleted once their status shows that they have completed their tasks.
Step 1: Initial Setup for Litmus Unify Deployment
To deploy Unify on Kubernetes cluster:
- Obtain the secret YAML file from Litmus via the Litmus Central Portal.
- Create the desired working namespace (e.g., uns) in the Kubernetes cluster using the kubectl CLI tool. Command: (sudo) kubectl create namespace uns
- Assuming the secret YAML file is in your current working directory, create a Kubernetes secret resource in the working namespace. For example, using uns as the namespace. Command: (sudo) kubectl create -f litmusautomation-uns-centralportal-secret.yml --namespace=uns
- Ensure you have the path to a valid Git repository containing the Unify Helm chart.
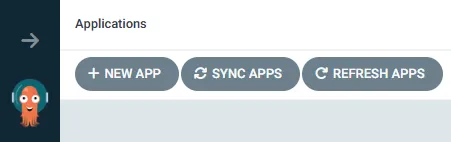
- In the ArgoCD Applications interface, click on the +NEW APP icon.
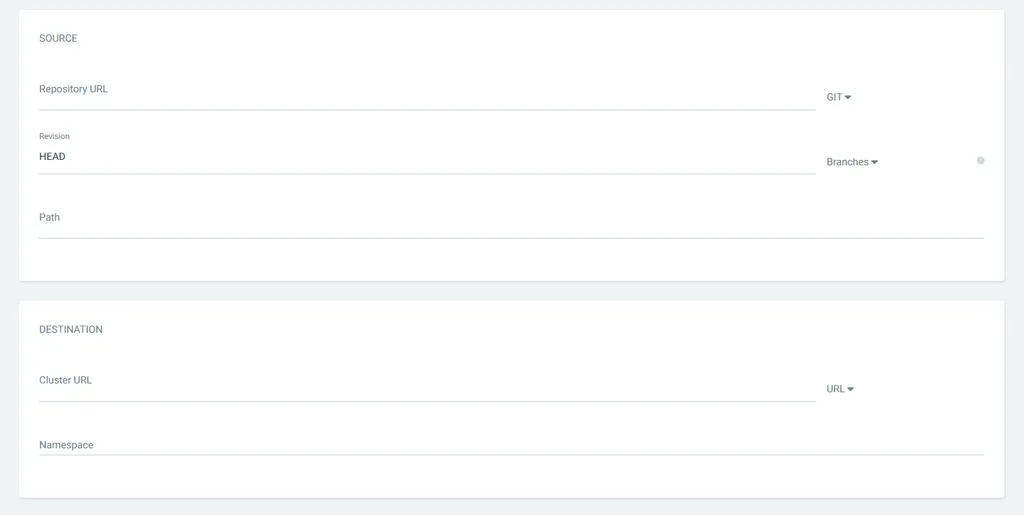
- Fill in the Application Name, Project Name, Repository URL, Path, Cluster URL, and Namespace fields, along with other desired options.
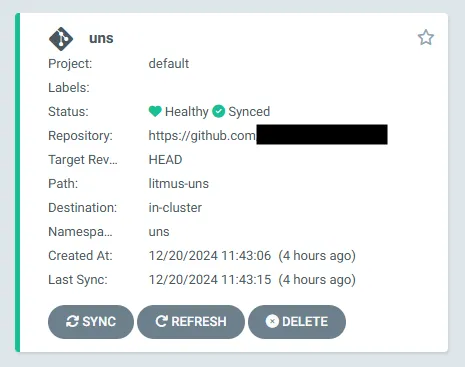
- Click the CREATE button to initialize the application. A new application card will be created in ArgoCD.
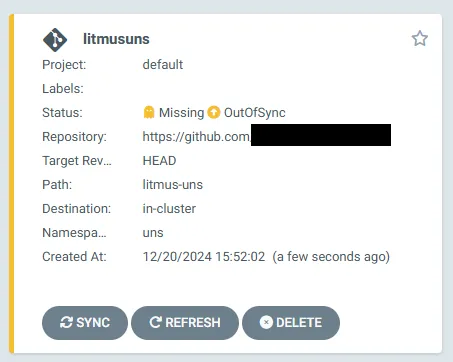
- Click the SYNC button to open the synchronization screen.
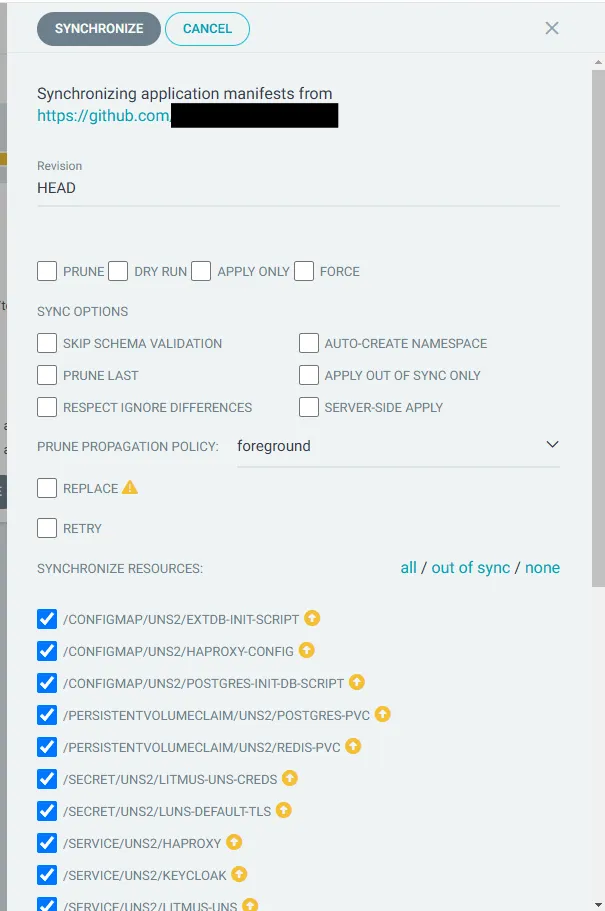
- Click the SYNCHRONIZE button to start the synchronization process and deploy Unify.
- The application is successfully deployed when the status changes to Healthy and Synced.
Step 2: Updating and Upgrading Unify
When making edits to the values.yaml file or when a new version of Unify is released, follow these steps to perform the update process:
- In the values.yaml file, set the secrets.create flag to false and the luns.createTlsSecret flag to false.
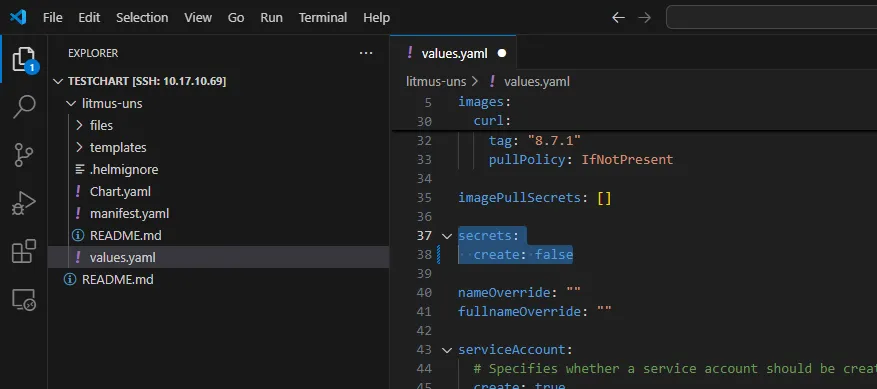
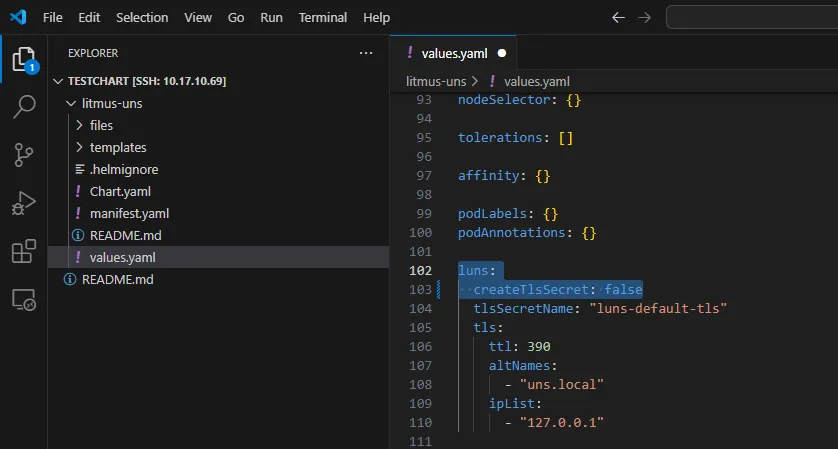
- Ensure that you save the above changes along with any other edits, and then commit and push them to the Git repository.
- Click the Refresh button on the application card. If the Git repository has been updated, you will see an OutOfSync status.
- Click the SYNC button to open the synchronization screen.
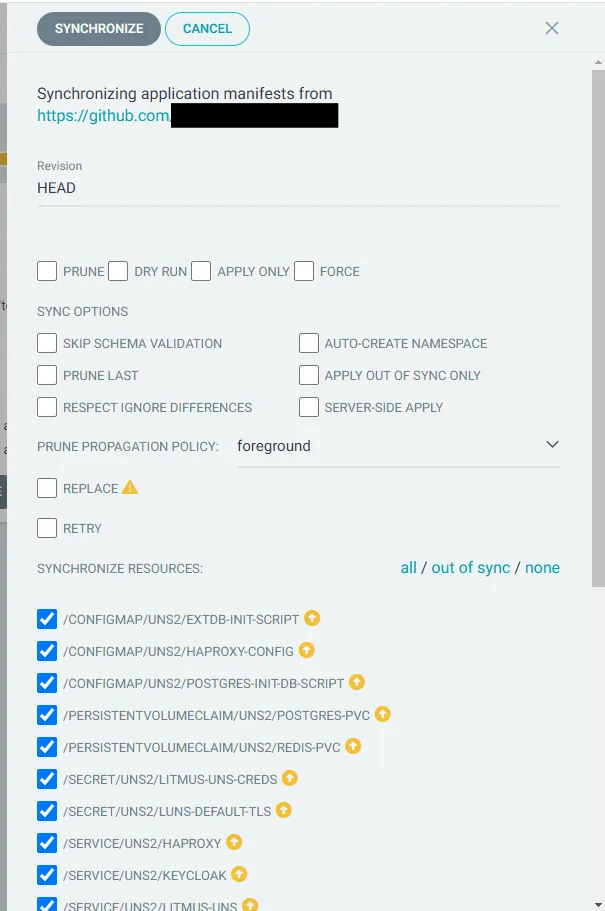
- By clicking the SYNCHRONIZE button, you will update Unify.