Kafka Integration
3 min
Follow these steps to set up the integration with Kafka connector.
Before You Begin
You will need the following:
- Access to a Kafka broker. Refer to the following links to learn more: Apache Kafka Download
- The CA certificate and other required authentication parameters needed to access the broker.
Step 1: Edit Kafka Connector
To configure Kafka integration in Litmus Unify:
- Navigate to Integrations from the side menu. The Integration pane appears.
- To add a new configuration or edit an existing configuration, click Edit. The Edit Kafka Connector dialog box appears.
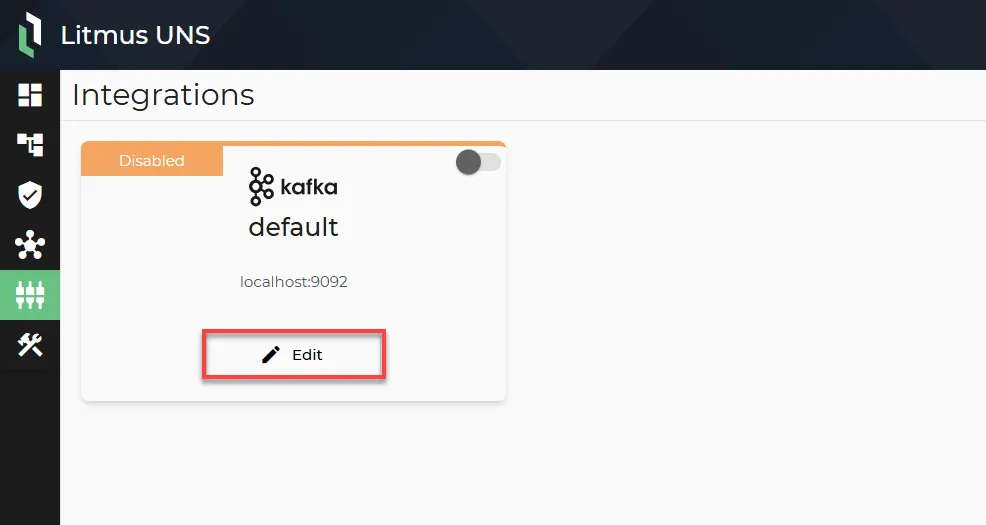
Integration pane
- Enter the following connection details:
- Brokers List: Add the Kafka broker address (e.g., 10.17.10.49:9092).
- Enable Toggle: Turn the connector on or off.
- SASL Mechanism: Choose the type (None, SASL Plain, SCRAM-SHA-256, SCRAM-SHA-512).
- Username and Password: Add these if the broker requires them.
- Timeout (seconds): Set how long to wait when connecting.
- Compression: Choose a method (None, Gzip, Lz4, Snappy, Zstd).
- Required Acks: Pick acknowledgment settings (None, All, Leader).
- Turn on the Require SSL option if needed for secure communication.
- Topic Mapping: Click the + icon and add MQTT topics with Kafka topics. Wildcards can be used.
- Click Save to apply the settings.
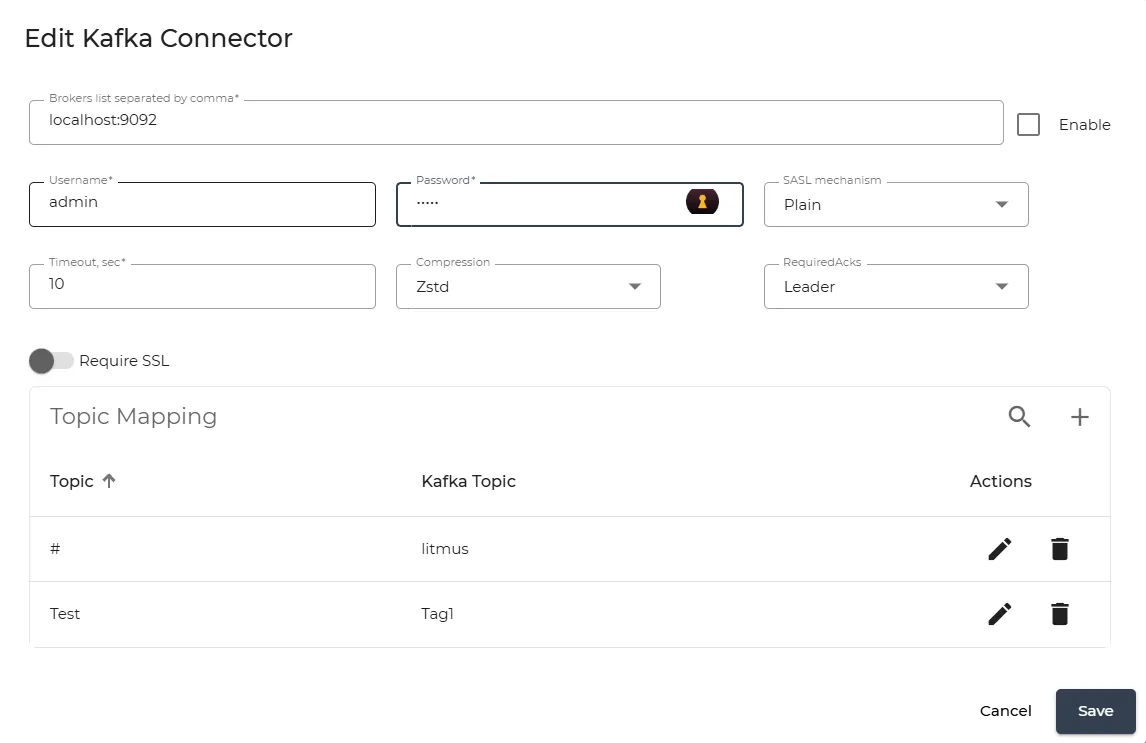
Edit Kafka Connector dialog box
Step 2: Enable the Connector
After adding the connector, click the toggle in the connector tile to enable it.
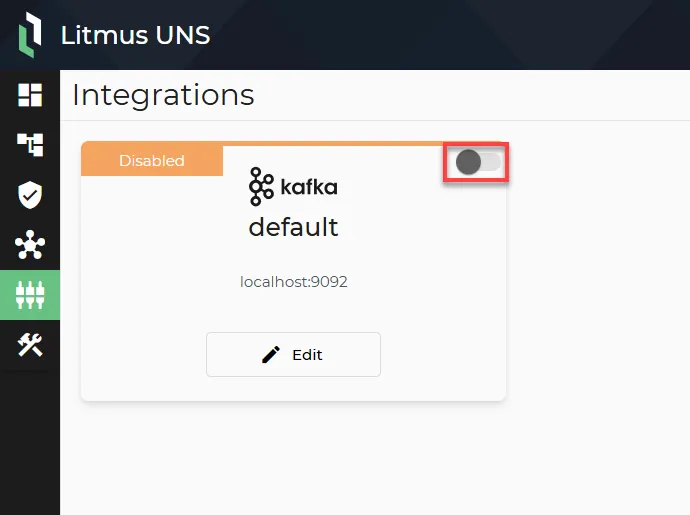
Kafka Connector
Step 3: Verify Connection
Access the Kafka broker and verify that Unify is successfully sending data.